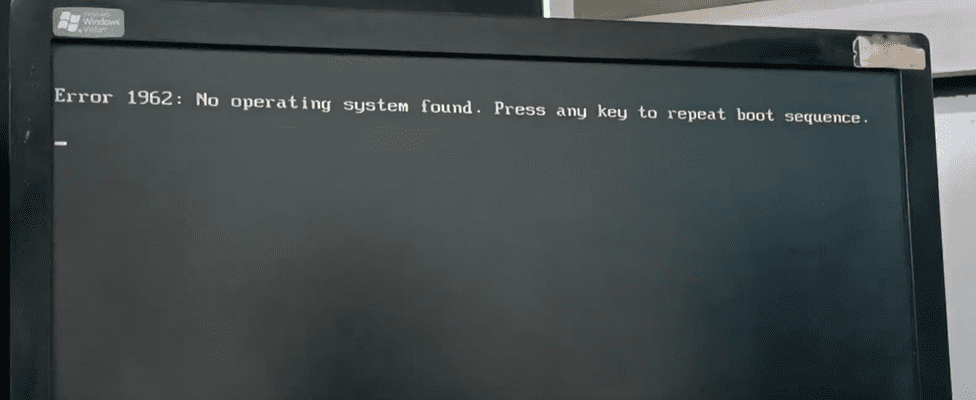
Error 1962: No operating system found. Change Hard Disk as the First Boot Device on Lenovo Laptops
If your Lenovo laptop is displaying a boot error or failing to start properly, the issue might be with the boot sequence in your BIOS settings. By configuring the hard disk as the primary boot device, you can solve this problem quickly. This article walks you through the step-by-step process to access BIOS, adjust the boot order, and ensure smooth system startup.
When Should You Change the Boot Sequence?
Changing the boot sequence is helpful when:
- Your laptop is stuck in a boot loop.
- You’ve installed a new OS but it doesn’t load.
- You see boot-related errors such as “No Bootable Device Found.”
- You need to prioritize the hard disk over USB or DVD.
Step-by-Step Guide to Set Hard Disk as First Boot Device
Step 1: Enter BIOS on a Lenovo Laptop
To access the BIOS on most Lenovo laptops:
- Shut down your laptop completely.
- Turn it on and immediately press the F2, F1, or DEL key repeatedly. (For many Lenovo models, it’s F2 or Enter + F1 for advanced options.)
- You’ll enter the BIOS settings interface.
🔗 You can find Lenovo’s official support here: https://support.lenovo.com/
Step 2: Navigate to Boot Sequence Settings
- Use the arrow keys to go to the Boot tab in BIOS.
- Under Primary Boot Sequence, you’ll see various bootable devices listed — including USB, CD/DVD, SATA drives, and the internal hard disk.
- Typically, the hard disk might appear at the bottom of the list. You need to bring it to the top.
Step 3: Move the Hard Disk to the Top
- Select each boot option (like USB or DVD).
- Press the Minus (-) key to move them down the list.
- As you move other options down, the hard disk will automatically rise to the top.
- Continue this process until the hard disk is the first boot option.
Step 4: Configure the Secondary Boot Sequence
- Still in the Boot tab, scroll down to Secondary Boot Sequence.
- Repeat the same steps: move the hard disk to the top by selecting other devices and pressing the Minus (-) key.
- This ensures consistent behavior across different boot stages.
Step 5: Set Boot Mode to Auto
- Find the Boot Mode option.
- Change it to Auto. This setting ensures your system can boot in either Legacy or UEFI mode depending on the OS installed.
- This avoids boot errors caused by mode mismatches between the BIOS and the operating system.
Step 6: Save and Exit
- Press F10 to save all changes.
- Confirm by selecting Yes when prompted.
- Your system will now reboot. If everything was done correctly, the boot error should be resolved, and your laptop should start normally.
Conclusion
Setting the hard disk as the primary boot device on your Lenovo laptop is an effective way to fix boot errors and ensure smooth startup. By adjusting the boot sequence and enabling Auto boot mode, your system will support both UEFI and Legacy OS installations without issues.
If you’re facing persistent problems even after making these changes, consider running Lenovo’s hardware diagnostics or reinstalling your OS.
Tags:
Lenovo BIOS boot settings, Lenovo boot error fix, change boot sequence Lenovo, BIOS setup Lenovo, hard disk not booting, Lenovo startup error, primary boot device Lenovo, Lenovo BIOS guide
Hashtags:
#Lenovo #LaptopFix #BootError #BIOSSettings #TechTips #StartupIssue #BootSequence #LenovoSupport