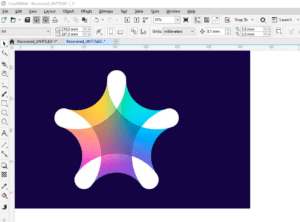
In this article, we’ll guide you through the process of creating a 6-sided polygon with 4 triangles inside it, similar to a design you might find in a logo. While it may look complex at first glance, it’s relatively easy to recreate using CorelDRAW’s powerful shape and snapping tools. Let’s dive into the step-by-step instructions to help you master this design.

Step-by-Step Guide for Creating a 6-Sided Polygon with Triangles in CorelDRAW
- Draw the Base 6-Sided Polygon:
- Start by selecting the Polygon Tool from the toolbar. Set the polygon to have six sides.
- Hold down the Control key while drawing the polygon to ensure that it is perfectly symmetrical.
- Once drawn, press P to center it on the page for better alignment and precision.
- Adjust Polygon Dimensions:
- To size the polygon correctly, adjust the dimensions using the Properties Bar. With the polygon selected, enter the desired size (e.g., set the width to 12 inches) and ensure that the Aspect Ratio is locked so that it scales proportionally.
- This creates a uniform 6-sided polygon, which will serve as the base for the triangles.
- Create a Triangle:
- Now, select the Polygon Tool again, but this time set it to create a 3-sided polygon, which is essentially a triangle.
- Hold the Control key to ensure the triangle is equilateral. Using the same method, resize it to fit within the polygon (for example, set the width to 6 inches).
- You can now flip and position this triangle inside the polygon.
- Snap Triangles to the Polygon:
- Make sure that Snap to Objects and Snap to Page are enabled in the View Menu. This will allow the triangles to align perfectly with the vertices of the polygon.
- Move the triangle to one of the polygon’s sides, and it should snap into place. Press the Plus (+) key on the keyboard to duplicate the triangle and move it to the next position.
- Continue duplicating and moving the triangles to ensure they are evenly distributed inside the polygon.
- Mirror and Rotate Triangles:
- For perfect alignment, you may need to mirror or rotate some triangles to fit properly inside the polygon.
- Select a triangle, go to the Mirror Tool and flip it horizontally or vertically depending on the orientation you need.
- Repeat this process for the other triangles to get them perfectly arranged.
- Create Connecting Lines:
- To fill in any gaps between the triangles and polygon, draw straight lines from one node to another using the Bezier Tool.
- Ensure that the lines connect precisely between the nodes of the triangles and the polygon to maintain a symmetrical design.
- Convert Outlines to Objects:
- Select all the shapes, including the polygon and the triangles, and go to Object > Convert Outline to Object. This allows you to manipulate them as solid shapes instead of outlines.
- Group them together using Control+G for easy manipulation.
- Apply Color Fills:
- To bring your design to life, use the Smart Fill Tool. Select the Eyedropper Tool to pick a color and then fill in the individual triangles and sections of the polygon.
- This will help create the appearance of a cohesive logo design by filling in each part with the desired color.
- Fine-Tune the Design:
- Once the design is complete, group everything together again for easy resizing. You can adjust the size by selecting the grouped object and scaling it proportionally to fit your needs.
- Final Adjustments and Export:
- If you’re happy with your design, make any final adjustments, such as tweaking colors or positioning.
- Save the file in CorelDRAW’s native format for future edits, and export it to other formats such as PNG or JPEG if necessary.
Conclusion
Creating a 6-sided polygon with 4 triangles in CorelDRAW is a simple but effective way to recreate a logo-like design. By following these detailed steps, you can ensure your design is symmetrical and professional-looking. The Snap to Objects and Smart Fill tools are your best friends when working on geometric designs like this, allowing for precise alignment and vibrant color fills.

