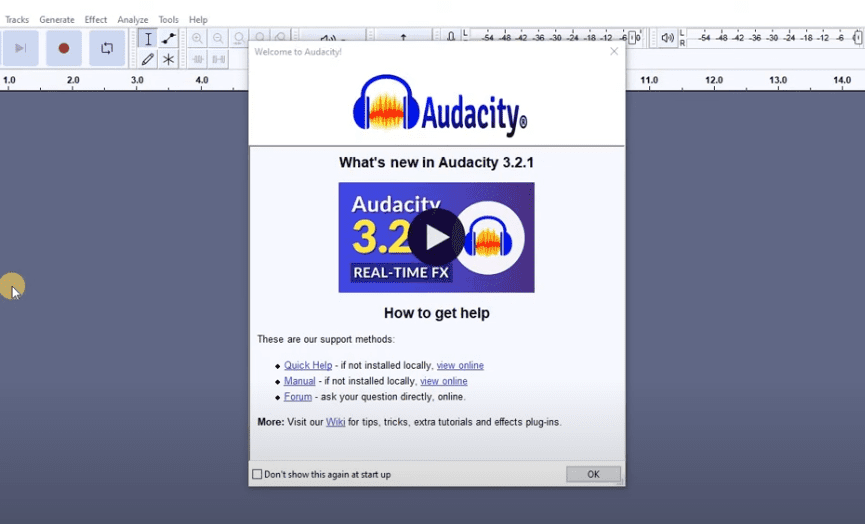
Audacity 3.2.1 is a free, open-source, and powerful audio editing software that has been a go-to tool for podcasters, voice-over artists, and content creators worldwide. In its latest version, Audacity brings a refreshed interface while maintaining all the essential features. In this article, we’ll take you through a detailed step-by-step guide on how to record, edit, clean, and export your audio using Audacity 3.2.1.
After installing the latest version of Audacity on your system, launch the application. You’ll notice a slightly updated interface with familiar features organized neatly. Let’s walk through the basic setup first.
🎙️ Step 1: Configuring Audio Settings
Host and Device Selection: Go to Audio Setup > choose your Playback and Recording devices (e.g., built-in speakers or external microphone).
Recording Channel: Set the recording mode to Mono if you’re using a single mic source, which is standard for voice recordings.
Test Your Audio: Always test your mic before starting. Hit the Record (Red) button or press R on the keyboard to begin recording.
🎧 Step 2: Recording Audio in Audacity
When recording:
Leave the first 3–4 seconds silent before speaking — this helps in capturing a clean noise profile for reduction later.
Speak clearly and maintain a consistent tone.
You can monitor your audio by pressing the Play button and listening to the recording.
🧹 Step 3: Cleaning and Enhancing Audio
After recording, it’s time to process your audio to improve clarity:
1. Normalize the Volume
Select the entire waveform using Ctrl + A.
Go to Effect > Volume and Compression > Normalize > Apply.
2. Compress the Audio
With the track still selected, go to Effect > Volume and Compression > Compressor > Apply.
This helps balance loud and soft parts of the recording.
3. Reduce Background Noise
Select the silent portion recorded at the start.
Go to Effect > Noise Reduction > Click Get Noise Profile.
Then reselect the full track, go back to Effect > Noise Reduction > Set levels and click OK.
To reapply the same settings quickly, use Effect > Repeat Noise Reduction.
✂️ Step 4: Editing the Audio
You can easily edit mistakes, retakes, or unwanted sounds:
Cut Mistakes: Select any incorrect or unwanted portion and press Delete.
Silence Breathing or Pauses: Select the noise > Effect > Silence Audio.
Add New Lines: Record a new sentence and copy-paste it at the right place in the waveform.
🔊 Step 5: Adjust Volume (Amplify)
To increase or decrease specific parts of your audio:
Select a portion.
Go to Effect > Amplify.
Enter the gain (positive to increase, negative to decrease) and click OK.
This helps balance any added or retaken audio clips.
Select the music track > Effect > Amplify > set a negative gain (e.g., -16 dB) so your voice is clearly audible.
💾 Step 7: Saving and Exporting
Save Project:
Go to File > Save Project > Name and Save. This saves your progress for future editing.
Export Final Audio:
Go to File > Export > choose your preferred format (MP3, WAV, etc.).
Set the file name and location, then click OK.
Audacity will export your mixed tracks into a single stereo file.
💡 Bonus Tips
For podcast or voice-over work, always monitor breathing sounds and background hiss.
Normalize and compress after every major edit or added track.
Use the Zoom In/Out tools to make precise edits.
✅ Summary
Audacity 3.2.1 offers an intuitive and powerful platform for audio editing with tools for recording, noise removal, amplification, and adding music. Whether you’re recording a podcast, voice-over, or audio narration, mastering these steps will make your output sound professional and polished.
⚠️ Disclaimer
Always use royalty-free or licensed music/audio samples when publishing or distributing your work commercially. Ensure microphone and hardware compatibility with Audacity for best performance.
Sneha is a hardware reviewer and technology journalist. She has reviewed laptops and desktops for over 6 years, focusing on performance, design, and user experience. Previously working with a consumer tech magazine, she now brings her expertise to in-depth product reviews and comparisons.