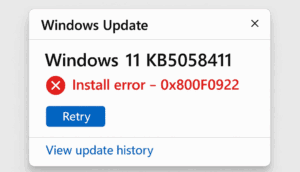
When installing a fresh version of Windows, you might encounter an error that prevents the process from proceeding. This article walks you through a detailed step-by-step solution to fix this issue. Follow these instructions carefully to resolve the problem and successfully complete your Windows installation.

Step 1: Boot from Installation Media
- Insert your Windows installation CD or USB flash drive into the computer.
- Restart the computer and boot from the installation media by selecting it in the BIOS/boot menu.
Step 2: Start the Installation Process
- Once the setup screen appears, choose your language and click Next.
- In the next window, select Repair Your Computer instead of proceeding with installation.
Step 3: Access Advanced Repair Options
- On the repair screen, choose Troubleshoot.
- Select Advanced Options and then click on Command Prompt to open a terminal window.
Step 4: Use Disk Management Commands
- In the Command Prompt, type the following command to launch the disk management tool:
diskpart
Press Enter. - Now type:
list diskPress Enter to display all connected storage drives.

Step 5: Identify and Select the Correct Disk
- Look at the list of disks shown.
- The primary drive where you want to install Windows is typically labeled as Disk 0. Be careful in selecting the disk because choosing the wrong one may result in data loss.
- If you have important files on the drive, it’s best to back up the data by connecting the drive to another computer before proceeding.
Step 6: Clean the Disk
- Type the following command, replacing
Xwith the number of your primary disk (e.g.,select disk 0):select disk XPress Enter. - Next, type:
cleanPress Enter. This command will erase all data on the selected disk and fix partition-related issues.
Step 7: Proceed with Windows Installation
- Close the Command Prompt and return to the installation window.
- Restart the process to install Windows on the cleaned disk.
Important Tips
- Always back up important data before using the
cleancommand, as it deletes all files on the selected disk. - If your computer still does not recognize the disk, ensure it is properly connected and functional.
Conclusion
By following these steps, you should be able to resolve the error message and complete your Windows installation successfully. This guide offers a straightforward approach to fixing disk issues during the installation process. Refer to this article whenever you need to troubleshoot similar problems.
Tags
windows installation error, fix windows error, disk clean windows, troubleshoot windows, command prompt repair, diskpart windows fix, windows boot issue
Hashtags
#WindowsInstallation #FixWindowsError #DiskpartCommand #WindowsRepair #CommandPrompt #Troubleshooting #CleanDisk
