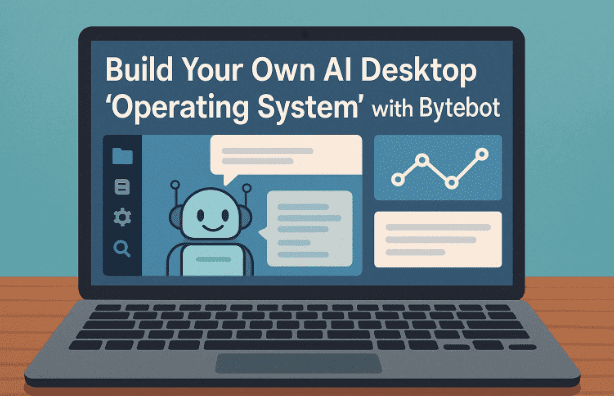
If you’ve ever rolled your eyes at tools that call themselves an “AI operating system” but only click around inside a browser tab, you’re not alone. Today we’re going to set up something that actually operates a desktop: Bytebot — a free, open-source project that deploys AI agents into a full virtual desktop so they can use real apps, move the mouse, type the keyboard, save files, and complete multi-step workflows. Think of it as a virtual teammate with its own machine.
We’ll walk through what Bytebot is, why it’s different from browser-only agents or traditional RPA, and how to run it locally with Docker Compose (plus options for Kubernetes and one-click cloud). Along the way, I’ll add context, pitfalls to avoid, security notes, and a Q&A section. By the end, you’ll have an agent that can open Firefox, read a PDF, summarize it, paste the result into a text editor, and store the output — all on a controlled, sandboxed desktop.
Let’s roll up our sleeves and get practical. We’ve got a lot to cover, so I’ll keep the flow conversational and add quick “breather” paragraphs before we dive into lists or steps.
Quick corrections & context (read this first)
Before we start, a few names you might have seen floating around:
- The project’s name is Bytebot (not “Bitebot,” “Pipebot,” or “Bitebit”). Official site, docs, and source code are here: Bytebot homepage, documentation, and GitHub repo. (docs.bytebot.ai, KDJingpai)
- Model providers: it’s Anthropic (not “Enthropic”), OpenAI, and Google (Gemini). Bytebot supports those directly and also supports OpenAI-compatible proxies such as LiteLLM and local engines like Ollama. (docs.bytebot.ai)
- When people say “AI OS,” Bytebot isn’t replacing Windows/Linux/macOS. It runs a containerized desktop the agent controls — which is exactly what we want for safety and reproducibility. (docs.bytebot.ai)
If you’ve heard “AI OS” claims before and felt underwhelmed, you’ll notice the difference here very quickly: Bytebot ships with a full desktop environment (Firefox, VS Code, terminal, file manager, etc.) that the agent can see and operate.
What Bytebot actually is (and why it’s different)
Let’s set expectations clearly before we jump into commands. Bytebot deploys an AI agent that:
- Boots a fresh sandbox computer (a containerized Linux desktop) on demand.
- Interacts visually with apps (clicks, types, drags, scrolls), not just HTTP.
- Works across multiple programs: web browsers, office tools, email clients, IDEs, terminals, and file systems.
- Can upload/download, rename, and organize files from its own storage.
- Can run one or many tasks, with human-in-the-loop options (“Takeover Mode”).
This full-desktop approach is very different from “headless browser scripts” or classic RPA. Bytebot was designed to see the screen and adapt to UI changes like a human would, while still giving you programmatic control and an API. If you’ve run into the fragility of DOM selectors or the limits of browser-only tools, the difference is night and day.
How Bytebot is put together (30-second architecture tour)
Before we install anything, here’s the mental model:
- bytebot-desktop: the containerized Linux desktop where work happens (the agent’s “PC”).
- bytebot-agent: orchestrates the LLM calls and translates plans into real UI actions.
- bytebot-ui: the web interface you use to create and monitor tasks (default port 9992).
- Tasks API: HTTP API (default port 9991) to create and manage tasks from your apps.
- Desktop API: low-level “computer-use” actions (default port 9990) for direct control.
Having this picture in mind makes the logs and ports “click” when we start the stack.
What you’ll need (prerequisites)
So far, so good. Let’s make sure your machine is ready before we bash out commands.
- Docker 20.10+ and Docker Compose installed (Docker Desktop on Windows/macOS; Docker Engine + Compose on Linux).
- 4 GB RAM minimum available for the stack (8 GB+ recommended for smoother multi-app workflows). (The Helm guide suggests cluster memory expectations; locally, plan for at least a few gigabytes free.)
- At least one LLM provider:
- Anthropic, OpenAI, or Google (Gemini) API key; or
- an OpenAI-compatible proxy such as LiteLLM; or
- a local model via Ollama (OpenAI-compatible server).
Tip: If you want everything to run on your LAN without cloud costs, start with Docker Compose + LiteLLM (or Ollama) and plug Bytebot into that. Bytebot’s docs include a proxy compose file that spins up LiteLLM for you.


Deployment options at a glance
It’s always comforting to see the big picture first. Bytebot supports four main paths:
- Railway (one-click cloud) — super fast, but you’ll pay for hosted compute at scale; good for quick trials.
- Docker Compose (local or server) — the sweet spot for most folks; we’ll use this path below.
- Kubernetes/Helm — for production clusters and teams; exposes ingress, resource limits, and auth.
- Desktop-only — minimal setup option for local tinkering; handy for quick tests.
We’ll go with Docker Compose now. If you’re a platform team or you already have a K8s cluster, I’ll point you to Helm later.
Step-by-step: Install and run Bytebot with Docker Compose
We’ve done the preflight. Now let’s do the thing — clearly, calmly, and without skipping steps.
1) Install Docker + Compose
If you don’t already have Docker and Compose, install Docker Desktop (Windows/macOS) or Docker Engine + Compose (Linux). Verify with:
docker --version
docker compose version
If you see versions (not “command not found”), you’re good. (Install docs are on Docker’s site if needed.)
2) Clone the Bytebot repository
Open a terminal and run:
git clone https://github.com/bytebot-ai/bytebot.git
cd bytebot
That gives you the docker/ folder with compose files and an example .env.
3) Choose your model provider (cloud or local)
Here’s where you decide how Bytebot talks to an LLM. You have three standard choices plus a “bring-your-own-proxy” option:
- Anthropic (Claude) — set
ANTHROPIC_API_KEY(and optionallyANTHROPIC_MODEL). - OpenAI (GPT) — set
OPENAI_API_KEY(and optionallyOPENAI_MODEL). - Google (Gemini) — set
GEMINI_API_KEY(and optionallyGEMINI_MODEL). - LiteLLM / Ollama via proxy — run Bytebot with the proxy compose file and point it to your local or multi-provider LLM gateway in OpenAI-compatible format.
A minimal .env (inside docker/.env) might look like this:
# Choose exactly one or use the proxy setup
ANTHROPIC_API_KEY=sk-ant-...
# Optional: pin a model
ANTHROPIC_MODEL=claude-3-5-sonnet-20241022

# If you prefer OpenAI or Gemini instead:
# OPENAI_API_KEY=sk-...
# OPENAI_MODEL=gpt-4o
# GEMINI_API_KEY=...
# GEMINI_MODEL=gemini-1.5-flash
(Those model names are examples from the docs; choose any valid model behind your key.)
Using a local model? Run Bytebot with its LiteLLM proxy and point that proxy to Ollama (OpenAI-compatible on port 11434 by default). It’s a tidy way to keep costs zero and data local. Bytebot and LiteLLM both document this flow.
4) Start the services
From the repo root:
docker compose -f docker/docker-compose.yml up -d
Wait for containers to pull and start. If something looks stuck, check logs:
docker compose -f docker/docker-compose.yml logs -f
The docs include commands to update, stop, or reset volumes if you ever want a clean slate.
5) Open the UI and say hello
By default the UI runs on http://localhost:9992. You’ll see the Bytebot home screen with a big input area where you can describe a task (“Open wikipedia.org, read about quantum computing, summarize in 200 words, and save to a text file on the desktop”). From here, Bytebot spins up the desktop and starts working.
Ports cheat-sheet: Desktop API (9990), Tasks API (9991), UI (9992). You can remap them in the compose file if you need to.
Your first hands-on task (and what to expect)
We’ve reached the fun part. Let’s give Bytebot a task that touches the browser, the clipboard, and the filesystem — something believable for a workday.
Example task (paste this into the UI):
“Go to Wikipedia and read the ‘Quantum computing’ article. Generate a concise 180- to 220-word summary suitable for a non-technical audience. Create a file called quantum_summary.txt on the desktop and paste the summary there.”
What will happen now:
- Desktop boots. You’ll see a live view of the Bytebot desktop as Firefox opens.
- Search & navigate. It finds the article, scrolls, and reads content.
- Write & save. It opens a text editor and creates
quantum_summary.txtwith your summary. - Task details. In the UI, you’ll see status updates (“navigating…”, “extracting text…”) and a timeline. You can chat back if it needs help or clarification.
If you prefer an API call instead of the UI: curl -X POST http://localhost:9991/tasks \
-H “Content-Type: application/json” \
-d ‘{“description”:”Summarize the Wikipedia page on quantum computing to ~200 words and save to quantum_summary.txt on the desktop.”}’
The Tasks API will queue and run the job just like the UI.
Human-in-the-loop: Takeover when the agent needs a hand
Even the best agents occasionally hit a captcha, an unexpected dialog, or a login flow that needs 2FA. Bytebot includes Takeover Mode so you can safely step in, type a password (or approve an MFA prompt), and hand control back to the agent — with everything audited. The docs explain recommended practices for credentials and 2FA during Takeover.
Small milestone check-in: so far we stood up the stack, created a real task, and learned how to help the agent over bumps. Let’s keep going and make it useful for “work-work.”
Working with files, PDFs, spreadsheets, and multi-app flows
Bytebot isn’t just for clicking links — it’s strong at document processing:
- Upload files with your task (PDFs, CSVs, images).
- Have the agent read entire PDFs, extract tables, and generate summaries.
- Chain actions across programs (download from a portal, parse locally, update a spreadsheet, then email results).
- Do batch operations and consolidate outputs into one report.
Practical example you can try right away in the UI:
“Read the uploaded invoices.zip (contains multiple PDFs). For each invoice, extract vendor name, date, and total amount. Create a single invoices_summary.xlsx on the desktop with one row per invoice, sorted by date.”
The Task Creation & Management guide includes proven prompt patterns and best practices (be specific, define success, one goal per task). It’s worth a skim — your results will improve dramatically with good instructions.
Passwords & 2FA, safely
Security time. When tasks involve logins:
- Use a password manager inside the agent’s desktop (e.g., 1Password, Bitwarden) so secrets aren’t hard-coded.
- Prefer Takeover Mode for one-time 2FA and approval prompts.
- Follow the docs’ recommendations on Password Management & 2FA to avoid exposing secrets in chat.
If you’re shopping for a browser extension to use inside the desktop, Bitwarden’s Firefox add-on is a solid open-source option; 1Password is also widely used — pick what fits your org’s policy.
Scaling up: multiple agents and longer workflows
Once you’re comfortable, you can run multiple tasks and even multiple agents. The Agent System guide covers concurrency, queuing, and how tasks move through states like Created → Queued → Running → Needs Help → Completed/Failed. If you automate repetitive back-office steps, the “enterprise process automation” templates are gold.
For teams or production:
- Kubernetes/Helm adds resource limits, ingress, auth, and persistent volumes for the desktop and database. The Helm guide shows port-forwarding for local access and how to enable ingress for a domain.
- Centralize LLM keys and routing with LiteLLM proxy for cost controls and failovers.
Optional: One-click cloud preview on Railway
Need a quick demo for colleagues? The Railway template can deploy the full stack with a single button and your LLM key. It’s not my recommendation for heavy, ongoing workloads (you’ll incur cloud costs), but it’s an extremely convenient way to kick the tires.
Troubleshooting (common bumps and quick fixes)
Let’s pause and prepare for the usual snags. Nothing’s wrong — this is just the shortest path through typical hiccups:
- Containers won’t start → confirm Docker is running and you have enough memory. Then
docker compose -f docker/docker-compose.yml logs. - Can’t reach the UI at :9992 → run
docker compose -f docker/docker-compose.yml psand ensurebytebot-uishows “Up”; check port conflicts and remap if necessary. - Agent errors / no response → verify your API key(s) in
docker/.envand checkbytebot-agentlogs. - Task stuck → look at the desktop viewer to see what’s on screen; provide clarification via chat or use Takeover Mode.
- Login flows brittle → rely on a password manager inside the desktop and keep instructions concrete (“Click the Sign in button at top-right, not the banner promo”).
Security & responsibility notes (please read)
Bytebot gives an AI the ability to operate a real desktop. That’s powerful — and it carries responsibilities.
- Respect website Terms of Service and rate limits. Don’t automate actions that violate platform rules or laws.
- Don’t store secrets in prompts. Use a password manager in the desktop; use Takeover Mode for MFA and approvals.
- Keep the desktop sandboxed. Bytebot runs inside containers; avoid mounting sensitive host directories unless you understand the risk.
- Audit and logs. Review task transcripts and desktop actions for critical workflows; Helm adds options for network policy and auth if you deploy to clusters.
Disclaimer: This article is for educational purposes. Use automation ethically, comply with your local laws and the terms of the services you automate, and never use Bytebot (or any agent) to bypass access controls, commit fraud, or scrape protected data. Configure credentials and 2FA according to your security policy.
Bytebot vs. browser agents and traditional RPA (quick reality check)
It’s fair to wonder if Bytebot replaces your headless-browser scripts or RPA bots. In short:
- Compared to browser-only agents: Bytebot can use any desktop app, not just a web tab. It reads the screen, not just the DOM.
- Compared to RPA: It’s LLM-orchestrated and more adaptable to UI drift; you get a real desktop, a task UI, and an API, without heavyweight proprietary stacks.
Think of Bytebot as a pragmatic middle ground: flexible like a person, scriptable like a service.
Advanced: Helm/Kubernetes deployment (for teams)
If you need centralized auth, ingress, resource caps, and persistence in a cluster:
- Clone the repo and create a
values.yamlwith your API keys. helm install bytebot ./helm -n bytebot --create-namespace -f values.yaml- Port-forward the UI (
9992) or expose it via ingress with TLS. - Add resource limits for the desktop and agent, persistent volumes, network policies, and optional auth for the UI.
This gives you an audited, multi-agent environment suitable for internal users.
Frequently Asked Questions (Q&A)
Q: Is Bytebot truly “self-hosted,” or do I need to pay a provider?
A: You can run everything locally with Docker Compose. For models, you may use Anthropic/OpenAI/Gemini keys or a local OpenAI-compatible endpoint (LiteLLM + Ollama). No mandatory SaaS fees.
Q: Does Bytebot replace my operating system?
A: No. It runs a desktop inside containers and lets an agent control that environment. Your host OS stays untouched. That’s the safety feature.
Q: Can it run multiple tasks at once?
A: Yes. Bytebot includes an Agent System with queuing, states, and management for multiple tasks and agents.
Q: Do I need a GPU?
A: Not for Bytebot itself. If you serve local LLMs, some models benefit from a GPU, but you can also use CPU-friendly models or external APIs. (LiteLLM/Ollama setups are flexible.)
Q: How do I keep credentials safe?
A: Put them in a password manager inside the desktop; use Takeover Mode for MFA. Avoid pasting secrets into prompts or environment variables where possible.
Q: What about captchas and anti-bot measures?
A: Respect them. Many sites prohibit automated interactions. If a captcha appears, use Takeover Mode to complete it manually, or stop — don’t bypass protections.
Q: How do I update Bytebot?
A: Pull the latest images and restart the stack:docker compose -f docker/docker-compose.yml pull && docker compose -f docker/docker-compose.yml up -d.
Q: Can Bytebot write to my host files?
A: Only to directories you mount into containers. By default, it writes to its own filesystem. Keep mounts minimal.
Q: Is there a one-click way to show this to stakeholders?
A: The Railway template is the fastest demo path, though cloud usage may incur costs.
A realistic, end-to-end example you can try next
We’ve done single-app tasks. Let’s stitch a workflow together — a tiny, but realistic back-office job:
“Log into acme-vendor-portal.example (credentials in the password manager). Download the latest ‘Statement of Account’ as a PDF. Extract the totals table into CSV format. Create soa_YYYYMM.csv on the desktop. Then draft a summary note (‘This month’s total is …’) in a text file and place both files in a folder named Monthly_SOAs.”
Why this is a good test:
- It touches login + navigation + download (browser).
- It performs document extraction (PDF → CSV).
- It writes files into a structured folder.
- It outputs a human-readable note for review.
If the site layout or naming differs, Bytebot will likely ask clarifying questions in the task chat — answer concisely (“Totals table is under the Reports tab”). That back-and-forth is a feature, not a bug.
So far we’ve built confidence with quick wins. If you’re feeling good, the next move is to template your common tasks and schedule them (via your own app calling the Tasks API) so they run with minimal nudges.
Where to go from here
- Explore the Task Creation & Management guide for more template prompts and best practices. docs.bytebot.ai
- Read Takeover Mode and Password Management & 2FA so you’re set up safely for real logins. docs.bytebot.ai+1
- If your team needs a multi-user setup, test the Helm deployment on a dev cluster with auth and network policies. docs.bytebot.ai
- If you’re cost-sensitive or privacy-oriented, plug in LiteLLM and a local model via Ollama to keep inference on-prem. docs.litellm.ai
Final thoughts
Calling something an “AI OS” is easy; handing an agent a real desktop and letting it work is the hard part. Bytebot lands squarely on the right side of that line. With a single docker compose up, you get a dependable sandbox where an AI can browse, edit, save, and stitch together everyday business tasks — all while you keep control, visibility, and logs.
We’ve covered a lot: what Bytebot is, how it differs from RPA/browser scripts, how to run it locally, how to work safely with credentials, and how to scale. If any part of your daily workload looks like “open app → click here → copy there → save file → repeat,” you now have a credible way to offload it.
Take your time, start small, and iterate. So far we’ve done a good job laying foundations — the next wins come from your domain knowledge baked into clear task descriptions.
References & official resources
- Bytebot — overview, docs, and source. docs.bytebot.ai+1KDJingpai
- Quick Start — ports, environment variables, logs, API examples. docs.bytebot.ai
- Task Creation & Management — prompts, templates, best practices. docs.bytebot.ai
- Desktop Environment — what’s installed inside the sandbox. docs.bytebot.ai
- Agent System — states, concurrency, multi-agent management. docs.bytebot.ai
- Bytebot vs Traditional RPA — conceptual comparison. docs.bytebot.ai
- Password Management & 2FA and Takeover Mode — secure ops patterns. docs.bytebot.ai+1
- Helm Deployment — Kubernetes guide for production-style setups. docs.bytebot.ai
- LiteLLM — OpenAI-compatible gateway for multi-provider/local models. docs.litellm.ai
- Docker/Compose — install & verify. Bitwarden
- Bitwarden Firefox add-on — open-source password manager option. Firefox Add-ons
Tags
AI agents, desktop automation, Bytebot, Docker Compose, Kubernetes, Helm, RPA alternatives, self-hosting, Anthropic, OpenAI, Google Gemini, LiteLLM, Ollama, Takeover Mode, password management, document processing, workflow automation, DevOps, on-prem AI
Hashtags
#Bytebot #AIAgents #DesktopAutomation #SelfHosted #Docker #Kubernetes #RPA #Anthropic #OpenAI #Gemini #LiteLLM #Ollama #InfoSec #DevOps #Automation