InDesign is a powerful tool for creating layouts, but its true potential is unlocked when you know how to use its advanced features effectively. In this article, we’ll explore several tips and tricks to help you work smarter and faster. Whether you’re creating complex grids, refining text, or enhancing visuals, these techniques will optimize your workflow and improve your designs.

1. Turn the Shape Tool into a Grid Builder
Creating a grid of shapes is easy with the shape tool and your arrow keys:
- Draw a shape: Start with a square, rectangle, or circle.
- Use arrow keys: While dragging the shape, press the arrow keys to subdivide it into smaller shapes.
- Edit shapes: These subdivisions are independent, allowing you to move or edit them individually or as a group.
This technique is excellent for building frames, logos, or decorative arrangements.
2. Leverage Dynamic Spelling for Text Proofing
Dynamic Spelling simplifies proofreading by highlighting errors as you type. Here’s how to enable it:
- Navigate to Edit > Spelling > Dynamic Spelling.
- Red lines appear under misspelled words.
- Right-click on errors to view suggestions or add them to your dictionary.
For additional control, use Check Spelling under the Spelling menu to review all flagged words systematically. This feature ensures polished, error-free content in your layouts.
3. Enhance Workflow with Custom Keyboard Shortcuts
Repeatedly accessing the Align panel or other tools can be time-consuming. Instead, set up custom keyboard shortcuts:
- Go to Edit > Keyboard Shortcuts.
- Choose the appropriate category, such as Object Editing.
- Assign shortcuts for alignments (e.g., horizontal or vertical alignment).
Customized shortcuts make repetitive tasks quick and seamless, improving efficiency.
4. Integrate Illustrator Vectors with Ease
InDesign handles vector graphics seamlessly:
- Copy and paste vector shapes directly from Illustrator into InDesign.
- Use this for high-quality logos, icons, and other scalable elements.
- Edit colors and paths within InDesign to adapt visuals as needed.
This integration maintains design fidelity and ensures compatibility across platforms.
5. Simplify Repetitive Layouts with Data Merge
The Data Merge feature is perfect for creating variations, such as business cards or certificates:
- Prepare a CSV file with relevant details (e.g., names, titles, contact info).
- Go to Window > Utilities > Data Merge.
- Import the CSV file and link fields to text boxes in your layout.
- Preview the variations to ensure accuracy.
This approach automates repetitive layouts, saving time and effort.
6. Customize Effects for Unique Designs
InDesign’s effects panel allows targeted modifications to objects:
- Access the effects via Object > Effects or the Effects Panel.
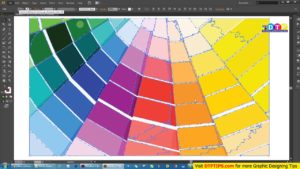
- Apply effects like gradients, shadows, or transparency to fills, strokes, or entire objects.
- Use the eyedropper tool to copy effects across multiple objects, maintaining consistency.
This feature is ideal for creating visually engaging and cohesive designs.
7. Convert Text to Outlines for Versatile Design
Transforming text into outlines lets you treat each character as a shape:
- Select your text and go to Type > Create Outlines.
- Ungroup the text to manipulate individual letters.
- Apply colors, gradients, or effects to each letter.
You can even mask images inside outlined text for creative compositions, making it a versatile tool for advanced layouts.
8. Streamline Text Styling with Paragraph Styles
Paragraph Styles allow consistent formatting across your document:
- Design a sample text box with your desired settings (e.g., font, size, spacing).
- Open the Paragraph Styles Panel and create a new style.
- Apply this style to other text boxes for consistent formatting.
Changes made to the style automatically update across all linked text boxes, which is invaluable for managing lengthy documents.
9. Switch Between Display Modes for Improved Precision
InDesign offers various display modes for different tasks:
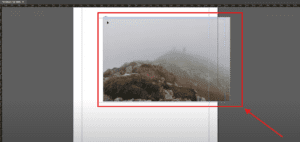
- Fast Display: Prioritizes speed by reducing visual details.
- Typical Display: Balances performance and quality.
- High-Quality Display: Best for fine-tuning visuals.
Toggle between these modes using Ctrl+Alt+H or adjust preferences in the View menu. Use grids and guides for precise alignment, and activate the baseline grid to maintain consistent text alignment.
By mastering these InDesign tips, you’ll not only save time but also produce polished, professional layouts with ease. Experiment with these features to discover what works best for your workflow.


