Creating impressive text effects is one of the most exciting features in CorelDRAW 2024. Whether you’re designing a logo, creating social media graphics, or making posters, adding textures, patterns, and other effects to your text can elevate your design.
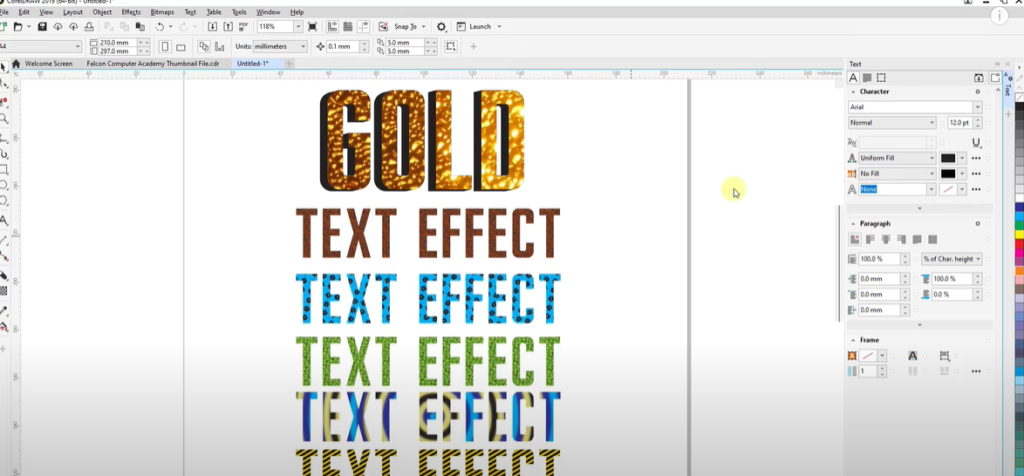
In this article, we’ll explore how to apply various text effects, including 3D effects, fill textures, patterns, bitmaps, and more in CorelDRAW 2024. By the end of this guide, you’ll know how to create eye-catching text that will enhance your designs.
Step 1: Start with Your Text
- Open CorelDRAW 2024.
- Type your desired text by selecting the Text tool from the toolbox.
- Once you’ve typed your text, customize the font and size. Choose a bold, large font to make your effects more prominent. For instance, you can pick a gold-colored text effect to make it stand out.
Step 2: Access Text Properties
- To open the Text Properties panel, either click on the text and look for the properties toolbar at the top, or simply press
Ctrl + Tto bring up the Text Properties on the right side of the screen. - This panel is where you will modify your text’s appearance, including adding patterns, textures, and other effects.
Step 3: Apply Gradient Effects
- After opening the Text Properties, select the Fill option.
- From the dropdown, choose Fountain Fill. This option allows you to apply gradient effects with multiple colors.
- Experiment with different gradients to see what works best. For example, you can apply a dark-to-light blue gradient for a two-color scheme.
Step 4: Add Texture Fills
- Duplicate your text by right-clicking on it while holding down
Ctrl, then drag the text to create a copy. - In the Fill options, select Two-Color Pattern.
- Choose from the available patterns and adjust the size and spacing of the pattern as needed. You can use the Interactive Fill Tool to fine-tune the texture placement and scale.
Step 5: Experiment with Bitmap Fills
- To apply a bitmap or image fill, duplicate the text again as before.
- Go to the Fill options and select Bitmap Fill.
- Choose a bitmap image from your computer or CorelDRAW’s library, and apply it to your text. Adjust the image size and alignment to ensure it fits the text shape perfectly.
- Use the Interactive Fill Tool to control the size and positioning of the bitmap within the text.
Step 6: Incorporate Vector Graphics
- Another great way to enhance your text is by incorporating vector patterns or graphics.
- Duplicate your text and access the Fill options once more.
- Select Vector Pattern Fill and pick from a variety of available shapes and designs.
- Adjust the size and placement of the pattern to your liking.
Step 7: Applying 3D Effects
- To add a 3D effect to your text, first, create a new copy of the text.
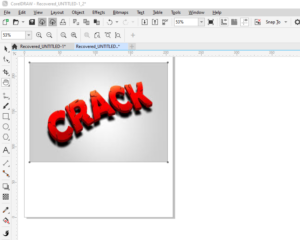
- Use the Extrude Tool found in the toolbox to apply a 3D extrusion to your text.
- Adjust the depth and direction of the extrusion to achieve your desired 3D look.
Step 8: Adding a Gold Effect
- Now, let’s apply a gold effect to your text. Type a new text and set the color to gold.
- Go to the Block Shadow Tool in the toolbox to apply a block shadow to your text, creating a 3D-like effect.
- After applying the shadow, right-click on the text and choose Break Apart to separate the shadow from the text.
- Finally, you can adjust the color of the shadow to give your gold text a polished, professional look.
Step 9: Final Adjustments
Once you’ve applied all these effects, zoom out to view your text from a broader perspective (F2 to zoom in, Shift + F2 to zoom out), ensuring that everything looks cohesive. Make final adjustments to the colors, shadow, and patterns as needed.
Conclusion
By following these steps, you can create stunning text effects in CorelDRAW 2024 using various fills, textures, patterns, and 3D effects. These techniques give your designs a dynamic and professional look, whether you’re creating logos, posters, or digital graphics. Experiment with different combinations and have fun exploring the endless possibilities.
