Betas are where good habits are born. If you’ve just finished your first weekend in the Battlefield 6 beta (or you’re warming up for Weekend 2), a handful of small mechanics and settings can quietly transform your experience—from snappier aim to smarter revives and fewer “why didn’t that work?” moments. I’ve collected the most useful discoveries (some returning from classic Battlefield titles, others brand new) and explained what they do, why they matter, and how to use them without overthinking.
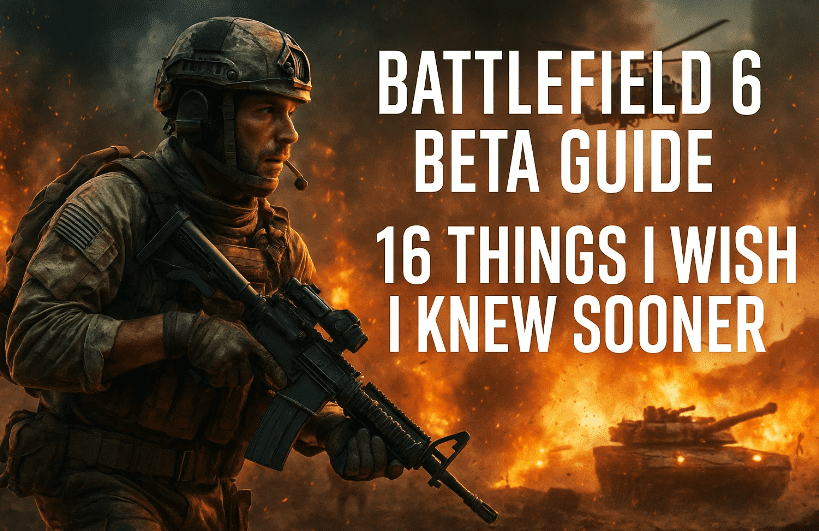
Take a minute, grab a coffee, and let’s make the next session smoother than the last.
Table of Contents
1 Weapon Bloom (and Why Your Long-Range Lasers Suddenly Miss)
2 Assault Ammo Quirk: The Weapon Sling Surprise
3 Suppression Pauses Auto-Heal (Here’s How to Play Around It)
4 Sniper “Sweet Spot” Damage Returns (Distance Matters)
5 Reading the Scope Glint: The Sweet-Spot “Starburst”
6 Rangefinder + Zeroing: Land First-Try Headshots at Range
7 Soft Point Rounds: Big Headshot Gains (and the Real Cost)
8 Flick Look Setting: Instant 180° Turns When You’re Flanked
9 Tank Health Checkpoints: Why Repairs Suddenly Feel Mandatory
10 Picking Up a Full Class (Not Just a Gun)
11 Adrenaline Injector (Assault): Not a “Heal”—Think Breaching
12 Revives: Charge Defibs, Saved Progress, and the Request Toggle
13 Platform Perks: PlayStation Beta Bonuses You Might Have Missed
14 HUD Compass Is Off by Default—Turn It On for Callouts
15 Spawn Camera Live Feed: Now Truly “What They See”
16 A Few Quality-of-Life Habits That Stack Over Time
17 FAQ
18 Quick Settings Checklist (Copy-Paste for Your Next Session)
19 Disclaimer & Helpful Links
But before you divein the game overview, do you know there are many errors that halts the gameplay when the exictement is almost at the peak… below are some tips which you can consider before you start the game like
- How to Fix the DirectX Function Error in Battlefield 6 — Step-by-Step Guide
- “Please Update Your Nvidia GeForce Driver” Error in Battlefield 6 – Step-by-Step Guide
- How to Fix Battlefield 6 Secure Boot Error on PC – Complete Step-by-Step Guide
- How to Fix the DirectX Function Error in Battlefield 6 — Step-by-Step Guide
- or you can check the complete Battlefield Game related articles here!
1 Weapon Bloom (and Why Your Long-Range Lasers Suddenly Miss)
Let’s start with the thing that makes you question your aim at long range. Weapon bloom is back. Even when you’re ADS, your shots won’t all land on the exact center pixel—especially as ranges stretch beyond ~30–40 meters.
Before we jump into fixes, a quick sanity check: this isn’t you “aiming worse.” It’s a mechanic.
- What to do:
- Burst or tap-fire at mid-to-long range to reset spread.
- Builds/attachments that stabilize your platform (lower recoil/spread) help keep strings tighter.
- Fire cadence matters—learn the rhythm for your gun; don’t glue the trigger down at 80+ meters.
If you were melting at 20m and suddenly “missing everything” at 70m, it’s probably bloom, not a bad day.
2 Assault Ammo Quirk: The Weapon Sling Surprise
Tried Assault and felt like your ammo evaporated? You’re not imagining it. The weapon sling changes how your total ammo pool is distributed between your primary and the sling weapon in your gadget slot. With sling equipped, Assault carries fewer mags than other classes.
- What to try:
- If the sling isn’t part of your playstyle, swap it for another launcher (explosive/incendiary). You’ll typically see your reserve mags normalize.
- If you love the sling (it’s strong in certain meta moments), plan resupplies more aggressively and fight in tighter loops close to ammo support.
Small swap, big difference in staying power.
3 Suppression Pauses Auto-Heal (Here’s How to Play Around It)
Suppression is back—and this time it directly pauses your automatic health regeneration while you’re in or just out of a gunfight. If you feel “stuck” at low HP, it’s not a bug; you’re suppressed.
- What to do:
- Break line-of-sight for a second or two—duck behind hard cover, change elevation, or smoke.
- Re-engage from a fresh angle once regen kicks back in.
- Call for support heals if you’re anchored on an objective.
Treat suppression like temporary gravity—step sideways, and it lets go.
4 Sniper “Sweet Spot” Damage Returns (Distance Matters)
If you played Battlefield 1, you’ll remember this: a distance-based “sweet spot” where a chest/upper-torso hit can be a one-shot kill—without requiring a headshot. Outside that range, damage drops off.
- How to use it:
- Learn your rifle’s approximate effective sweet-spot band (practice on a range or in live fights).
- If you’re outside the band, take the head or reposition to bring targets into the lane where body shots delete.
A good recon isn’t just accurate—they’re distance-aware.
5 Reading the Scope Glint: The Sweet-Spot “Starburst”
A subtle visual cue helps both sides. In the sweet-spot band, scope glint upgrades from standard “dot glow” to a starburst/rainbow lens flare. If you see that shimmer, treat it as code for: this sniper doesn’t need your head to drop you.
- As a target:
- Break LOS immediately, smoke, or angle off.
- Avoid peeking the same slice—change height or flank.
- As the sniper:
- Starburst visible? You’re in business—commit to clean chest shots and cycle quickly.
It’s a tiny effect with big tactical meaning.
6 Rangefinder + Zeroing: Land First-Try Headshots at Range
Zeroing is back (100–500m in steps). Add a rangefinder attachment and you can auto-zero to whatever you ping—no more “hold two ticks over the brow and pray.”
- Flow to practice:
- Range the target → 2) Zero to readout → 3) Aim center-mass or head based on sweet-spot → 4) Fire.
- Combine with a stable platform (bipod/prone) for laser-flat follow-ups.
This is the difference between “almost” and “first-try.”
7 Soft Point Rounds: Big Headshot Gains (and the Real Cost)
On weapons that offer them, Soft Point rounds are borderline mandatory in the beta. They boost headshot multipliers and often have no significant downsides beyond attachment point cost (commonly ~30 points).
- When to use:
- If your gun has a clean recoil pattern and you naturally aim high, equip Soft Point and reap the multiplier.
- If you need every other slot for stability/ADS handling, consider testing with/without to see which produces more consistent TTKs for you.
In short: if your gun offers Soft Point, try it. You’ll feel it.
8 Flick Look Setting: Instant 180° Turns When You’re Flanked
There’s a setting that feels like keyboard magic but works on controller too: Flick Look. One tap = a clean 180° turn.
- When to use:
- You’re finishing a fight and hear steps behind—tap, adjust, shoot.
- You suspect a wrap but don’t want to take your crosshair off the current target—finish, flick, check.
You’ll still need a micro-adjust (enemies won’t be perfectly centered), but it buys you the half-second that wins trades.
9 Tank Health Checkpoints: Why Repairs Suddenly Feel Mandatory
Tank health now uses checkpoint thresholds. If incoming damage knocks you below a dot on the health bar, natural regen will not rise past that dot again.
- What to do:
- Pull back once you drop past a checkpoint and call for an Engineer repair.
- Or visit a Vehicle Supply Station to restore ammo and push your max recoverable health back up.
Treat those dots like oxygen levels—dip too low without resupply, and your lifespan shrinks fast.
10 Picking Up a Full Class (Not Just a Gun)
See a weapon lying next to a backpack/satchel on the ground? That’s not just a gun swap—it’s a full class kit. Grab it, and your entire loadout flips mid-life: weapons, gadgets, the lot.
- When to do it:
- Your squad wipes and you need a Medic now.
- Your role is wrong for the fight (e.g., you’re Assault, but a friendly Recon kit with beacon is right there near a rooftop push).
It’s a powerful mid-match pivot—just remember what you’re giving up.
11 Adrenaline Injector (Assault): Not a “Heal”—Think Breaching
If you’re expecting the Adrenaline Injector to work like a classic “stim” that instantly restores HP, you’ll be disappointed. It doesn’t immediately heal. Instead, think of it as a breaching tool:
- What it actually does:
- Speeds up health regen kick-in rather than instantly filling HP
- Clears grenade/stun effects
- Amplifies footstep audio so you’re hyper-aware during the push
Use it to cut through chaos—not to “pop a heal” mid-duel.
12 Revives: Charge Defibs, Saved Progress, and the Request Toggle
Support/Medic players, this trio saves lives (and tickets).
- Charge your defibs: The longer the charge, the more HP your revive restores—up to a full 100.
- Saved progress: If you must cancel mid-revive to take a fight, progress is saved. Win the duel, hop back in, and finish the revive faster.
- Request revive extends timer: Holding Request slows your bleed-out. In settings, enable Toggle so a single tap holds the request until you tap again—no finger cramp.
These small behaviors stack into a massive survivability bump for squads.
13 Platform Perks: PlayStation Beta Bonuses You Might Have Missed
During Weekend 1, PlayStation players had bonus perks (e.g., an exclusive skin and double XP windows). The rank cap kept things even in the short term, but for unlock chasers: platform events can speed progress.
- Takeaway: If you have multiple platforms available, keep an eye on time-limited perks during beta windows. They can be worth a few evenings of focused play.
14 HUD Compass Is Off by Default—Turn It On for Callouts
Precise callouts are the difference between “they’re over there!” and “two on NE 40°, pushing left.” The compass is off by default.
- Path: Settings → Graphics → Interface & HUD → Advanced HUD → Enable Compass
- Why it matters:
- Faster squad comms
- Cleaner target designation in large fights
- Better crossfire coordination on objectives
Turn it on once and never look back.
15 Spawn Camera Live Feed: Now Truly “What They See”
In older titles, the spawn camera could show an approximation of what your squadmate saw—sometimes leading you to spawn into surprise trouble. The system has been rebuilt so the feed now reflects what your teammate is actually seeing.
- Practical use: If the live feed looks hot, trust it. Wait half a beat, spawn on a safer squadmate, or take the nearest spawn point/vehicle instead.
It’s a small confidence boost that prevents silly spawns.
16 A Few Quality-of-Life Habits That Stack Over Time
We’ve covered the headline mechanics. Let’s finish with a handful of tiny habits that pay big dividends.
Before we list them, a quick mindset check: these aren’t flashy, but they compound—like interest for your skill.
- Swap builds for distance. If you’re stuck at 60–80m engagements, consider a calmer optic and a stability-first attachment set.
- Use micro-repositions in suppression. Move one doorway over, crouch under a window frame, or hop a short wall—just enough to restart regen.
- Practice your “flick + micro adjust.” The Flick Look gets you facing danger; your muscle memory lands the shot.
- Align your class to the objective. If the flag needs smoke + defib, don’t be your team’s 5th Recon.
The betas are perfect for building these into reflex.
17 FAQ
Q. Why do my bullets feel random at long range even when I’m steady?
Likely bloom. Switch to burst/tap fire, and consider a recoil/spread-friendly build for long lanes.
Q. My Assault ammo seems low—bug or feature?
It’s the weapon sling distributing total ammo between primary and sling gadget. Swap the sling if you want standard reserve mags back.
Q. Is the Adrenaline Injector supposed to heal me?
Not instantly. Think debuff clear + regen speed-up + awareness—use it to breach, not as a mid-duel heal.
Q. Do charged defibs really change revive HP?
Yes. Longer charge = more HP on revive (up to full).
Q. I held Request Revive and my timer slowed. Is that intended?
Yes, holding Request extends your downed time. Enable Toggle in settings so one tap keeps it active.
Q. Is the scope “starburst” real or just a visual bug?
It’s a visual cue for the sweet-spot zone—treat that sniper as extra dangerous even to chest.
18 Quick Settings Checklist (Copy-Paste for Your Next Session)
Before we rattle these off, one little tip: tweak one setting at a time and test in a short game. You’ll actually feel what changed.
- Compass: On (Settings → Graphics → Interface & HUD → Advanced HUD)
- Flick Look: On (and bind a comfortable button)
- Request Revive: Toggle (so one tap holds)
- Zeroing Controls: Bound and practiced (sniper/rangefinder combo)
- Audio: Footstep clarity up; reduce non-essential UI/music if needed
- Sensitivity: One value for hip; one for ADS; test with 180° + micro-adjust drills
- Colorblind/UI contrast: Adjust to personal clarity—glanceable beats pretty
19 Disclaimer & Helpful Links
Beta means change. Mechanics, values, attachments, and UI placements can evolve between weekends and at launch. Treat this guide as a practical baseline; keep an eye on patch notes and in-game tooltips for updates.
Helpful links (official):
- Battlefield (official): https://www.ea.com/games/battlefield
Tags
battlefield 6 tips, battlefield 6 beta guide, battlefield 6 settings, battlefield 6 sniper sweet spot, battlefield 6 suppression, battlefield 6 weapon bloom, battlefield 6 soft point rounds, battlefield 6 revive tips, battlefield 6 compass hud, battlefield 6 rangefinder zeroing
Hashtags
#Battlefield6 #BF6 #BattlefieldTips #FPSGuides #ShooterGames #PCGaming #ConsoleGaming

