Adobe InDesign is a powerhouse when it comes to desktop publishing, layout design, and creative print projects. Whether you’re a seasoned designer or just getting started, mastering a few insider tips can make your workflow faster and more efficient. This A-to-Z guide is packed with 26 essential tips and tricks to help you take full advantage of Adobe InDesign’s robust features.

🔤 A to Z: InDesign Tips You Should Know
A – Auto Save
A crucial lifesaver. If something crashes, InDesign’s auto-save can recover your file. Go to Edit > Preferences > File Handling to view or change the document recovery location.
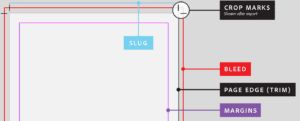
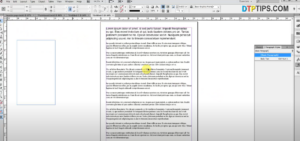
B – Bleed
A bleed ensures that images or background colors reach the edge of a printed document without a white border. You can set it during New Document creation or modify it later via File > Document Setup.
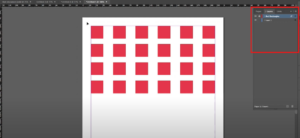
C – Clipping Masks
Want to show only a portion of an image? Use the Pen Tool to draw a custom shape, then go to File > Place to import your image into that shape, masking unnecessary parts.
D – Data Merge
Create personalized content like business cards easily. Prepare a CSV file with variable data and use Window > Utilities > Data Merge to automate the design process for multiple entries.
E – Effects
Make your designs pop. Right-click on an image and choose Effects > Transparency, then apply a blend mode like Multiply to blend layers creatively.
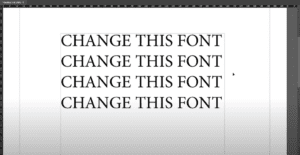
F – Fill & Stroke Colors
Modify object and text colors via the Fill and Stroke icons at the bottom of the Tools Panel. If editing text color, ensure the ‘T’ icon is active to apply changes correctly.
G – Guides
Drag from the rulers to create guides. Need a clean view? Toggle them on/off under View > Grids and Guides.
H – Hand Tool
Navigate around your document easily using the Hand Tool. Click and drag to pan without affecting your design elements.
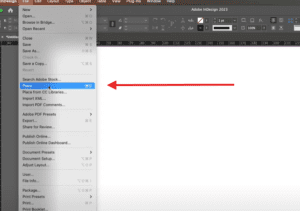
I – Images
Place images using File > Place. Either draw a new frame or click on an existing one to import your image.


J – Justification
Change paragraph alignment via the Paragraph panel: Window > Type & Tables > Paragraph. Adjust text to align left, center, right, or justified.
K – Kerning
Tweak character spacing in Window > Type & Tables > Character. Adjust the spacing manually or pick from predefined settings.
L – Links
Ensure external assets remain linked correctly. Use the Links panel (Window > Links) to re-link or update images and files as needed.
M – Margins & Columns
Set them during document creation or later under Layout > Margins and Columns. This ensures better layout balance and consistency.
N – Numbering
Insert automatic page numbers via Type > Insert Special Character > Markers > Current Page Number. Use on master pages for consistency.
O – Options Panel
The bottom of the Tools Panel has view options to toggle rulers, guides, grids, and more—great for quick access during design.
P – Pages Panel
Open via Window > Pages. Add or delete pages, and work with master pages to apply repeated design elements.
Q – QR Codes
Create functional QR codes from within InDesign. Go to Object > Generate QR Code and input your desired link, contact info, or text.
R – Rectangle Frames
Use the Rectangle Frame Tool to create containers for images or content. Insert images by selecting the frame and using File > Place.
S – Spell Check
Ensure professional output using Edit > Spelling > Check Spelling. Fix typos and customize your dictionary if needed.
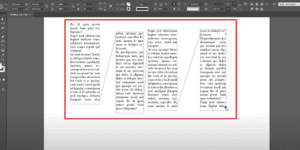
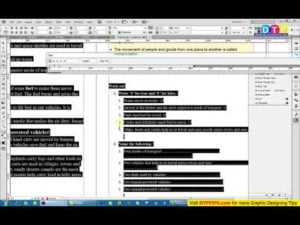
T – Text Wrap
Wrap text around objects by selecting both the object and text, then go to Window > Text Wrap and choose a wrap option.
U – Units & Measurements
Customize your preferred units (inches, pixels, picas, etc.) in Edit > Preferences > Units & Increments.
V – View Modes
Under the View menu, explore options like Overprint Preview and Actual Size to review how your document will appear in print.
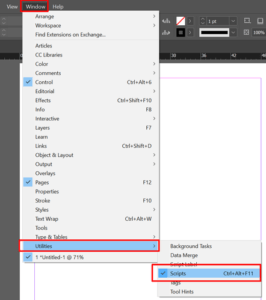
W – What Was That Tool? (Tool Hints)
Lost in the tools? Activate Window > Utilities > Tool Hints to get helpful information about the currently selected tool.
X – Export
Finish your project by exporting it. Go to File > Export and choose from formats like PDF, EPUB, or JPEG. Always save an editable backup via File > Save a Copy.
Y – Y-Axis (and X-Axis)
Use these coordinates in the Control Panel to position objects precisely. The X-axis adjusts horizontal placement, and the Y-axis controls vertical alignment.
Z – Zoom Tool
Zoom in to inspect fine details, or zoom out for an overview. Use Alt (Windows) or Option (Mac) + click to zoom out quickly.
🛠️ Useful Resource
- Envato Elements – Thousands of premium InDesign Templates, fonts, graphics, and more with unlimited downloads.
⚠️ Disclaimer
This article is for educational and informational purposes only. Adobe InDesign is a registered trademark of Adobe Inc. This guide is not affiliated with or endorsed by Adobe. Always ensure you’re using licensed assets when working on commercial projects.
🔖 Tags
Adobe InDesign, InDesign Tips, Graphic Design, Print Design, Desktop Publishing, Envato Elements, Creative Cloud, InDesign Templates, Design Workflow, InDesign A to Z
# Hashtags
#AdobeInDesign #InDesignTips #GraphicDesign #PrintDesign #CreativeCloud #InDesignTemplates #EnvatoElements #DesignWorkflow #DesktopPublishing #InDesignTricks