When your Windows 10 or 11 system fails to boot, it can be an overwhelming experience. Typically, you’ll encounter a blue screen with an error code or a message about a missing or corrupted file. This guide will walk you through the steps to repair the UEFI (Unified Extensible Firmware Interface) partition and get your system up and running again.
What You’ll Need
To begin, ensure you have the following:
- A USB flash drive with a bootable version of Windows 10 or 11.
- Backups of your system’s registry and boot records, if possible.
Creating a Bootable USB Flash Drive
- Visit the official Microsoft Windows Download Page and download the Media Creation Tool.
- Follow the instructions to create a bootable USB flash drive containing Windows 10 or 11.
- Once created, keep this flash drive readily available for emergencies.
Backing Up Your Boot Records
Before attempting any repairs, it’s a good idea to back up your boot configuration:

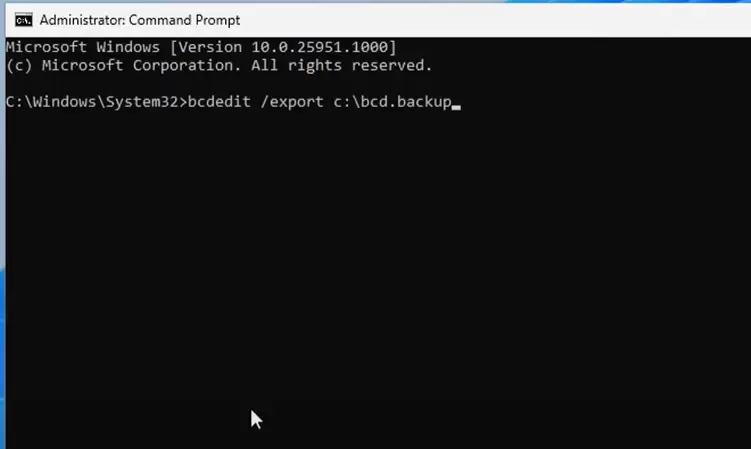
- Open Command Prompt as an Administrator.
- Type the following command to export the Boot Configuration Data (BCD):
bcdedit /export C:\BCD_backup - Verify the backup file is saved in your C: drive.
Steps to Fix the UEFI Partition
Step 1: Boot from the USB Flash Drive
- Insert your bootable USB into the affected computer.
- Restart your system and access the BIOS/boot menu (commonly done by pressing a key like F2, F12, DEL, or ESC during startup).
- Select the USB flash drive as the boot device.
Step 2: Access the Repair Tools
- Once booted, click Next on the initial Windows setup screen.
- Select Repair your computer instead of “Install now.”
- Choose Troubleshoot > Command Prompt to open a terminal window.
Step 3: Use Diskpart to Identify the Correct Partition
- In Command Prompt, type:
diskpart - List all disks to identify your storage drives:
list disk - Select your primary disk (usually Disk 0):
select disk 0 - List volumes to find the FAT32 EFI partition:
list volume
Note the volume number of the EFI partition (e.g., Volume 2). - Select the EFI volume:
select volume 2 - Assign a new drive letter (e.g., Z):
assign letter=Z
Step 4: Format and Rebuild the EFI Partition
- Format the EFI partition:
format Z: /FS:FAT32 - Recreate the boot record:
bcdboot C:\Windows /s Z: /f UEFI
Step 5: Verify and Restart
- Check the new files in the EFI partition:
dir Z:\EFI - Exit the Command Prompt:
exit - Restart your computer and remove the USB drive. Your system should now boot correctly.
Tips for Preventing Future Issues
- Always maintain a bootable USB with your operating system.
- Regularly back up critical system files, including the boot configuration.
- Create restore points to revert your system in case of errors.
By following these steps, you can resolve common UEFI-related issues and get your Windows 10 or 11 system back in working order.
Tags and Hashtags
Tags: UEFI repair, Windows 10 troubleshooting, Windows 11 troubleshooting, bootable USB creation, system repair, boot configuration, diskpart commands, Windows recovery, boot issues, computer troubleshooting.
Hashtags: #UEFIRepair #Windows10 #Windows11 #SystemRepair #BootIssues #Troubleshooting #TechTips #DiskPart #WindowsRecovery #PCRepair


