Adobe InDesign is a powerful tool for creating visually appealing designs, and setting up your document correctly is a critical first step. Proper configuration ensures your project meets its intended purpose, whether for print or digital use. This blog post will guide you through the new document and page setup process in InDesign, ensuring your project gets off to a perfect start.
Step 1: Launching the New Document Dialog
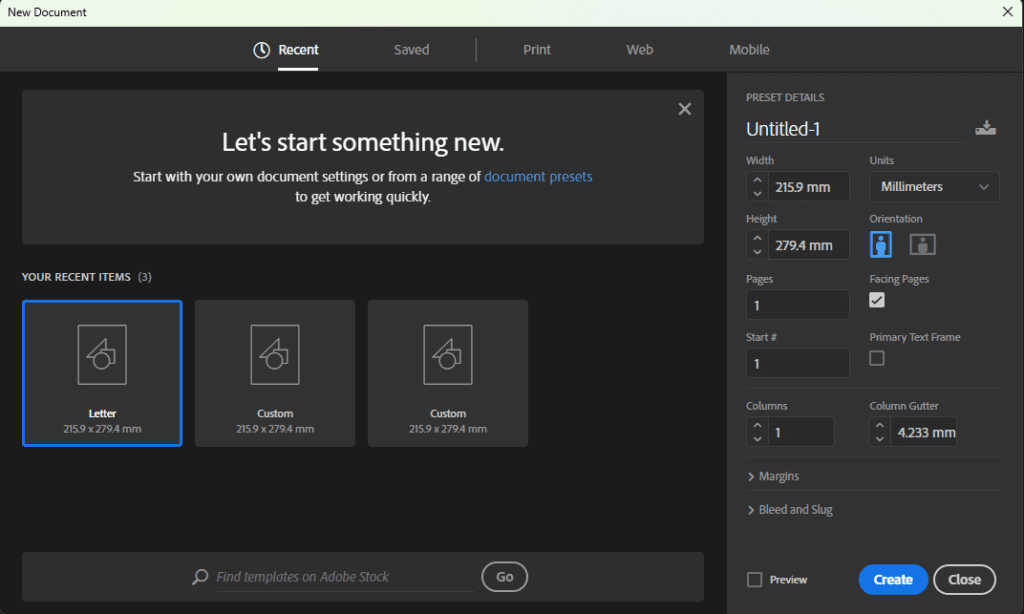
To start, open Adobe InDesign and create a new document:
- Go to File > New > Document or press
Ctrl+N(Windows) /Cmd+N(Mac). - The New Document dialog box will appear, presenting various options to customize your document settings.
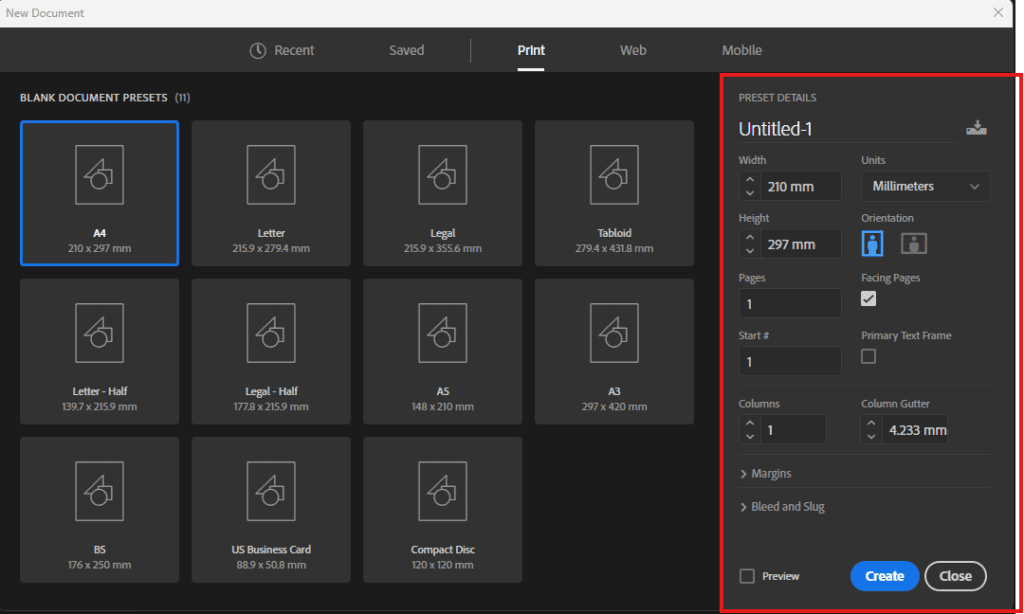
Step 2: Selecting the Intent
The first decision is to choose the purpose of your document:
- Print: Ideal for materials like brochures, flyers, or books. Print documents use CMYK color mode and higher resolution for clarity.
- Web: Best for digital assets like PDFs or interactive eBooks. Web documents use RGB color mode and are optimized for screen resolution.
- Mobile: Designed for digital publications like apps or mobile-friendly eBooks, with pre-defined sizes for mobile devices.
Step 3: Configuring Basic Settings
- Page Size:
- Choose a preset size like A4, Letter, or Tabloid, or set a custom size using width and height fields.
- Consider the orientation—portrait or landscape—based on your content layout.
- Number of Pages:
- Input the total number of pages if known, or add pages later as needed.
- Enable Facing Pages for documents like books or magazines where pages appear in spreads.
- Columns:
- Divide the page into columns for structured layouts. Use the Gutter field to set the spacing between columns.
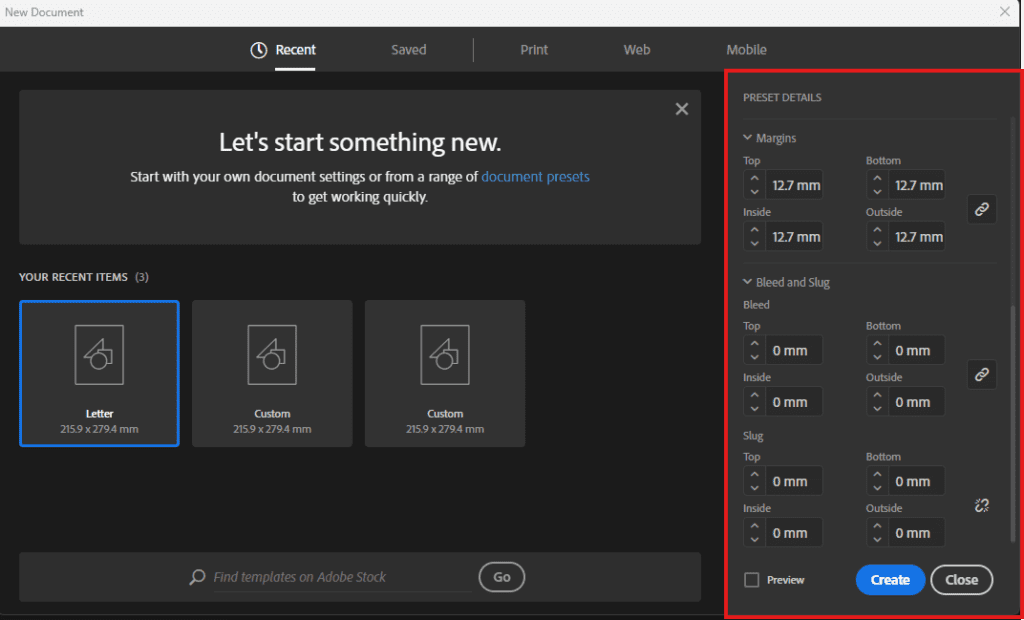
- Margins:
- Define the space around the edges of your document. Margins help frame content and ensure no text or elements are cut off during printing.
Step 4: Adding Bleed and Slug
Bleed and slug settings are crucial for printed documents:
- Bleed: Extends design elements beyond the page edge to avoid white borders after trimming. A typical bleed size is 3mm or 0.125 inches.
- Slug: Provides space for notes or instructions for the printer outside the page area. This is optional and rarely used in digital-only designs.
Step 5: Advanced Setup Tips
- Start Page Number:
- Change the start page number if your document doesn’t begin at “1” (e.g., when creating a chapter of a larger book).
- Primary Text Frame:
- Enable this option to add a text frame automatically on every page, making it easier to layout text-heavy projects like books.
- Preview:
- Toggle the Preview checkbox to see how your settings affect the document before finalizing them.
Step 6: Saving Your Preset
If you frequently create documents with similar settings, save a preset to streamline future projects:
- Set up your document as desired.
- Click the Save Preset button in the New Document dialog.
- Name your preset and access it under Saved Presets in future projects.
Step 7: Finalizing the Document
Once you’ve configured all settings, click Create. Your new document will open, ready for design work.
Why Proper Document Setup Matters
Taking the time to configure your document correctly:
- Prevents costly mistakes during printing.
- Ensures consistency across pages.
- Saves time in the design process by reducing adjustments later.
Conclusion
Setting up a document in Adobe InDesign is the foundation of any successful project. By understanding and utilizing these settings effectively, you can create professional designs tailored to your specific needs. Whether you’re designing for print or digital, the right setup will ensure your project is both visually stunning and technically sound.
#AdobeInDesign #GraphicDesign #DocumentSetup #InDesignTips #PageLayout #PrintDesign #WebDesign #BleedSettings


