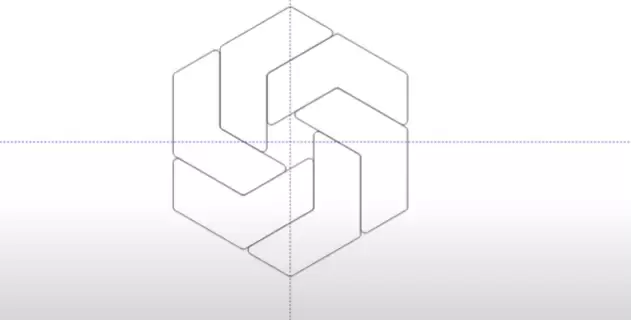
CorelDRAW offers endless possibilities for creative designs, including complex geometric shapes. In this guide, we will walk you through creating an intricate pattern using three six-sided polygons. You’ll learn how to manipulate polygons, adjust their sizes, use the Smart Fill tool, and even round the corners for a more polished look.

Follow the steps below to create a beautifully symmetric pattern using CorelDRAW’s powerful design tools.
Step-by-Step Guide to Creating a Pattern with Six-Sided Polygons
1. Create a Six-Sided Polygon
- Select the Polygon Tool from the toolbox.
- Hold down the Control key to draw a perfect six-sided polygon.
- Press P to center the polygon in the middle of the page.
2. Adjust the Polygon Size
- Check the polygon’s width. Let’s say it’s 12.88 inches wide by default.
- If you want to resize it, make the polygon exactly 10 inches wide. This will be the starting point for creating duplicates.
3. Duplicate and Resize
- Press Control + D to create a duplicate of the polygon.
- Resize the duplicate to 60% of the original size. This will create a smaller polygon inside the first one.
- Repeat this step by making another duplicate, resizing it to 60% of the second polygon. You should now have three polygons of descending size.
4. Align the Polygons
- Select all three polygons. To align them, press R to move them to the right, ensuring perfect alignment.
- Click off the selection, then reselect the outer polygon. Use Control + D to duplicate and move it to the center of the page, aligning all polygons properly.
5. Use the Smart Fill Tool
- Select the Smart Fill Tool from the toolbox and fill the areas between the polygons. This will create a new object based on the filled areas.
- Move the filled shape aside for now, as you will use it in the next steps.
6. Position and Duplicate the Shape
- Place the filled shape back in the center of the page by pressing Alternate + C, which is a shortcut to center objects.
- With the shape selected, press Control + D to create a duplicate.
- Rotate the duplicate by 60 degrees.
- Repeat the process by pressing Control + D multiple times until you have a full, circular pattern.
7. Add Rounded Corners (Optional)
- To create a smoother look, you can round the corners of the polygons.
- Go to Window > Dockers > Corners to open the corner settings.
- Set the Bevel to 0.25 inches to soften the edges.
- Apply the bevel to all the polygons, and then use Control + D to duplicate and rotate the shape as before.
8. Finalize Your Design
- Make sure everything is centered by pressing Alternate + C.
- Continue duplicating and rotating the shapes until the pattern is complete.
- You can now experiment with different fills, colors, and additional effects to enhance the design.
Conclusion
By following these steps, you can create a stunning geometric pattern using three six-sided polygons in CorelDRAW. The Smart Fill tool, combined with precise alignment and rotation, allows you to make complex designs with ease. You can further enhance the design by rounding the corners or experimenting with different fills and colors. This technique is perfect for creating unique graphic elements for your designs.


