Content is the heart of your WordPress site. This blog will guide you through creating and managing posts and pages, adding media, and organizing your content.
1. Creating a New Post
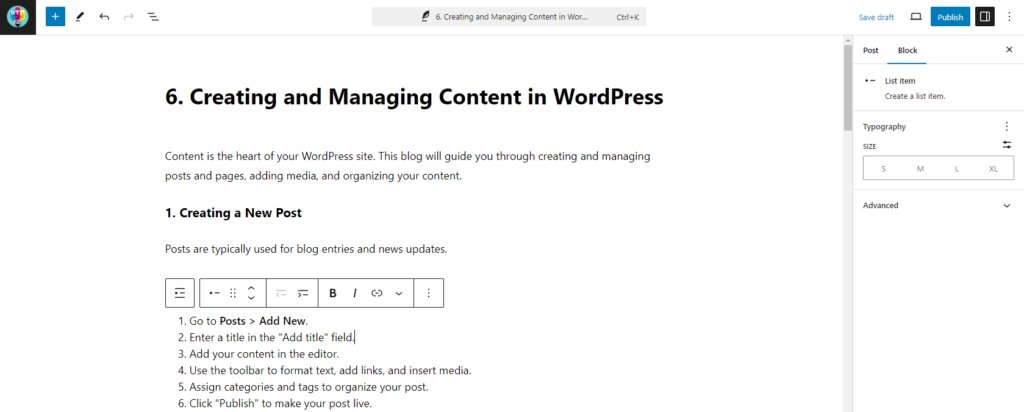
Posts are typically used for blog entries and news updates.
Steps:
- Go to Posts > Add New.
- Enter a title in the “Add title” field.
- Add your content in the editor.
- Use the toolbar to format text, add links, and insert media.
- Assign categories and tags to organize your post.
- Click “Publish” to make your post live.
Example: Create a blog post titled “How to Grow Roses” with detailed instructions, images, and relevant tags like “Gardening” and “Roses.”
2. Creating a New Page
Pages are used for static content like About, Contact, and Services.
Steps:
- Go to Pages > Add New.
- Enter a title in the “Add title” field.
- Add your content in the editor.
- Use the toolbar to format text, add links, and insert media.
- Click “Publish” to make your page live.
Example: Create an “About” page with information about yourself, your mission, and a photo.
3. Adding and Managing Media
Media includes images, videos, and documents that you can insert into your posts and pages.
Steps:
- Go to Media > Add New.
- Drag and drop files or click “Select Files” to upload.
- To insert media into a post or page, click the “Add Media” button in the editor.
- Select the media file and click “Insert into post/page.”
Example: Upload a photo of a beautiful garden and insert it into a blog post about garden design.
4. Organizing Content with Categories and Tags
Categories and tags help organize your content and improve navigation.


Steps (Categories):
- Go to Posts > Categories.
- Enter a name and optional description for the category.
- Click “Add New Category.”
Steps (Tags):
- Go to Posts > Tags.
- Enter a name and optional description for the tag.
- Click “Add New Tag.”
Example: Create categories like “Gardening Tips” and “Plant Care” and tags like “Roses” and “Soil Preparation.”
5. Using the Block Editor
The WordPress Block Editor (Gutenberg) allows you to create content using blocks for different types of media and layouts.
Steps:
- In the post or page editor, click the “+” button to add a new block.
- Choose from various block types such as paragraph, image, heading, and gallery.
- Customize each block using the options in the toolbar and sidebar.
Example: Use an image block to add photos, a gallery block to display multiple images, and a paragraph block for text content.
6. Scheduling Posts
You can schedule posts to be published at a future date and time.
Steps:
- In the post editor, click the “Publish” button.
- Click “Immediately” next to “Publish” to open the date and time picker.
- Set the desired publish date and time.
- Click “Schedule.”
Example: If you want a post to go live at 9:00 AM on Monday, set the date and time and click “Schedule.”
7. Creating Reusable Blocks
Reusable blocks allow you to save and reuse blocks across multiple posts and pages.
Steps:
- Create and customize a block in the editor.
- Click the three dots in the block toolbar and select “Add to Reusable Blocks.”
- Name the reusable block and click “Save.”
Example: Create a reusable block for a call-to-action button that you can insert into multiple posts.
8. Managing Comments
Comments allow readers to interact with your content. You can moderate and manage comments from the WordPress dashboard.
Steps:
- Go to Comments.
- Approve, reply to, edit, or delete comments as needed.
- Use the bulk actions to manage multiple comments at once.
Example: Approve insightful comments and reply to questions to engage with your readers.
9. Creating Custom Post Types
Custom post types allow you to create different types of content beyond posts and pages.
Steps:
- Install a plugin like Custom Post Type UI.
- Go to CPT UI > Add/Edit Post Types.
- Fill in the required fields to create a new post type.
- Click “Add Post Type.”
Example: Create a custom post type for “Recipes” with custom fields for ingredients and instructions.
10. Optimizing Content for SEO
Optimizing your content for search engines helps improve your site’s visibility.
Steps:
- Install an SEO plugin like Yoast SEO.
- Go to the post or page editor and scroll down to the Yoast SEO section.
- Enter a focus keyword and optimize the content based on the plugin’s suggestions.
- Ensure the content has a good readability score and is structured properly.
Example: For a blog post about growing roses, use “how to grow roses” as the focus keyword and follow the SEO recommendations.
#WordPressContent #Blogging #WebsiteContent #PostManagement