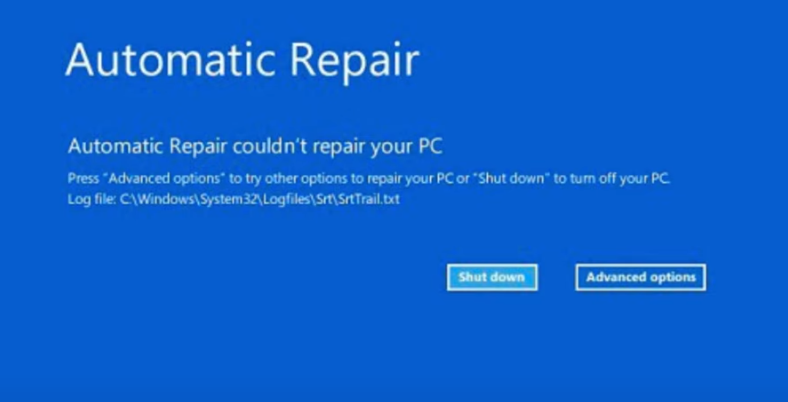
Are you stuck on the dreaded blue screen with an error message that says, “Automatic Repair couldn’t repair your PC” or “Startup Repair couldn’t repair your PC”? Don’t worry! This problem can occur for various reasons, including hardware issues, registry changes, or CPU overload. This guide will walk you through five powerful fixes to resolve the issue and get your PC back up and running.
Step 1: Use Command Prompt for System Repairs
- Access Advanced Options:
- When you’re stuck in the Automatic Repair loop, click on Advanced options from the blue screen.
- Select Troubleshoot, then Advanced options, and click on Command Prompt.
- Run System File Checker (SFC):
- In the Command Prompt, type the following command to scan for system file integrity violations:
sfc /scannow - Press Enter. This command checks for corrupt system files and repairs them if necessary. Wait for the scan to complete.
- In the Command Prompt, type the following command to scan for system file integrity violations:
- Run Bootrec Commands:
- After the SFC scan, type the following Bootrec commands one by one and press Enter after each command:
bootrec /fixmbr bootrec /fixboot bootrec /scanos bootrec /rebuildbcd - These commands repair the boot configuration and master boot record (MBR). If any errors are found, the tool will fix them automatically.
- After the SFC scan, type the following Bootrec commands one by one and press Enter after each command:
- Run Check Disk:
- Finally, run the Check Disk command to scan your hard drive for errors:
chkdsk /f /r C: - Replace
C:with the letter of your Windows installation drive if it differs. This process can take several minutes.
- Finally, run the Check Disk command to scan your hard drive for errors:
- Exit Command Prompt:
- Once all commands are completed, type
exitand press Enter. - Click Continue to reboot your system and check if the issue is resolved.
- Once all commands are completed, type
Step 2: Uninstall Problematic Updates
If the automatic repair loop persists, a recent Windows update might be the cause. Here’s how to uninstall updates:
- Access Advanced Options:
- From the Advanced options menu, click Troubleshoot, then Advanced options.
- Uninstall Updates:
- Click on Uninstall Updates. You’ll have two options:
- Uninstall latest quality update
- Uninstall latest feature update
- Start by uninstalling the latest quality update and restart your computer. If the issue persists, uninstall the latest feature update.
- Click on Uninstall Updates. You’ll have two options:
Step 3: Boot into Safe Mode
If you can’t uninstall updates or the previous steps didn’t work, try booting into Safe Mode:
- Access Startup Settings:
- Go to Advanced options > Startup Settings, then click Restart.
- Enable Safe Mode with Networking:
- Once your PC restarts, press the number 5 to enable Safe Mode with Networking.
- Uninstall Problematic Software:
- In Safe Mode, press
Windows + Sand type Control Panel. - Go to Programs > Uninstall a program. Uninstall any recent applications or updates you suspect might be causing the issue.
- In Safe Mode, press
- Restart Your PC:
- After uninstalling, restart your PC normally to see if the problem is fixed.
Step 4: Use System Restore
If the previous methods don’t work, you can restore your system to an earlier working state using System Restore:
- Access Advanced Options:
- Go to Advanced options > System Restore.
- Choose a Restore Point:
- Select a restore point from when your computer was functioning correctly and follow the on-screen instructions to complete the restoration.
- Restart Your PC:
- After the restore process, your PC will restart. Check if the problem is resolved.
Step 5: Perform a Power Drain
A power drain can fix issues caused by static charges on the motherboard:
- For Desktops:
- Shut down your computer and disconnect the power cable.
- Press and hold the power button for 25–30 seconds to discharge any residual power.
- Reconnect the power cable and restart your PC.
- For Laptops:
- Shut down your laptop and unplug the charger.
- If your laptop has a removable battery, take it out.
- Press and hold the power button for 25–30 seconds.
- Reconnect the battery and charger, then restart the laptop.
Final Step: Reset Your PC or Reinstall Windows
If none of the previous solutions work, resetting or reinstalling Windows might be necessary:
- Reset Your PC:
- Go to Advanced options > Troubleshoot > Reset this PC.
- You’ll have two options:
- Keep my files: Resets the system but keeps your personal data.
- Remove everything: Resets the system and removes all files.
- Choose Local reinstall and follow the instructions to reset your PC.
- Reinstall Windows:
- If resetting the PC doesn’t work, you may need to reinstall Windows. Don’t worry—this process won’t erase your data. Follow a video tutorial for reinstalling Windows without data loss if needed.
Conclusion
These five steps should help you fix the “Automatic Repair couldn’t repair your PC” or “Startup Repair couldn’t repair your PC” error. If one method doesn’t work, don’t lose hope—try the next one! Let me know in the comments which solution worked for you, and feel free to ask any questions if you’re still having trouble.
#AutomaticRepair #StartupRepair #Windows10 #Windows11 #BSODFix #TechTips #SystemRestore #PCRepair