Creating forms in Adobe InDesign is a straightforward process, especially when you use Character Styles for formatting blank rules. These blank rules make forms look professional and allow for customization to suit your specific design needs. In this article, we’ll walk you through the steps to create forms with blank rules in InDesign using Character Styles.

Step-by-Step Guide to Creating Blank Rules in Forms
Step 1: Set Up Your Document
- Open Adobe InDesign and create a new document.
- Go to File > New > Document and set up the page size, margins, and other specifications according to your requirements.
- Enable the Rulers by going to View > Show Rulers for precise placement.
Step 2: Insert the Text for the Form
- Use the Text Tool (T) from the toolbar to create text boxes for your form fields.
- Add placeholder text for the form questions or labels (e.g., “Name,” “Address,” etc.). Leave space where the blank rules will be added.
Step 3: Add Blank Rules
- Place the cursor where the blank rule should appear.
- Use the underscore key (
_) to manually create the blank line or add a series of underscores.- For consistency, use the Tab key to space out text evenly before and after the blank line.
Step 4: Create a Character Style for the Blank Rules
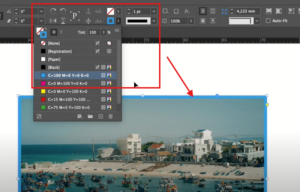
- Open the Character Styles Panel by going to Window > Styles > Character Styles.
- Click the New Style button (a small square with a plus sign at the bottom of the panel).
- In the Character Style Options dialog box:
- Name the style (e.g., “Blank Rule Style”).
- Under Basic Character Formats, adjust the following:
- Font Family: Choose a clean, legible font.
- Font Size: Match the size of the text in your form.
- Underline: Enable the underline and adjust its weight and offset.
- Apply the style by selecting the underscores and clicking the newly created Character Style.
Step 5: Fine-Tune the Appearance
- Highlight the underscores with the applied style and go to Character > Underline Options.
- Adjust the underline settings:
- Weight: Control the thickness of the underline.
- Offset: Adjust the position of the line relative to the text baseline.
- Color: Choose a color that complements your form design.
Step 6: Align and Format the Form
- Use the Tab Stops Panel to align text and rules:
- Go to Type > Tabs and set tab stops for consistent spacing.
- Drag the tab markers in the ruler to position the text and blank lines appropriately.
- Adjust spacing using Paragraph Styles if necessary.
Step 7: Preview and Export
- Preview the form by going to View > Screen Mode > Preview to ensure everything aligns properly.
- Export the form:
- Go to File > Export and choose the format (e.g., PDF).
- For interactive forms, enable form field recognition in the PDF export options.
Tips for Using Character Styles Effectively
- Use Clear Naming Conventions: Name your styles descriptively for easy identification.
- Create Multiple Styles: If your form requires different types of blank rules, create unique styles for each.
- Save Your Styles: Save the document as a template for future use.
Conclusion
Using Character Styles to create blank rules in forms makes your design process more efficient and professional. This approach ensures consistency across your form and simplifies any future edits. Whether designing for print or interactive use, mastering Character Styles is a valuable skill in InDesign.
#AdobeInDesign #FormDesign #CharacterStyles #GraphicDesignTips #InDesignTutorial #ProfessionalForms #TypographyDesign


