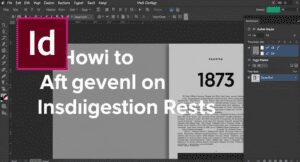
Adobe InDesign is a powerful tool for creating professional layouts, from magazines and brochures to interactive PDFs. Whether you’re a beginner or an experienced user, mastering these 15 essential tips and tricks will help you work faster and design more efficiently.

1. Using Text Frames on Parent (Master) Pages
Instead of manually creating text frames on every page, use Parent (Master) Pages to set up reusable frames.
- Navigate to Parent Pages (Window > Pages).
- Use the Type Tool (T) to create text frames for consistent placement (e.g., headers, footers, body text).
- Return to your document pages and press Shift + Command (Mac) / Shift + Ctrl (Windows) to activate the frames.
This saves time and ensures uniformity across your document.
2. Generating a QR Code
QR codes are great for linking printed materials to websites.
- Go to Object > Generate QR Code.
- Select Web Hyperlink and enter your URL (include
https://). - Customize the color via the Swatches panel.
- Click OK and place the QR code in your design.
To edit later, right-click > Edit QR Code.
3. Creating a Pop-Up for Interactive PDFs
Enhance digital documents with interactive pop-ups.
- Set up layers (e.g., “Artwork” for static elements, “Pop-Up” for interactive content).
- Create an overlay (Rectangle Tool + adjust opacity).
- Place a video (File > Place) and style it.
- Add a close button (Ellipse Tool + Pen Tool for an “X”).
- Use the Animation Panel (Window > Interactive > Animation) to set:
- Zoom In for the pop-up.
- Fade In for the overlay.
- Use the Buttons and Forms Panel to trigger animations.
Preview with Window > Interactive > EPUB Interactivity Preview.
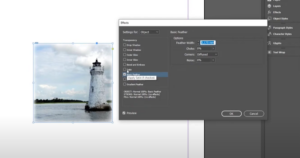
4. Placing an Animated GIF in Interactive PDFs
Animate designs with GIFs for engaging PDFs.
- Export your GIF from Photoshop (File > Export > Save for Web).
- In InDesign, File > Place the GIF.
- Adjust animation settings in the Animation Panel (Window > Interactive > Animation).
- Set “On Page Load” for automatic playback.
5. Automating a Table of Contents
Save time by auto-generating a TOC.
- Apply Paragraph Styles to all section headings.
- Go to Layout > Table of Contents.
- Select your heading style under “Styles in Table of Contents.”
- Choose formatting (e.g., dots, tabs for page numbers).
- Click OK and place the TOC.
6. Using Pathfinder for Custom Shapes
Create unique designs by combining shapes.
- Type > Create Outlines to convert text to shapes.
- Use the Pathfinder Panel (Window > Object & Layout > Pathfinder).
- Subtract, Unite, or Intersect shapes for custom effects.
7. Extracting Color Themes from Graphics
Quickly match colors from imported graphics.


- Use the Color Theme Tool (I).
- Click on your graphic to extract a color palette.
- Add selected colors to your Swatches Panel.
8. Creating Neon Text Effects
Make eye-catching text without Photoshop.
- Apply Effects (Window > Effects):
- Drop Shadow (Distance: 5px, Size: 2.6px).
- Outer Glow (Mode: Hard Light, Opacity: 90%, Size: 21px).
- Inner Glow (Opacity: 100%, Size: 5px).
- Bevel & Emboss (Size: 4px, Shadow: Magenta).
9. Highlighting Text with Underlines
Emphasize text without manual shapes.
- Select text and press Option + Underline (Mac) / Alt + Underline (Windows).
- Adjust weight, color, and offset in Underline Options.
10. Exporting to Editable PowerPoint
Convert InDesign files to editable PPTs.
- File > Export > Adobe PDF (Print).
- Open in Acrobat > File > Export To > PowerPoint.
- Enable “Recognize Text” if needed.
Note: Package fonts if sharing with clients.
11. Using Find/Change for Bulk Edits
Update text across multiple pages instantly.
- Edit > Find/Change.
- Enter the old text and replacement text.
- Click Change All.
12. Multiple Page Sizes in One Document
Combine different-sized pages (e.g., invitations, flyers).
- Add a new page.
- Use the Page Tool (Shift+P) to resize.
- Export as PDF with “Create Separate PDF Files” enabled.
13. Data Merge for Batch Designs
Automate business cards, labels, etc.
- Prepare a CSV file (Name, Title, Email, etc.).
- Window > Utilities > Data Merge.
- Link the CSV and drag fields into place.
- Preview and export.
14. Creating Fillable PDF Forms
Design interactive forms for digital use.
- Use the Rectangle Frame Tool to create fields.
- Object > Interactive > Convert to [Text Field/Checkbox/Dropdown].
- Customize in the Buttons and Forms Panel.
- Export as Interactive PDF.
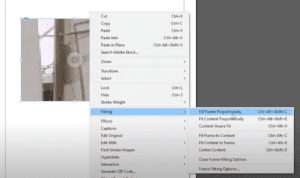
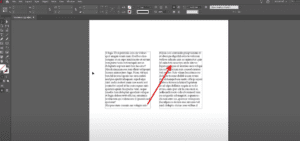
15. Text Wrapping Around Images
Make text flow around irregular shapes.
- Select the image.
- Window > Text Wrap > Wrap Around Object Shape.
- Under Contour Options, choose “Subject”.
- Refine with the Direct Selection Tool (A).
Final Thoughts
Mastering these Adobe InDesign techniques will streamline your workflow and elevate your designs. Whether you’re creating print layouts, interactive PDFs, or digital presentations, these tips ensure professional results.
🔗 Explore Adobe InDesign: Adobe Official Website
Tags
Adobe InDesign, Graphic Design, Desktop Publishing, Design Tips, PDF Design, Print Design, Interactive PDF, InDesign Tricks
Hashtags
#InDesign #DesignHacks #CreativeDesign #PrintLayout #DigitalPublishing #DesignWorkflow
Disclaimer: Adobe InDesign is a registered trademark of Adobe Inc. This article is not affiliated with Adobe but provides tips for users.
Would you like any modifications or additional details? Let me know! 🚀