Adobe InDesign is a powerful tool for designing layouts, creating documents, and handling text and images with precision. If you’re new to InDesign, these beginner-friendly tips will help you work more efficiently and achieve professional results.

1. Disable Auto-Hyphenation
Auto-hyphenation splits words at the end of a line with hyphens, which might not always be desirable. Here’s how you can turn it off:
- Select the Type Tool (T), click inside the text box, and press
Ctrl + A(Windows) orCommand + A(Mac) to select all text. - Go to Window > Type & Tables > Paragraph to open the Paragraph Panel.
- Uncheck the Hyphenate option at the bottom of the panel to disable automatic hyphenation.
2. Change Text Case
You can quickly change text case without retyping:
- Select the text using the Type Tool.
- Go to Type > Change Case, and choose between options like:
- Uppercase
- Lowercase
- Title Case
- Sentence Case
3. Format Text vs. Container
InDesign allows formatting text and its container independently:
- Use the Selection Tool (V) to select the text container or the Type Tool to select specific text.
- Toggle between Formatting Affects Text and Formatting Affects Container using the “J” shortcut.
- Apply colors or strokes to either the text or its container as needed.
4. Add Drop Shadows
Enhance your designs with drop shadows:
- Select the object, then go to Object > Effects > Drop Shadow.
- Adjust settings like distance, angle, size, spread, and noise in the drop shadow menu.
- Enable Preview to see real-time changes.
5. Create and Customize Tables
InDesign’s table feature is versatile and customizable:
- Use the Type Tool to draw a text frame.
- Go to Table > Insert Table, and specify the number of rows and columns.
- Customize the table using Table Options or Cell Options:
- Change cell fill colors and strokes.
- Apply dashed or solid strokes for borders.
6. Toggle Between Normal and Preview Views
Quickly preview your layout:
- Press
Wto toggle between Normal View and Preview Mode.- Normal View shows margins, bleed, and slug areas.
- Preview Mode hides all guides for a clean look.
- Adjust document properties under File > Document Setup.
7. Scale Images Properly
Avoid accidental cropping when resizing images:
- Use File > Place to insert an image.
- Hold
Shift + Ctrl(Windows) orShift + Command(Mac) and drag the corners to scale the image proportionally without cropping. - Alternatively, use the Scale X% and Scale Y% fields in the control panel for precise adjustments.
8. Crop Images with the Direct Selection Tool
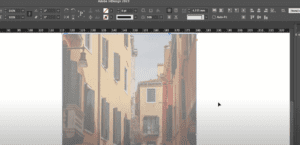
Zoom in or adjust the crop of an image without altering its frame:
- Select the Direct Selection Tool (A) and click the image.
- Adjust the scale or crop using the bounding box handles or the Scale X% and Scale Y% fields.
- Move the image within the frame as needed.
9. Fit Content to Frame
Ensure content fits perfectly into its container:
- Right-click the image and go to Fitting.
- Choose options like:
- Fill Frame Proportionally
- Fit Content to Frame
- Fit Frame to Content
- Use Clear Frame Fitting Options to reset the settings.
10. Optimize Display Performance
Handle large documents with high-resolution images more effectively:
- Go to Object > Display Performance.
- Choose from:
- Fast Display: Replaces images with placeholders.
- Typical Display: Shows images at low resolution.
- High-Quality Display: Renders images in full resolution.
- Use lower display settings for smoother performance on large projects.
Final Thoughts
These 10 tips cover essential skills for beginners in Adobe InDesign. Whether you’re adjusting text, handling images, or creating tables, these techniques will improve your workflow and help you produce polished designs.
#AdobeInDesign #InDesignTips #GraphicDesign #DesignTutorials #TextFormatting #ImageCropping #DropShadows #WorkflowOptimization


