In this article, we’ll explore how to use the Skew and Transformation tools in Adobe InDesign. These tools, accessed through the Picker tool, allow users to manipulate objects with precision, transforming them to meet specific design requirements. By the end of this guide, you’ll have a clear understanding of how to effectively use these tools for your projects.

What is the Picker Tool?
The Picker Tool in InDesign functions as a selection tool. Beyond basic selection, it offers advanced functionalities such as skewing, rotating, scaling, and transforming objects. These features provide flexibility when working with various shapes and designs.
Understanding Transformation Tools
InDesign includes a set of Transformation tools, each serving a specific purpose. Let’s delve into how to use these tools step by step.
1. Free Transform Tool
The Free Transform Tool is versatile, allowing users to resize, rotate, and skew objects.
Steps to Use:
- Select an object using the Picker Tool.
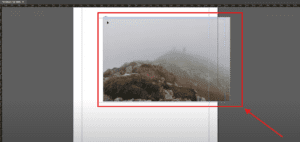
- Hover over the corners of the object to reveal transformation options.
- Drag the corners to resize the object. To maintain proportions, hold the Shift key while dragging.
- Release the mouse once the desired size or shape is achieved.
2. Rotate Tool
The Rotate Tool enables you to pivot an object around a specific center point.
Steps to Use:
- Select the object and activate the Rotate Tool.
- Click on the object to set a rotation anchor point.
- Drag around the anchor point to rotate the object. You can also input specific degrees for precise rotation.
3. Scale Tool
The Scale Tool allows you to increase or decrease the size of an object.
Steps to Use:
- Select the object and choose the Scale Tool.
- Click and drag to resize the object. For proportional scaling, hold the Shift key while dragging.
- Release the mouse once scaling is complete.
4. Shear Tool
The Shear Tool skews an object at a specified angle, creating a dynamic look.
Steps to Use:
- Select the object and activate the Shear Tool.
- Set a reference point by clicking on the object.
- Drag the object to skew it along the chosen axis. The reference point remains fixed while the shape adjusts.
Pro Tips for Using Transformation Tools
- Shift Key: Always hold the Shift key for proportional transformations. This ensures that the object’s proportions are maintained during resizing or skewing.
- Center Point: Use the center point as a pivot for transformations. Adjusting this point provides more control over the final result.
- Combination Commands: Combine tools like Scale and Rotate for unique transformations.
Practical Applications
These tools are essential for:
- Adjusting shapes for custom layouts.
- Creating dynamic designs by skewing and scaling objects.
- Precisely rotating elements to fit into complex designs.
What’s Next?
In the next article, we’ll discuss cut, copy, and paste options in InDesign, including commands like Paste Into, Paste in Place, and Paste Without Formatting. These advanced paste options will streamline your text and object management workflows.
#SkewTool #TransformationTools #InDesignTutorial #PickerTool #RotateTool #ScaleTool #ShearTool #FreeTransformTool #AdobeInDesign #DesignTips #TutorialForBeginners

