Hello friends, welcome back to our detailed Adobe InDesign tutorial series! Today, we will dive into one of the most frequently used tools in graphic design software—the Selection Tool. Whether you’re using Adobe InDesign, Illustrator, or CorelDRAW, the Selection Tool plays a crucial role in creating, modifying, and arranging objects in your design. Let’s explore how to make the most of this indispensable tool.

Why Is the Selection Tool So Important?
The Selection Tool allows designers to interact with objects within their projects. It enables selecting, resizing, repositioning, and even transforming shapes, text boxes, and other elements. Its versatility makes it a cornerstone of effective design workflows.
How to Use the Selection Tool in Adobe InDesign
Step 1: Basic Selection
- Click to Select:
- Simply click on an object to select it.
- Ensure the object has a defined outline or fill color. If it doesn’t, clicking on the object won’t select it.
- Check Object Properties:
- If the object isn’t selectable, check its Fill and Outline values in the control bar.
- A None fill and a visible outline may require you to click directly on the outline to select the object.
- If the object isn’t selectable, check its Fill and Outline values in the control bar.
- Drag and Select:
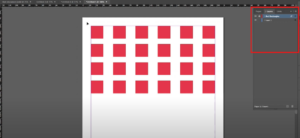
- Click and drag over an area to create a selection box.
- Any object even partially within the selection box will be selected.
Step 2: Selecting Multiple Objects
- Use Shift + Click:
- Hold down the
Shiftkey and click on multiple objects to select them simultaneously.
- Hold down the
- Drag and Group Select:
- Drag the selection box over multiple objects to include them in one selection.
Step 3: Handling Overlapping Objects
- Control + Click for Hidden Objects:
- If an object is behind another, hold down
Control(Windows) orCommand(Mac) and click in the area where the object is located. - Ensure the object has a fill or outline to allow selection.
- If an object is behind another, hold down
- Reorder Objects:
- Use
Object > Arrangeto bring an object to the front or send it to the back. This is especially useful for accessing overlapping elements.
- Use
Step 4: Resizing and Transforming Objects
- Resize Using Handles:
- Select the object, and handles will appear on its edges and corners. Drag these handles to resize the object.
- Hold
Shiftwhile resizing to maintain aspect ratio.
- Rotate the Object:
- Hover near a corner handle until the cursor changes to a rotation icon.
- Drag the cursor to rotate the object manually, or specify a rotation angle in the control bar.
Step 5: Advanced Selection Tips
- Double-Click for Transform Options:
- Double-click on an object’s corner or side handles to access advanced transform options such as skew or perspective adjustments.
- Editing Groups:
- When working with grouped objects, double-click on the group to enter isolation mode and select individual elements.
Common Issues and Their Solutions
Objects Aren’t Selecting
- Reason: The object might not have a fill or outline.
- Solution: Assign a visible fill or outline to the object.
Selection Doesn’t Cover All Objects
- Reason: In CorelDRAW, the entire object must be inside the selection area.
- Solution: In Adobe InDesign, even partial coverage by the selection box will select objects.
Conclusion
Mastering the Selection Tool is essential for efficient design in Adobe InDesign. From selecting and resizing objects to working with overlapping elements, the tool offers robust functionality. Practice these techniques to streamline your design process and achieve professional results.
Thank you for reading this detailed guide. We hope it enhances your design workflow. For more such tutorials, stay tuned to this blog!
#AdobeInDesign #SelectionTool #GraphicDesign #InDesignTutorial #DesignTips #AdobeTools #ObjectSelection #CreativeWorkflow #InDesignGuide

