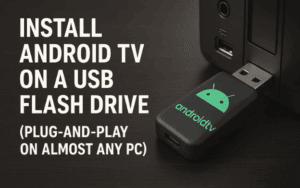
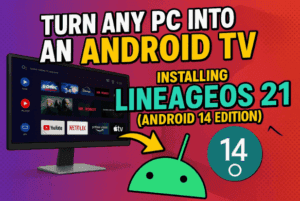
If you’ve been following the Android-on-PC scene, you already know how far Android TV 13 x86 has come. It can turn almost any Intel/AMD desktop or laptop into a living-room style smart hub with the Play Store, streaming apps, Bluetooth controllers, and even keyboard/mouse support.
But—and this is important—getting it installed permanently on an internal drive (HDD/SSD) or set up portably on a USB/external disk can be confusing. Some users hit snags like “system not booting after install,” “no sound,” “Wi-Fi/Bluetooth missing,” or “apps not showing in Play Store.”
So, let’s do this properly. In this detailed, human-style guide, we’ll cover both methods (portable and permanent), explain every tool and click, and then walk through real fixes for the most common issues. We’ll also include a troubleshooting FAQ, a quick boot-key cheat sheet, and a comparison table so you can pick the right approach for your device.
Grab a cup of coffee—this is a complete, no-shortcuts walkthrough. By the end, you’ll have Android TV 13 running smoothly on your PC, with your apps and settings persisting across reboots.
1) What Is Android TV 13 x86 (and Why Install It)?
Android TV 13 x86 is a community-built version of Android TV tailored for standard x86 PCs/laptops (Intel or AMD). It delivers the living-room TV experience—Google Play Store, streaming apps, media players, game controllers, and familiar remote-style navigation—but on desktop-class hardware.
Why you’ll love it:
- Big-screen UI designed for TV remotes but also works with keyboard/mouse.
- Play Store support for compatible TV apps.
- Light gaming works surprisingly well (puzzle/arcade/strategy/mid-tier action).
- Turn old hardware into a streaming/media box.
- Works portably (USB/external SSD) or permanently (internal drive) depending on your needs.
Before we dive into steps, let’s align on prerequisites so we can avoid the common “why didn’t it boot?” moments.
2) Requirements, Warnings, and What You’ll Need
A little prep goes a long way. Here’s what to gather and what to keep in mind.
Minimum Suggested Hardware
- CPU: Intel or AMD x86_64; SSE4.2 support recommended (lack of it can cause a console
#halt). - RAM: 4 GB minimum (8 GB recommended).
- Storage:
- Portable: USB 3.0 flash drive (32–64 GB+) or external HDD/SSD (better).
- Permanent: Internal HDD/SSD with 20–60 GB free (more is better).
- Graphics: Integrated or discrete GPU that can output via HDMI/DP/VGA (HDMI preferred).
- Network: Ethernet works out of the box more often; Wi-Fi may require supported chipsets/USB dongles.
- Peripherals: Keyboard + mouse; optional BT/USB gamepad.
Software & Tools (Official Links)
- Rufus (for bootable USB creation in the portable workflow): rufus.ie
- MiniTool Partition Wizard (for clean, controlled permanent partitioning): partitionwizard.com
(You can also use Windows Disk Management; MiniTool is just friendlier for this job.)
✋ Important
Android TV 13 x86 is a community build. Only download the ISO from the original developer(s) or a trusted official page. If you’d like, share your preferred safe source link so we can place it in your blog before publishing.
Safety Notes
- Back up important data before partitioning drives.
- Disable Secure Boot in BIOS/UEFI if the system refuses to boot.
- Use UEFI/GPT for modern machines; Legacy/MBR for older ones if needed.
- When in doubt, start with the portable method (non-destructive) and move to permanent only when you’re happy.
Alright, we’ve laid the groundwork. Let’s move to downloads.
3) Downloading the ISO and Tools (Safe Sources)
You’ll need:


- Android TV 13 x86 ISO (community build).
- Rufus (for portable method) — download the correct bitness for your Windows from the official site.
- MiniTool Partition Wizard (for permanent method) — free edition is enough for creating/formatting partitions.
⚠️ Avoid random mirrors. For the ISO, prefer the original developer’s page/community post. If you have a verified link, insert it in your final blog where you list downloads.
Once you’ve downloaded the ISO and tools, keep them on the Desktop for easy access. Now choose your path:
- Want a quick, safe trial without touching internal disks? → Method A (Portable).
- Ready for speed and daily use? → Method B (Permanent).
4) Method A — Portable USB/External Drive Setup (Quick & Safe)
This is the “try it first” method. We’ll prepare a USB/external disk using Rufus, set persistent storage, and boot any compatible PC from it. The best part: your existing Windows install remains untouched.
A. Create the Bootable USB with Rufus
Before we jump to bullets, here’s the flow: we plug in a fast USB/external SSD, feed the ISO to Rufus, enable persistence, and let Rufus write everything cleanly.
- Run Rufus as Administrator (right-click → Run as administrator).
- Insert your USB/external SSD (32/64 GB+ recommended; USB 3.0 strongly preferred).
- In Rufus:
- Device: select your USB drive.
- Boot selection: click Select and choose the Android TV 13 ISO.
- Persistent partition size: move the slider as high as possible (more = more app/data space).
- Partition scheme:
- Try GPT (UEFI) for modern machines.
- If the target is old/Legacy BIOS, use MBR (BIOS).
- Advanced Drive Properties: tick Add fixes for old BIOS if you plan to use older PCs.
- Volume label: set something recognizable (e.g.,
ATV13_BOOT).
- Click Start → confirm data loss on the USB → wait for completion.
💡 Tip
If you want broadest compatibility, some builders press Alt+E in Rufus to enable dual-boot metadata (varies by Rufus version/build). If you don’t see any effect, don’t worry—GPT/MBR choice plus Secure Boot off usually suffice.
B. Reveal/Create the Data Partition (If Needed)
On some setups, only a small boot partition is visible post-Rufus. If you created persistence in Rufus, you may already be set; if not, or you want to manually manage a large data area:
- Windows Start → right-click → Disk Management.
- Find your USB drive (double-check size/model).
- If you see Unallocated space next to the small boot partition:
- Right-click → New Simple Volume → choose a drive letter.
- File system: FAT32 or exFAT works well for Android TV data.
- Label:
ATV13_DATA. - Finish the wizard.
C. Copy System/Data Files (When Using ISO + Data Image Layout)
Some community builds ship with system.sfs and data images (data.img of various sizes). If your ISO workflow expects manual copy:
- Mount the ISO (right-click → Mount in Windows 10/11).
- Copy all ISO files to the boot partition except
system.sfs. - Copy
system.sfsto the data partition (the large one). - Data image (persistence): Extract the
data.imgthat matches your available space:- 8 GB, 16 GB, 32 GB, 64 GB, etc.
- Larger
data.img= more space for apps, caches, and settings. - Place it in the data partition alongside
system.sfs.
⏱️ Heads-up
Extracting largedata.imgcan take 10–45 minutes, depending on drive speed.
D. Boot from USB/External Disk
- Reboot the PC.
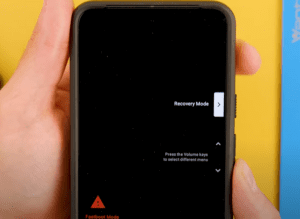
- Enter Boot Menu (tap the brand-specific key—see cheat sheet below).
- Select your USB drive (sometimes listed under Hard Drives).
- Pick a kernel from the Android TV boot menu (start with the default).
- First boot may take a bit—be patient.
You’re in! If you like what you see, you can stop here and enjoy Android TV from USB. Or, if you want faster daily performance, continue to the permanent method later.
5) Method B — Permanent Install on Internal HDD/SSD (Faster Daily Driver)
If portable worked fine and you’re ready to commit, the permanent route gives you faster load times and a smoother day-to-day experience. We’ll use MiniTool Partition Wizard to set up a proper BOOT partition and a SYSTEM/DATA partition.
⚠️ Risk Notice
This involves editing internal disk partitions. Back up your data first. Double-check target disks to avoid wiping Windows.
A. Plan Your Partition Layout
We’ll create two partitions on your target drive:
- BOOT (FAT32, ~500 MB) — holds bootloader files.
- ATV13 (exFAT or NTFS/exFAT, remaining size) — stores
system.sfsanddata.img(or persistent data).
B. Create Partitions with MiniTool Partition Wizard
- Open MiniTool Partition Wizard.
- Select your target disk (e.g., a spare 60 GB HDD/SSD).
- Delete any existing test partitions on that disk (careful—don’t touch your Windows disk unless that’s your plan!).
- Create a new partition:
- Size: 500 MB
- Label: BOOT
- File system: FAT32
- Create a second partition with the remaining space:
- Label: ATV13_SYSTEM (or any friendly name)
- File system: exFAT (widely compatible)
- Click Apply to write changes.
- Right-click BOOT → Set Active → Apply again.
(If BOOT isn’t active, the system may not start.)
C. Copy Files from the ISO
- Mount the ISO in Windows.
- Copy all files from the mounted ISO except
system.sfsto the BOOT (FAT32) partition. - Copy
system.sfsto the ATV13_SYSTEM partition. - Extract and place
data.img(choose size per your storage) into ATV13_SYSTEM as well.
D. Configure BIOS/UEFI and Boot
- Reboot → enter BIOS/UEFI.
- Disable Secure Boot (if present and boot fails).
- Adjust Boot Order so the target drive boots before Windows.
- Save and exit; pick the default kernel at first boot.
If you land in the Android TV setup screen—great job! Let’s set it up.
6) First Boot & Initial Setup (Language, Wi-Fi, Play Store)
The first run is a one-time setup. Don’t rush; a clean setup avoids oddities later.
- Language: Select your preferred language.
- Phone-based quick setup: Skip for now (we can link phones/remotes later).
- Network:
- If Ethernet is connected, you’re online immediately.
- For Wi-Fi, pick your SSID and enter the password.
- If Wi-Fi isn’t detected, continue without it (we’ll troubleshoot below).
- Google account: Sign in to enable Play Store and sync.
- Device name: Choose a friendly name (e.g., Living-Room ATV).
After the launcher loads, you may see a relatively bare screen—that’s normal until you install apps. Let’s do that next.
7) Apps, Games & Streaming — What Works Well (and Workarounds)
Here’s the honest rundown based on community experience:
- Works smoothly out of the box:
- YouTube / YouTube Kids, VLC, Kodi, Plex, Jellyfin, Spotify, most TV-optimized apps.
- Premium streaming (Netflix, Disney+, Hulu, Prime Video):
- Often missing in Play Store due to Widevine certification limits and device model checks.
- Workarounds:
- Use the built-in browser (web playback often works well).
- Sideload APKs (note: HD/4K playback may be restricted).
- Games:
- Casual/light titles run great with keyboard/mouse.
- Many games improve with a USB/Bluetooth controller.
- This build isn’t meant for heavy 3D or high-end emulation—keep expectations realistic.
🎧 Sound Tips
Volume scaling is generally good. For advanced tuning, communities sometimes use Viper4Android (availability varies by build). Only proceed if you’re comfortable with audio mods.
So far, so good. Now, let’s make sure we can tackle the usual bumps in the road.
8) Fixes for Common Issues (Sound, Bluetooth, Wi-Fi, Boot, Console #)
It’s normal to face one or two hiccups on first attempts. Here’s a practical, field-tested set of fixes.
A) System Won’t Boot After Install
- BOOT partition not Active: In MiniTool, right-click BOOT → Set Active → Apply.
- Secure Boot enabled: Disable Secure Boot in BIOS/UEFI.
- Wrong boot mode:
- If you installed GPT/UEFI, boot in UEFI mode.
- If you installed MBR/Legacy, boot in Legacy/CSM.
- Try alternate kernel from the boot menu.
- Re-create USB with the other Partition Scheme (MBR↔GPT) if portable method fails on your hardware.
B) Black Screen or Stuck at Logo
- Give it a minute—first boot can be slower.
- If you only see a mouse cursor on a black background, try Alt+Tab, Alt+Enter, or Win key (on some builds this brings UI focus back).
- On laptops/external displays, try a kernel entry labeled “external display” if available.
C) Sound Not Working
- Some audio chipsets lack out-of-box support in community builds.
- Workaround: an inexpensive USB sound card/dongle often fixes output immediately.
- Try switching HDMI outputs or lowering/raising resolution to trigger handshake.
D) Bluetooth Not Working
- Built-in BT adapters may not be recognized.
- Use a USB Bluetooth dongle known to work on Linux/Android x86 bases.
E) Wi-Fi Not Detected
- On desktops, built-in Wi-Fi cards are hit-or-miss.
- Use Ethernet for setup or a USB Wi-Fi dongle with better support.
- As a temporary bridge, enable USB tethering from your phone (Android → Hotspot & tethering).
F) Console # Prompt After Boot
- This typically indicates a CPU missing SSE4.2 (required by the kernel/build).
- Sadly, there’s no software fix; you’ll need newer hardware.
G) Netflix/Disney+/Hulu Not in Play Store
- Expected due to Widevine and device certification.
- Use a browser for playback, or sideload the APK (note: HD may be limited).
H) Persistent Data Not Saving
- Ensure a proper
data.imgexists and is large enough. - If using the Rufus persistence slider, confirm the partition was created and mounted by the build.
- Avoid copying
system.sfsto the boot partition; it belongs in the data/system partition per your build’s instructions.
9) Portable vs Permanent — Quick Comparison Table
| Aspect | Portable (USB/External) | Permanent (Internal HDD/SSD) |
|---|---|---|
| Risk to Windows | None (non-destructive) | Low–Medium (partitioning required) |
| Speed | Good on USB 3.0, best on external SSD | Best overall performance |
| Setup Time | Quick | Longer (planning + partitioning) |
| Persistence | Yes (Rufus persistence or data.img) | Yes (data.img/native data) |
| Best For | Testing, traveling, multi-PC use | Daily driver on a single PC |
| Troubleshooting | Easiest to redo | Requires more care |
If you only want a media stick you can move between rooms, go portable. If this replaces a TV box for a single machine, go permanent.
10) Boot-Menu Keys (Cheat Sheet)
Tap the key immediately after powering on:
- Acer: F12
- ASUS: F8 / Esc
- Dell: F12
- HP: Esc → F9 (or F9 directly)
- Lenovo: F12 / Novo button
- MSI: F11
- Toshiba: F12
- Gigabyte: F12
- ASRock: F11
If nothing happens, try again and tap repeatedly right after pressing the power button.
11) Frequently Asked Questions (FAQ)
Q1. Can I install Android TV 13 directly on my main Windows disk?
A. Technically yes, but it’s safer to use a separate drive (internal or external). If you must share a disk, back up first, and create the BOOT (FAT32 ~500 MB) and ATV13 (exFAT) partitions carefully.
Q2. Is this an official Google release?
A. No. It’s a community build maintained by independent developers. That’s why some hardware (Wi-Fi/BT/audio) may need workarounds.
Q3. Will my settings and apps persist after reboot?
A. Yes—if you configured persistence correctly (Rufus slider or a correct data.img extracted to the data partition).
Q4. Do I need a controller?
A. Not required. Keyboard/mouse works for most navigation. A USB/Bluetooth gamepad improves the gaming experience.
Q5. Why don’t I see Netflix/Disney+/Hulu in the Play Store?
A. Because the device isn’t Widevine certified. Use a browser or sideload APKs (HD quality may be limited).
Q6. What if my HDMI audio doesn’t work?
A. Try different kernels/resolutions/HDMI ports. A USB sound card is a quick, reliable workaround.
Q7. Can I dual-boot with Windows?
A. With careful partitioning and the bootloader on a separate drive, yes. Many users prefer portable USB to avoid GRUB/bootloader edits on the Windows disk.
Q8. My CPU boots to a console #. Is there a fix?
A. That usually indicates no SSE4.2 support on your CPU. You’ll need newer hardware for this build.
12) Final Thoughts & Next Steps
You’ve just learned both reliable paths to run Android TV 13 x86 on a PC—portable for safety and flexibility, permanent for speed and convenience. We covered exact partition layouts, file placement (system.sfs, data.img), Rufus persistence, and BIOS/UEFI gotchas.
From here, explore:
- Media stacks like Kodi/Plex/Jellyfin for local + network libraries.
- Light gaming with a BT/USB controller.
- Smart-home dashboards or ambient dashboards on a spare monitor/TV.
If you maintain a download section on your site, consider adding the verified developer link for the Android TV 13 ISO you trust, so readers avoid risky mirrors. And if you test specific USB Wi-Fi/BT dongles or USB sound cards that work perfectly, list those models to save your readers time.
So far we’ve done a good job setting everything up the right way—no shortcuts, no guesswork. Now, enjoy the big-screen Android TV experience right on your PC.
⚠️ Disclaimer
This article is for educational purposes. Android TV 13 x86 is a community build, not an official Google product. Compatibility varies by hardware. Always back up your data before partitioning drives, and only download builds from trusted, original sources. The author is not responsible for data loss, device issues, or policy violations from sideloading apps or using uncertified playback paths.
Tags: android tv 13 x86 install, android tv on pc, permanent android tv install, portable android tv usb, rufus tutorial android tv, minitool partition wizard android tv, android tv troubleshooting, android tv sound fix, android tv wifi bluetooth fix, android tv persistence data img
Hashtags: #AndroidTV #AndroidOnPC #Rufus #PartitionWizard #TechTutorial #x86 #Streaming #HTPC #DIYTech #HomeTheater


