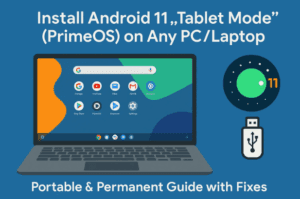
Want the full Android TV experience on your computer without replacing Windows or Linux? A bootable USB stick is the perfect workaround. In this guide, we’ll build a portable Android TV USB you can plug into laptops, mini-PCs, desktops, and even some TVs that support USB boot. You’ll boot into a familiar Android TV interface, install apps, sign in, and stream—all without touching your internal drive.
We’ll take it step by step, explain why each setting matters, and add fixes for common hurdles (Wi-Fi not detected, Secure Boot errors, black screens, etc.). If you like to double-check before you dive in, there’s a full FAQ at the end.
1) What You’ll Build & How It Works
Before we touch any tools, let’s align on the goal. You’re going to:
- Write an Android TV ISO to a USB drive so the PC can boot directly from it.
- Add a persistent storage file (
data.img) so your apps, settings, and accounts survive reboots. - Boot this USB on compatible hardware, without altering your internal disk.
Why this is useful:
- You can try Android TV on your exact hardware (GPU, Wi-Fi, Bluetooth) with zero risk to your OS.
- It’s portable—carry a mini streaming “box” in your pocket.
- Great for older PCs you want to repurpose.
Limitations to expect:
- Widevine L1 DRM (needed for 1080p/4K Netflix/Prime) is typically unavailable on generic x86 builds; many apps will fall back to L3 (SD).
- Hardware support varies (especially Wi-Fi and GPU drivers). Ethernet is your friend if Wi-Fi is stubborn the first time.
Alright—so far we’ve got a clear picture. Let’s collect the right tools.
2) Requirements (Hardware, Software, and Files)
Before downloading anything, here’s what you need and why.
Hardware
- USB 3.0 flash drive (16 GB or larger)
8 GB may work for minimal builds, but 16–32 GB is comfortable and leaves room for apps. - PC with UEFI or Legacy BIOS that can boot from USB
Most systems made after 2012 support UEFI. We’ll handle both. - Optional: Ethernet cable (recommended for first boot if Wi-Fi is flaky).
Software (Official Links)
- Rufus (Windows) – to create the bootable USB.
👉 https://rufus.ie/ - 7-Zip or WinRAR – to extract compressed archives (e.g.,
data.zip→data.img).
👉 7-Zip: https://www.7-zip.org/
👉 WinRAR: https://www.rarlab.com/ - (macOS/Linux alternative) balenaEtcher if you’re not on Windows.
👉 https://etcher.balena.io/
Files
- Android TV x86 ISO from a reputable project (examples below).
We’ll discuss how to verify what you download in the next section.
Let’s move to the most important decision—the ISO itself.
3) Get a Trustworthy Android TV ISO (and Verify It)
There isn’t a single “official Google Android TV x86” download for PCs. Instead, community projects port Android/Android TV to x86 hardware. Popular starting points include:
- Android-x86 Project (base Android builds; some forks provide TV variants):
👉 https://www.android-x86.org/ - Bliss OS (Android for PC; occasionally TV-style builds):
👉 https://blissos.org/
Tip: Some maintainers publish Android TV-flavored x86 builds maintained on GitHub/GitLab. Since links and maintainers change over time, prefer sources with active releases, issue trackers, and checksums.
Verify the Download
- Prefer downloads that include a SHA256 checksum.
- After download, compute the checksum and compare it to the provided one. On Windows:
CertUtil -hashfile AndroidTV.iso SHA256 - If no checksum is provided, consider a different source. It’s worth the extra minute.
You now have a clean ISO ready. Let’s turn it into a bootable USB.


4) Create the Bootable USB with Rufus (Windows)
We’ll use Rufus because it intelligently handles partition schemes, file systems, and “DD mode” when needed. Before we begin, back up anything important from the USB drive—it’ll be erased.
Step-by-Step (with context)
1) Launch Rufus
Open Rufus (no install needed). It detects your removable drives automatically.
2) Select your USB drive
Use the Device dropdown. Double-check the capacity to avoid choosing the wrong disk.
3) Choose the ISO
Click SELECT → Browse to your downloaded Android TV ISO.
4) Partition scheme and target system
- UEFI systems: choose GPT (Target system: UEFI (non-CSM)).
- Legacy BIOS or mixed systems: choose MBR (Target system: BIOS or UEFI).
If unsure and your PC is modern, GPT/UEFI is the usual choice.
5) File system
- Many Android x86 ISOs boot fine with FAT32.
- If the ISO is larger than 4 GB, Rufus may automatically switch to NTFS or prompt to use DD mode. Accept Rufus’s recommendation.
Why FAT32? It’s widely UEFI-friendly. Why NTFS? Necessary for larger images; Rufus adds an UEFI:NTFS loader for compatibility.
6) Click START
- If Rufus asks about ISO mode vs DD mode, try ISO mode first. If your ISO is not hybrid, DD mode is safer.
- Confirm the warning about wiping the USB.
7) Wait for completion
When Rufus says READY, safely eject the USB or keep it inserted for the next step.
We’re close—but for a true “install apps and keep them” experience, add persistent storage next.
5) Expand Android TV Storage with data.img (Persistence)
Most Android x86/TV images boot with a tiny writable partition. A data.img file acts like an “expansion pack”—it’s mounted as your /data partition so apps, cache, and settings have space.
Where data.img Comes From
- Many Android TV USB packs include a compressed file like
data.zipordata-4GB.7z. - Extract it to the root of your USB so that
data.imgsits alongside the ISO’s boot files.
Tools to extract:
- 7-Zip → right-click → 7-Zip → Extract Here
- WinRAR → right-click → Extract Here
How Big Should data.img Be?
- 4 GB is a practical minimum (you’ll fill it quickly).
- 8–16 GB gives room for several apps and updates.
- Some builds auto-create/resize
data.imgon first boot; others expect you to supply it.
If your build didn’t include a
data.img, you can create one manually (advanced). But most curated Android TV USB packs provide it.
Now your USB has both the bootable Android TV system and a writable data store. Time to boot it.
6) Boot from USB: BIOS/UEFI Keys, Secure Boot, and Modes
This is where most people get stuck—but you won’t, because we’ll go slowly and explain the “why”.
Enter the Boot Menu
- Common keys: F12 (Dell/Lenovo), F9 (HP), F8/F11 (MSI), Esc (ASUS/Acer).
- Tap the key immediately after powering on.
Select your USB drive from the list. If you see two entries (e.g., “UEFI: USB” and “USB”), pick UEFI for GPT/UEFI setups; choose the non-UEFI entry for MBR/Legacy.
If the USB Doesn’t Appear
- Go to BIOS/UEFI Setup (often F2, Del, or Esc).
- Disable Secure Boot (temporarily). Android x86 builds are rarely signed for Secure Boot.
- Enable USB boot and, if necessary, Legacy/CSM support for older builds.
Don’t worry—you can re-enable Secure Boot later when you’re done testing.
First Boot Options
- Many builds show a small bootloader menu (Android TV, debug, install).
- Choose Android TV (or Live).
- Some builds allow Installation to disk—do not use this if your goal is USB-only.
If everything is compatible, you’ll see the boot animation and then the Android TV setup.
7) First-Run Setup: Language, Network, and Login Tips
You’ll land on a familiar Android TV setup screen. Let’s walk through calmly—so far, we’ve done a good job.
Language & Region
- Choose your language and keyboard layout.
- If your remote isn’t working, use a USB keyboard/mouse.
Network (Wi-Fi vs Ethernet)
- Ethernet: Plug in and it usually “just works”.
- Wi-Fi: Some chipsets need different kernels/modules. If you don’t see your network:
- Try “Virtual Wi-Fi” or similar toggles provided by the build.
- Skip Wi-Fi, complete setup, and rely on Ethernet for the first session; we’ll troubleshoot Wi-Fi later.
Google Account Sign-In
- Sign in if you plan to install apps from Play Store (if included).
- Some builds ship microG/alternate stores or no Google services. In that case, sideload apps or use Aurora Store (advanced).
“Press Esc to Bypass”
- If you get stuck on a pairing or device selection page, Esc often skips the step on PC builds. This is normal in TV ports that expect a remote.
When you reach the Android TV home screen, congrats—your USB build works!
8) Daily Use: Apps, Updates, Storage, and Performance
You’ve got a portable Android TV. Let’s make it practical.
Installing Apps
- Play Store (if present) → sign in → install TV-optimized apps.
- Sideload APKs with a file manager if the store is missing or limited. Ensure you trust the source.
Storage & Persistence
- Open Settings → Storage to check free space.
- If it’s tiny, your
data.imgmay be missing or too small. Replace it with a larger one and reboot.
Display & Sound
- Settings → Device Preferences → Display to adjust resolution and overscan.
- Audio: choose the correct HDMI/DP output if you have silence on TVs/monitors with speakers.
Performance Tips
- Prefer Ethernet for smooth 1080p/4K streams (DRM permitting).
- Use USB 3.0 sticks; they’re much faster than old USB 2.0 drives.
- If animations stutter, try lowering resolution or disabling fancy transitions in Developer options.
Updates
- Most Android TV x86 builds don’t do OTA like commercial boxes.
- To “update,” you often recreate the USB with a newer ISO and keep the same
data.img. (Back it up first.)
9) Troubleshooting (Wi-Fi, Black Screen, Audio, Input, Resolution)
Let’s pre-solve the common pain points so you don’t get stuck.
9.1 Wi-Fi Not Detected
- Use Ethernet for first boot; some Wi-Fi chipsets need alternate kernels/modules.
- Try a different USB Wi-Fi dongle known to be Linux-friendly (Intel/Realtek chipsets vary).
- Some builds expose a “Virtual Wi-Fi” option during setup—toggle it.
9.2 Black Screen / Stuck on Boot Animation
- Recreate USB in DD mode (Rufus will prompt).
- Try Legacy/CSM if UEFI boot misbehaves, or vice versa.
- Disable Secure Boot.
- Try a different display output (HDMI vs DP) or different monitor during first boot.
- If your GPU is very new/very old, try an alternative build (different kernel).
9.3 No Audio via HDMI
- Settings → Device Preferences → Sound → select the correct output.
- Toggle HDMI pass-through options if the build includes them.
- Test headphones or a USB audio adapter to isolate the issue.
9.4 Keyboard/Mouse Not Working
- Move them to USB 2.0 ports (front panel sometimes resets power differently).
- Try a wired mouse first (wireless receivers can be finicky on the very first boot).
9.5 Wrong Resolution / Overscan
- Display settings → pick a standard resolution (1920×1080 often safest).
- On TVs, disable overscan/zoom and enable “Just Scan”/“1:1” or PC Mode.
9.6 Google Play Missing
- Some builds are AOSP without Google services. You can:
- Sideload Aurora Store (open-source client for Play, advanced).
- Use APKMirror or developer websites for apps you trust.
- Switch to a build that includes GApps (TV variant) if you want official Play on TV.
9.7 USB Not Listed in Boot Menu
- Reformat and recreate with Rufus; ensure the Partition scheme matches your firmware mode (GPT/UEFI vs MBR/BIOS).
- Try another USB port, preferably USB 2.0 for older machines.
- Update your BIOS/UEFI to the latest from your vendor.
10) Safety Notes, Legal Bits, and Best Practices
A quick reality check keeps your setup reliable down the road.
- Back up files on the USB before you re-flash or replace
data.img. - Use official sources for tools: Rufus, 7-Zip/WinRAR, and the project’s own site for your ISO.
- Avoid random mirrors and “modded” builds without source or checksums.
- Don’t install paid apps you don’t own; respect licensing.
- Expect DRM limits (Widevine L1) on generic x86—many services cap quality.
- If you later decide to install Android TV to internal disk, back up your PC first; that’s beyond the scope here.
So far we’ve done everything safely and transparently. If any detail still feels fuzzy, the FAQ below should close the loop.
11) FAQs
Q1. Can I do this from macOS or Linux instead of Windows?
Yes. Use balenaEtcher to write the ISO to USB. If the ISO isn’t hybrid, Etcher still handles raw images well. For advanced users, dd works—but be careful with device paths.
Q2. Why does the guide prefer Ethernet on first boot?
Because Wi-Fi drivers are the #1 friction point on x86 builds. Ethernet guarantees connectivity so you can update apps and test quickly; Wi-Fi can be tuned later.
Q3. What’s the point of data.img?
It’s your /data partition in a single file. Without it, the system often runs read-only or with minimal writable space, so apps/settings don’t persist. With it, your install behaves like a “real” device.
Q4. My ISO is >4 GB; Rufus switched to NTFS. Is that okay?
Yes. Rufus uses a UEFI:NTFS shim so UEFI firmware can still boot it. If your firmware is picky, try DD mode or a smaller ISO build.
Q5. Can I keep using the USB across multiple PCs?
Absolutely—that’s the point. Just note that hardware differences (GPU/Wi-Fi) may change what works best. Ethernet smooths over most differences.
Q6. Why won’t Netflix play 1080p/4K?
Widevine L1 DRM is typically limited to certified devices. Generic x86 ports usually have L3 only, which caps resolution. It’s a platform limitation, not a bug.
Q7. The boot menu shows “Install to hard disk.” Should I use it?
Not if your goal is USB-only. That option writes to your internal drive. Stick to Live/Run Android TV options.
Q8. Is Secure Boot a problem?
Often. Since these aren’t signed with Microsoft’s keys, UEFI Secure Boot will block them. Disable Secure Boot in BIOS/UEFI to proceed, and re-enable later if desired.
Q9. How do I update Android TV later?
Most projects don’t push OTA updates to x86. You usually recreate the USB with a newer ISO and reuse (or replace) your data.img. Always back up the old USB first.
Q10. Is there a performance difference between USB 2.0 and USB 3.0 sticks?
Yes—USB 3.0 is noticeably faster for app installs, caching, and boot times. It’s worth it.
Disclaimer
Creating bootable media erases the target USB. Double-check devices in Rufus/Etcher before writing. Community Android TV builds for x86 vary in quality and compatibility. Only download from sources you trust and verify checksums when provided. Streaming quality and app availability may be limited by DRM or Google certification. This guide is for educational purposes; proceed at your own risk and respect app licensing and regional restrictions.
Tags
Android TV USB, Android TV on PC, Android x86, Bootable Android TV, Rufus bootable USB, data.img Android, Android TV persistence, USB boot UEFI, Disable Secure Boot, Android TV troubleshooting, Ethernet Android TV PC
Hashtags
#AndroidTV #Androidx86 #BootableUSB #Rufus #PCMods #TechHowTo #Streaming #USB3 #UEFI #SecureBoot