If you’ve ever wished your old (or new) PC could run Android natively—with mobile games, streaming apps, and social platforms—Android 11 “Tablet mode” builds (PrimeOS) are a surprisingly capable option. In this step-by-step, no-shortcuts guide, we’ll walk through both ways to run it:
- Portable mode (USB/external drive) so you can try it safely without touching Windows.
- Permanent install (internal HDD/SSD) for faster day-to-day use.
In this blog you will also get explanations, extra context, and solutions for common issues like boot loops, sound not working, Wi-Fi/Bluetooth missing, key mapping for shooters, and HDMI quirks. By the end, you’ll have a smooth Android experience on your computer—ready for games (Battle Royale, racers, kids’ titles), streaming (Netflix, Prime Video, etc.), and your favorite social apps.

Grab a coffee. Let’s do this the right way—carefully, completely, and with zero guesswork.
📌 What You’ll Get from This Guide (Before We Begin)
Instead of jumping straight into steps, here’s a quick preview so you know what’s coming and why each part matters. We’ll:
- Explain what PrimeOS (Android 11 Tablet mode) is and how it differs from emulators.
- Clarify hardware compatibility (Intel/AMD, old vs new machines).
- Show where to download the official ISO and Rufus (bootable USB tool).
- Walk through Method A (Portable) using Rufus — safest way to try first.
- Walk through Method B (Permanent) using the built-in installer — best for speed.
- Set up language, Wi-Fi/Ethernet, Play Store, and early personalization.
- Cover gaming essentials: built-in key mapping (F10/F9), controller tips, and performance notes.
- Explain streaming app behavior (Play Store availability, browser fallback).
- Provide troubleshooting & FAQs (boot, HDMI audio, Wi-Fi/BT dongles, older CPUs, etc.).
- Add disclaimer and official links so your readers stay safe and informed.
So far, so good! Now, let’s briefly understand the system you’re about to install.
🧩 What Is PrimeOS (Android 11 “Tablet Mode” for PC)?
PrimeOS is an Android-x86–based operating system optimized for desktops and laptops. Think of it as “Android for PCs”—bootable on real hardware—not a Windows emulator. You get:
- Native Android 11 experience with a desktop-like taskbar, windowing support, and mouse/keyboard integration.
- Play Store access (on supported builds), plus sideloading for APKs.
- Gaming features like a built-in key-mapping overlay—great for shooters and action titles.
- Much better efficiency than running Android inside a heavy virtual machine.
In short: PrimeOS can re-energize older hardware and give new life to budget machines, while also being fun on powerful rigs.
🧰 Requirements, Compatibility & Prep (Read This First)
A little preparation saves a lot of headaches later. Here’s what you need and what to expect.
Hardware You’ll Need
- CPU: Intel or AMD x86_64 (most machines from the last ~10 years work well).
- RAM: 4 GB minimum (8 GB+ recommended).
- Storage options:
- Portable trial: USB 3.0 flash drive (32–64 GB+ recommended) or external SSD/HDD.
- Permanent: Internal HDD/SSD (at least 20–60 GB free, more is better).
- Graphics/Output: HDMI/DP/VGA (HDMI preferred). Note: some HDMI audio setups need tweaks; we’ll cover workarounds.
- Network: Ethernet is easiest. Wi-Fi may need supported chipsets; USB Wi-Fi dongles often help.
- Peripherals: Keyboard + mouse. Optional: USB/Bluetooth gamepad.
Software You’ll Download (Official Links)
- PrimeOS ISO (Android 11 Tablet mode):
Official downloads: https://www.primeos.in/download/ - Rufus (for creating bootable USB):
Official site: https://rufus.ie/
Tip: Always prefer official pages. Avoid random mirrors to prevent tampering and malware.
Safety & Setup Notes
- Back up important data before permanent installs or partition changes.
- If your PC refuses to boot the USB, disable Secure Boot in BIOS/UEFI.
- Modern PCs usually prefer GPT/UEFI; older ones may need MBR/Legacy.
- For the very first try, use the portable method. If you like it, then consider a permanent install.
Alright—prep done. Let’s download the tools.
⬇️ Download PrimeOS (Android 11) and Rufus
- PrimeOS ISO
- Go to PrimeOS Download: https://www.primeos.in/download/
- Device/Architecture: Choose x86.
- Version: You’ll see multiple options (e.g., Standard/Classic/Android 11 Beta).
For this guide, pick Android 11 (most recent tablet-mode build). - Type: Choose ISO image (not the Windows executable).
- Start the download and wait.
- Rufus
- Go to Rufus: https://rufus.ie/
- Scroll to Downloads and pick the build that matches your Windows (x64 vs x86).
- Save it—Rufus is a single executable (no install required).
When both files are ready, put them on your Desktop for easy access. Now, choose your path: Portable or Permanent.


🚀 Method A — Portable Install (USB/External Drive) with Rufus
This is the safest way to test PrimeOS. Nothing on your internal drive changes; you boot Android from USB and keep Windows intact. If you love it, you can move to Method B later.
Step A1: Create the Bootable USB
- Insert your USB 3.0 flash drive or external SSD/HDD (32–64 GB+ recommended).
- Right-click Rufus → Run as administrator.
- Device: choose your USB/external drive.
- Boot selection: click Select → choose the PrimeOS ISO you downloaded.
- Partition scheme & target system:
- For modern machines: GPT (UEFI).
- For older machines: MBR (BIOS/Legacy).
- Some users press Alt + E in Rufus to toggle a dual-mode metadata trick; not essential, but can help mixed hardware.
- Volume label: set something recognizable, e.g.,
PRIMEOS_USB. - Click Start → confirm that Rufus can erase the USB → let it finish.
Let’s move to the next step. So far, we’ve created a bootable stick; now we’ll boot from it.
Step A2: Boot from the USB (Boot Menu)
- Reboot your PC and spam the Boot Menu key as soon as it powers on.
Common keys: F12 (Dell/Lenovo/Toshiba/Gigabyte), F11 (MSI), F8/Esc (ASUS), F9 (HP). - Choose your USB drive from the menu.
- You’ll land on the PrimeOS boot screen with options like Try/Install/Advanced.
Step A3: Try Before Installing (Optional but Recommended)
- Select the first/try option to boot live.
- Check basic things: keyboard/mouse, display, Ethernet/Wi-Fi, basic audio.
- If everything looks good and performance feels fine, you’re ready to proceed.
If you only want Android as a portable system, you can stop here and keep using PrimeOS from USB. For the best speed and consistency, continue with permanent install (Method B) below.
💾 Method B — Permanent Install on Internal HDD/SSD (Built-In Installer)
Now that we’ve tested the waters, let’s commit PrimeOS to a drive for everyday use. We’ll use the official installer that ships with the ISO.
⚠️ Important
Permanent installation can erase data if you select the wrong disk/partition. Double-check everything and back up first.
Step B1: Boot the Installer
- Boot from the USB again (Boot Menu).
- On the PrimeOS screen, pick Install (Installation/Installer) instead of Try.
- You’ll see a disk/partition list.
Step B2: Pick the Target Disk/Partition
- Select the internal HDD/SSD (or a spare internal/external disk you don’t mind formatting).
- The installer will propose a filesystem (you’ll often see ext4; in the source script this appeared as “S4,” which refers to ext4).
- Confirm the format and installation target.
Step B3: Let the Installer Write the System
- The installer will:
- Create the PrimeOS partition.
- Copy system files.
- Install a lightweight bootloader pointing to PrimeOS.
- When prompted, choose Reboot.
- Remove the USB when the screen tells you to, so the PC boots from the internal disk.
If you choose the “Run PrimeOS now” option and it fails after removing USB, don’t panic—use Reboot, remove USB, and let the internal bootloader take over.
Step B4: First Boot from Disk
- After reboot, you should see the PrimeOS boot menu directly from your target disk.
- Select the default entry. First load can take a minute—be patient.
So far we’ve done a good job—installer finished, bootloader works, and Android is up. Let’s finish the initial setup and polish the experience.
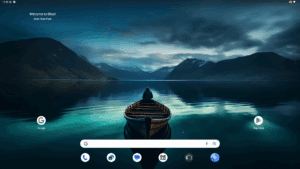
🧭 First-Run Setup: Language, Network, Play Store & Basic Tuning
When PrimeOS starts for the first time:
- Language
- Choose English (or your preferred language).
- If only English shows at first, open Settings → System → Languages & input → Languages.
- Add your language, then drag it to the top to make it the system default.
- Network
- Ethernet: usually works automatically—great for first setup.
- Wi-Fi: open Settings → Network & Internet. Toggle on Wi-Fi and pick your SSID.
- If Wi-Fi doesn’t show, don’t worry—we’ll cover dongles/workarounds in the fixes section.
- Sign in to Google
- Open Play Store and sign in with your Google account to enable app installs/updates.
- Personalize
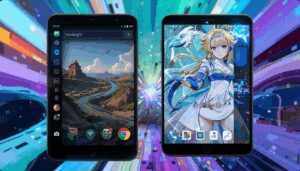
- Wallpapers: use a wallpaper app (as in the source script) or Settings → Wallpaper.
Note that some mobile-oriented wallpapers don’t scale perfectly to desktop resolutions.
- Wallpapers: use a wallpaper app (as in the source script) or Settings → Wallpaper.
- Sound & Display
- If HDMI audio is silent on first try, switch outputs in Sound or test another HDMI port/resolution.
- You can tweak Display resolution/scale in Settings; lower resolutions sometimes help older GPUs.
Alright—PrimeOS is usable. Now let’s talk apps, gaming, and streaming.
🎮 Apps, Gaming & Streaming: What Works, What to Expect
Apps & Play Store
- YouTube, VLC, Kodi, Plex, Spotify, and many tablet-friendly apps work well.
- Social apps generally run fine in tablet mode.
- If an app doesn’t appear in Play Store, sideload the APK from a reputable source (be careful; verify integrity).
Gaming (Key Mapping & Controllers)
- PrimeOS includes a Game Center/Gaming overlay for key mapping.
- F10 typically toggles the mapping editor; F9 cycles overlay visibility (transparent/hidden).
- Popular shooters (Free Fire, PUBG Mobile, CoD Mobile) may work with mapping, but compatibility varies by version and anti-cheat policies.
- Some titles close immediately or don’t progress past splash screens—this is normal on certain builds/hardware.
- USB or Bluetooth controllers (Xbox/PS) can dramatically improve the experience in many games.
Streaming (Netflix, Prime Video, Disney+)
- Depending on device certification (Widevine) and Play Store device flags, some premium apps may not appear in Play Store.
- Workarounds:
- Use the web browser to watch directly (often works well).
- Sideload APKs if allowed in your region (HD/4K playback may be restricted).
So far we’ve covered the fun bits. Now let’s fix the common bumps you could face.
🛠️ Common Problems & Proven Fixes
1) System Doesn’t Boot After Install
- Ensure the correct target disk was selected during install.
- If your BIOS uses Secure Boot, disable it and try again.
- If your PC is UEFI, install/boot in UEFI/GPT mode; if it’s older, use Legacy/MBR.
- Reboot and select a different kernel entry from the PrimeOS boot menu.
- As a sanity check, try Method A (USB) again to confirm your hardware can boot PrimeOS.
2) Black Screen or Stuck After Logo
- Give it a full minute on first boot.
- Try Alt+Tab, Alt+Enter, or the Windows key to force focus (some window managers need a nudge).
- If you’re using a laptop with an external monitor/TV, test a different kernel or unplug/replug HDMI after the boot splash.
3) No Sound / HDMI Audio Missing
- Switch audio output in Settings → Sound; try different HDMI ports.
- If internal audio is unsupported, an inexpensive USB sound card often fixes it instantly.
- Try lower/higher resolutions to retrigger HDMI audio handshakes.
4) Wi-Fi Not Detected
- Desktop Wi-Fi chipsets are hit-or-miss. Use Ethernet for initial setup.
- A known-good USB Wi-Fi dongle can solve it; check Linux/Android-x86 compatibility lists where possible.
- As a temporary bridge, use USB tethering from your phone.
5) Bluetooth Not Working
- Built-in BT chips can be unsupported. A USB Bluetooth dongle with common chipsets is an easy fix.
6) Netflix/Prime/Disney+ Missing from Play Store
- Expected on uncertified devices.
- Use the browser or sideload an older APK (note: HD/4K may not work due to DRM).
7) Game Crashes or Won’t Launch (e.g., Free Fire)
- Try a different version of the game (updates can break compatibility).
- Use the mapping overlay (F10) and fine-tune controls; some games need manual binds.
- If a title refuses to run, it may be a build or anti-cheat limitation—try alternatives.
8) Very Old Hardware (Pre-2010 Era)
- Some machines simply won’t initialize modern Android kernels, or they throw install errors.
- If you hit repeated failures, test on newer hardware to separate build limits from device age.
⚖️ Portable vs Permanent: Which Should You Choose?
| Feature | Portable (USB/External) | Permanent (Internal Disk) |
|---|---|---|
| Risk to Windows | None | Low–Medium (partition changes) |
| Speed | Good on USB 3.0; great on external SSD | Best overall |
| Setup Time | Fast | Longer |
| Portability | Excellent (use on multiple PCs) | Tied to one PC |
| Best For | Testing, casual use, travel | Daily driver, dedicated Android box |
If you’re starting from scratch, go portable first. Once you’re happy, install permanently for speed.
🔧 Bonus: Quality-of-Life Tips
- Wallpaper scaling: Tablet wallpapers don’t always fit desktop resolutions; try multiple sources or a wallpaper resizer.
- Taskbar/Windowing: PrimeOS often provides desktop-style behavior (resize windows, app switchers). Explore Settings → PrimeOS features (naming varies by build).
- Backup your data: If your build uses a data image for persistence, keep a backup copy once you’ve configured everything the way you like it.
- Game performance: Close background apps, keep storage with free space, and prefer external SSDs over slow USB sticks.
❓ Frequently Asked Questions (FAQ)
Q1. Can I dual-boot PrimeOS with Windows?
Yes, but it’s safer to use a separate disk or keep PrimeOS portable. If you must share a disk, back up first and be cautious about bootloaders.
Q2. Do I need a powerful GPU for PrimeOS?
No. Many integrated GPUs work fine for Android UI and light gaming. For heavy 3D or advanced emulation, expectations should be modest.
Q3. Why don’t I see certain apps in the Play Store?
Device certification and region gating. Sideload where legal, or use web versions.
Q4. My HDMI shows video but no audio. Fix?
Try another HDMI port, adjust resolution, change audio output in Settings, or use a USB audio adapter.
Q5. Is PrimeOS better than an emulator like BlueStacks?
Different approach. PrimeOS runs Android natively (bare-metal) and can feel lighter, while emulators run inside Windows. Try both; keep what suits your workflow.
Q6. Can I use PrimeOS on very old Core 2 Duo/first-gen i3 machines?
Sometimes yes, sometimes no. Kernel and driver support is the limiter. If it fails, test on newer hardware to confirm.
Q7. Can I project PrimeOS to a TV?
Video output is usually fine; HDMI audio can be hit-or-miss depending on drivers. A USB sound card is an easy solution if the TV gets video only.
✅ Wrap-Up
We covered everything you need to run Android 11 Tablet mode (PrimeOS) on a PC—from portable USB testing to permanent internal installs, including language, network, Play Store, gaming key-mapping, and streaming realities. We also bundled practical fixes for the typical issues you may encounter on mixed PC hardware.
So far, we’ve done a good job setting things up the right way—carefully, step by step, without shortcuts. Now it’s your turn to enjoy a big-screen Android experience on the machine you already own.
⚠️ Disclaimer
This article is for educational purposes. PrimeOS (Android-x86) builds are community projects and may not support every device or feature. Streaming DRM, app availability, and hardware drivers vary by model and region. Always back up your data before modifying partitions or installing operating systems. Respect app licenses and regional content restrictions.
Tags: primeos android 11 install, android on pc, android tablet mode pc, primeos permanent install, primeos usb portable, rufus primeos tutorial, android x86 gaming key mapping, primeos wifi bluetooth fix, hdmi audio android pc, play store android pc
Hashtags: #PrimeOS #AndroidOnPC #Android11 #Rufus #Androidx86 #TechTutorial #HTPC #GamingOnPC #StreamingApps #DIYTech