Getting a new internet connection at home or replacing your old router often feels intimidating. All those blinking lights, cables, and confusing setup menus can easily overwhelm you. But trust me—setting up a TP-Link Wi-Fi router is much simpler than it looks. With the right steps, you can get your internet up and running in just a few minutes.
In this guide, I’ll walk you through the entire process of setting up a TP-Link Wi-Fi router—from unboxing to getting your first speed test results. Whether your router is brand new or previously used, you’ll find detailed instructions here. I’ll also include common troubleshooting tips, a few extra explanations (like what a WAN port actually does), and FAQs to make sure you feel confident by the end.
1. 🔄 Resetting Your TP-Link Router (For Used Devices)
If your TP-Link router is brand new, you can safely skip this part and move to the next section. But if it’s a router you’ve used before—or maybe one you borrowed or bought second-hand—it’s always best to reset it to factory defaults before starting fresh.
Why reset? Because leftover settings (like old Wi-Fi passwords, ISP configurations, or parental controls) can cause conflicts and stop you from connecting properly.
Here’s how you can reset your TP-Link router:
- Make sure the router is powered on.
- Look at the back of your TP-Link router. You’ll notice a small pinhole labeled RESET.
- Take a paperclip, safety pin, or SIM ejector tool and gently insert it into the hole.
- Press and hold for about 10 seconds until all the lights blink at once.
- Release the button and wait for the router to restart.
Once the lights stabilize, your router is back to factory default settings—just like new.
2. 🔌 Connecting the Router with Ethernet and Fiber Setup
Now that your router is ready, let’s physically connect it to your internet provider’s system.
Most ISPs today deliver internet using fiber optic cables. These cables don’t connect directly to your router. Instead, they connect to a device called the ONU (Optical Network Unit). Think of it as a translator—it converts fiber signals into something your router can understand (Ethernet).
Here’s what to do:
- Take an Ethernet cable (usually included with your TP-Link box).
- Plug one end into the LAN port of your ONU/ONT device (provided by your ISP).
- Plug the other end into the blue WAN port on your TP-Link router.
💡 Tip: WAN stands for Wide Area Network. This port is special—it’s the gateway through which all internet traffic enters your home network.
Now your TP-Link router is officially connected to the internet line. But here is more than just connecting to internet like


- How to Set Up a VPN on Your Router in 2025 – The Complete Guide
- Understanding the Difference Between a Modem and a Router: A Complete Guide
- DNS, Speed, and BLOCKING ADULT Sites Everything I Wish I Knew Before I Touched My Settings
- How to Connect Multiple Wi-Fi Routers at Home for Better Coverage and a lot more…
3. 📱 Connecting Your Device to the Default TP-Link Wi-Fi
With the hardware connected, it’s time to connect your phone or laptop to the router’s default Wi-Fi network.
Every TP-Link router comes with a pre-configured Wi-Fi name (SSID) and password. You’ll find these details printed on a sticker at the bottom of your router.
Steps to connect:
- Open Wi-Fi settings on your phone or PC.
- Look for the default SSID (e.g., “TP-Link_1234”).
- Enter the default password from the sticker.
Once connected, you’ll be able to access the router’s configuration page.
4. 🌐 Accessing the Router Setup Page
To configure your router, you need to log into its setup page. This works like visiting a website, but instead of going online, you’re accessing the router directly.
- Open a browser (Chrome, Edge, or Safari).
- In the address bar, type:
tplinkwifi.netor192.168.0.1
Both addresses usually work. If one doesn’t load, try the other.
You should now see the TP-Link login/setup screen.
5. 🔐 Setting a New Admin Password
The very first thing TP-Link asks is to create a new admin password. This password is not the same as your Wi-Fi password—it’s just for logging into the router settings page.
Why is this important? Because anyone connected to your Wi-Fi could potentially log into your router and change settings if you keep the default admin password. Setting your own makes your network safer.
Pick a password that’s strong but easy for you to remember. Avoid using the same as your Wi-Fi password for security reasons.
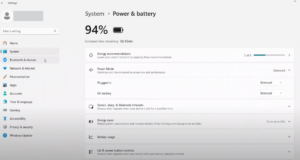
6. ⏰ Configuring Time Zone Settings
Next, the setup wizard will ask for your time zone. This helps your router keep accurate logs, schedule parental controls, and perform automatic updates correctly.
If you’re in India, select:
Chennai / Kolkata / Mumbai / New Delhi.
For other regions, just pick your city or the closest available option.
7. 🌍 Choosing the Correct Connection Type
This is the part where many people get stuck. TP-Link will ask: What type of internet connection do you have?
The options usually include:
- Dynamic IP (DHCP) – most common, works automatically.
- Static IP – requires manual entry of IP address, subnet, gateway, and DNS.
- PPPoE – requires a username and password from your ISP.
- Others (L2TP, PPTP, etc.) – used rarely, mostly in enterprise setups.
💡 To avoid confusion, always check with your Internet Service Provider (ISP). If they gave you login details (like username/password), you’re on PPPoE. If they gave you numbers like “IP Address, Subnet Mask, DNS,” you’re on Static IP. If they gave nothing, it’s probably Dynamic IP.
Enter the details carefully. A single mistake (like wrong DNS) can break your internet.
8. 📶 Creating Your Wi-Fi Name (SSID) and Password
Now comes the fun part—choosing your Wi-Fi name and password.
- SSID (Wi-Fi name): This is what you’ll see in your device’s Wi-Fi list. You can name it anything—like “MyHomeNet,” “TPLinkHouse,” or even something quirky like “LAN of Thrones.”
- Password: Make sure it’s strong. Combine upper/lowercase letters, numbers, and symbols. Avoid simple ones like 12345678 or password.
Example:
SSID: MySecureHome
Password: H0me@2025!
Once you set these, your router will save the settings and restart.
9. 🔁 Restarting, Reconnecting, and Testing Your Internet
After applying your settings, the router will reboot. This takes about 1–2 minutes. During this time, your phone will disconnect.
Steps to finalize:
- Go back to Wi-Fi settings on your device.
- Connect to your new SSID with the password you just created.
- Open a browser and try loading any website.
- (Optional) Run a speed test at Speedtest.net to confirm your connection is stable and at the expected speed.
Congratulations—your TP-Link router is now fully configured and ready to use!
10. 🛠️ Troubleshooting Common Issues
Even with the right steps, you may run into problems. Let’s quickly look at common ones:
- Can’t access tplinkwifi.net? → Try using
192.168.0.1. - No internet even after setup? → Double-check WAN cable and connection type.
- Wi-Fi keeps dropping? → Change the Wi-Fi channel in advanced settings.
- Forgot admin password? → Reset router and start again.
11. ❓ Frequently Asked Questions (FAQs)
Q1: Do I need a computer to set up my TP-Link router?
No, you can set it up entirely from your smartphone using the default Wi-Fi.
Q2: Where can I find the TP-Link setup guide?
You can always refer to the official TP-Link support page.
Q3: Is TP-Link safe to use?
Yes, as long as you change the default admin password and set a strong Wi-Fi password.
Q4: What if my ISP uses PPPoE but I don’t know my login details?
Contact your ISP customer support—they’ll provide username and password.
Q5: How often should I restart my router?
For best performance, restart it once every couple of weeks.
12. ⚠️ Disclaimer
The steps provided in this article are general setup instructions for most TP-Link routers. Models may vary slightly, so always refer to your specific model’s manual if something looks different. If you are unsure about your ISP settings, contact your provider before entering details. Incorrect configuration may temporarily disrupt your internet connection.
🎯 Final Thoughts
So far, we’ve covered everything—from resetting your router to configuring internet settings and personalizing your Wi-Fi. While it may feel technical at first, once you go through the steps, you’ll realize how straightforward the process really is.
Now you’re all set with a secure, high-speed Wi-Fi network at home. Enjoy uninterrupted browsing, streaming, and gaming—all powered by your freshly configured TP-Link router.
Tags: TP-Link router setup, Wi-Fi configuration, router installation, home internet setup, static IP, PPPoE, tplinkwifi.net, networking guide
Hashtags: #TPLINK #WiFiSetup #Networking #RouterSetup #InternetGuide #HomeWiFi


