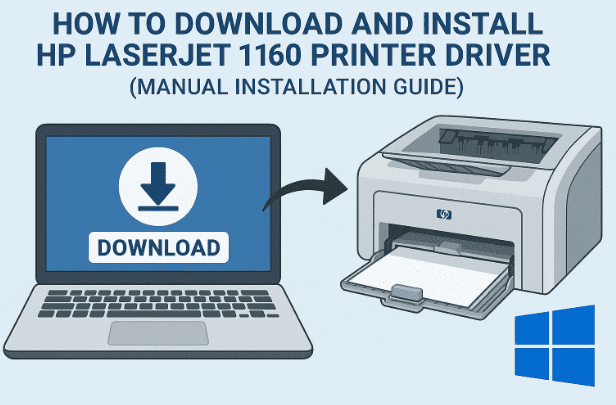
The HP LaserJet 1160 is one of those classic printers known for its durability and crisp black-and-white printing quality. However, since HP has officially discontinued support for this model, users often struggle to find its drivers for modern Windows systems like Windows 10 or Windows 11.
In this article, we’ll walk you through the complete step-by-step process of downloading and manually installing the HP LaserJet 1160 driver on your computer — whether it’s a 32-bit or 64-bit system. Along the way, we’ll also explain how to check your system type, properly extract driver files, install them using Windows’ built-in “Add Printer” feature, and troubleshoot any issues that might arise.
Let’s get started and bring your LaserJet 1160 back to life!
1️⃣ Introduction: Why Manual Installation Is Required
The HP LaserJet 1160 was released in the early 2000s, and it became one of HP’s most trusted monochrome laser printers. Unfortunately, HP no longer maintains driver downloads for this printer on its official support website.
Modern operating systems like Windows 10 and 11 may not automatically recognize this printer when you plug it in, which means you’ll need to install the driver manually using compatible legacy driver files.
This manual process isn’t difficult — you just need the right files and correct setup steps, which we’ll explain below in great detail.
2️⃣ Step 1: Check Whether Your System Is 32-bit or 64-bit
Before downloading anything, it’s essential to know whether your Windows version is 32-bit or 64-bit. Installing the wrong version of the driver will cause it to fail or your printer to not show up at all.
Let’s check your system type:
- Right-click on This PC (or My Computer) on your desktop or File Explorer.
- Click Properties.
- In the window that appears, find the System Type entry under the System section.
- If it says 32-bit Operating System, download the 32-bit driver.
- If it says 64-bit Operating System, download the 64-bit driver.
💡 Most modern systems are 64-bit, especially those running Windows 10 or 11. However, some older laptops or office PCs may still be 32-bit, so it’s always safer to double-check.
Once you’ve identified your system type, close the window. Now, let’s move on to downloading the correct driver package.
3️⃣ Step 2: Download the Correct Driver Package
Since HP has deprecated official support for the HP LaserJet 1160, the drivers are not available directly on the HP Support page.
However, safe and verified links have been provided below via Google Drive and MEGA, offering both 32-bit and 64-bit versions.


Choose the version that matches your system architecture.
🔗 Google Drive Links
- 64-bit: Download (Google Drive)
- 32-bit: Download (Google Drive)
🔗 MEGA Links
- 64-bit: Download (MEGA)
- 32-bit: Download (MEGA)
Click on the appropriate link, and your browser will open the download page.
Press Download to start saving the driver package to your computer.
⏱ The file is small, so it should download within a few seconds on most internet connections.
Once the download is complete:
- Open your Downloads folder.
- Right-click the ZIP file and select Show in folder.
- Drag it to your Desktop for easy access during the next steps.
Now, let’s extract the contents.
4️⃣ Step 3: Extract the Driver ZIP File
The downloaded file will be compressed in .zip format. To install the driver, we must extract it first.
Here’s how to do it properly:
- Right-click on the downloaded ZIP file (e.g.,
HP_LaserJet_1160_Driver.zip). - Select Extract Files… or Extract Here (depending on your extraction tool).
- Click OK or Extract when prompted.
Wait a few seconds — once the extraction completes, a new folder with the same name will appear on your desktop.
Open the folder to ensure it contains files such as .inf, .cat, and .dll — these are the driver files needed for installation.
Now, close the folder. We’re ready to install the driver manually.
5️⃣ Step 4: Manually Install the HP LaserJet 1160 Driver
Since HP’s automated installer no longer supports this printer, we’ll use Windows’ manual “Add Printer” method to install the driver.
It may sound technical, but the process is straightforward if you follow these steps carefully.
🧩 Step-by-Step Manual Installation
- Click the Start Menu and type Printers & Scanners.
- Open the Printers & Scanners settings page.
- Click the Add a printer or scanner button.
- Wait for Windows to search for printers (this may take a minute).
- When it doesn’t find your HP LaserJet 1160, click the link: “The printer that I want isn’t listed.”
- A new window will appear. Choose: Add a local printer or network printer with manual settings.
- Click Next.
- In the “Choose a printer port” window:
- Select a port such as USB001 (or any USB port shown).
- If you see an HP-specific port (like
DOT4_001), choose it.
- Click Next.
- On the next page, click Have Disk.
- Click Browse, then navigate to your Desktop → HP_LaserJet_1160 folder.
- Select the
.INFfile inside and click Open, then OK. - From the list, choose HP LaserJet 1160 and click Next.
- If asked to rename the printer, you can leave it as “HP LaserJet 1160” or give it a custom name.
- Click Next to begin the installation.
Windows will now copy the necessary files and install the printer driver.
This may take a minute or two. Once done, you’ll see a confirmation message.
Next, you’ll be asked if you want to share the printer on your network.
If you’re installing it for personal use, select “Do not share this printer.”
Click Next, and you’ll be offered the option to:
- Set this as the default printer
- Print a test page
You can do both if you wish, or simply click Finish to complete the process.
6️⃣ Step 5: Verify That the Printer Installed Successfully
We’ve done all the heavy lifting — now let’s make sure your printer is visible and ready to use.
Here’s how to check:
- Go to Printers & Scanners again from the Start menu.
- Scroll through the list of installed printers.
- You should now see HP LaserJet 1160 listed among them.
If it’s visible, congratulations — your printer is successfully installed! 🎉
You can now print documents, reports, or invoices directly from your favorite applications.
If you don’t see the printer, don’t worry. Restart your computer and reconnect the printer via USB. It should appear after that. If not, follow the troubleshooting section below.
7️⃣ Step 6: Optional – Set Default Printer or Print a Test Page
Once your printer appears, you can make it your default printer to save time later.
To set the printer as default:
- Go to Control Panel → Devices and Printers.
- Right-click HP LaserJet 1160.
- Choose Set as default printer.
You’ll also see a small green checkmark next to it, confirming that it’s the primary printer for your system.
To make sure everything is working properly, try printing a test page:
- Right-click the printer → Printer Properties → click Print Test Page.
If you see a clean test page output, your installation was successful.
❓ Troubleshooting and Frequently Asked Questions (Q&A)
Even after following all steps, you might face minor issues. Don’t worry — here are the most common ones and how to fix them.
Q1. My printer doesn’t show up even after installation.
👉 Reconnect your USB cable to a different port, or restart your computer.
Also, try running the Add Printer wizard again and ensure you select the correct port (USB001 or similar).
Q2. Windows shows a warning: “Driver not digitally signed.” Should I continue?
👉 Yes. Since this is an older driver, it may not have a modern Microsoft digital signature. It’s safe to install if downloaded from the verified links in this article.
Q3. Can I use this driver on Windows 11?
👉 Yes. It works on both Windows 10 and Windows 11 (32-bit or 64-bit).
However, some users may need to disable driver signature enforcement temporarily if Windows blocks the installation.
Q4. My printer prints blank pages — what’s wrong?
👉 Check toner levels and make sure cartridges are properly seated.
If toner is fine, reinstall the driver and try printing again — sometimes configuration mismatches cause blank pages.
Q5. Is this printer wireless? Can I connect it over Wi-Fi?
👉 No, the HP LaserJet 1160 supports only USB connection.
To share it over Wi-Fi, connect it to one PC and use Windows Printer Sharing on your local network.
💡 Extra Tips for Smooth Installation
So far, you’ve done an excellent job following along. Before wrapping up, let’s go through a few expert tips to help you maintain a smooth experience.
- Always download from trusted sources. Avoid random driver websites that could contain malware.
- Restart your PC after installation to ensure all files are registered.
- Use original USB cables and plug directly into your PC (avoid hubs).
- Print a test page once a week if the printer isn’t used frequently — this prevents toner clogging.
- If you reformat your system, keep this driver folder backed up for future use.
⚠️ Disclaimer
This article is intended purely for educational and troubleshooting purposes.
HP no longer provides official driver downloads for the LaserJet 1160 model. The links shared above are legacy archives for user convenience and should be used responsibly.
Always verify any downloaded files with antivirus software before extraction.
You can check HP’s current support site here:
🔗 HP Support Website
✅ Final Thoughts
And that’s it — your HP LaserJet 1160 printer is now ready for action!
We’ve covered every part of the process — from checking system architecture to downloading, extracting, manually installing, and verifying the driver.
Even though official HP support has ended, this method ensures your classic printer continues serving you efficiently on modern Windows systems.
Whether you’re printing business documents, academic papers, or invoices — your LaserJet 1160 can still deliver great results today.
#HPLaserJet1160 #PrinterSetup #DriverInstallation #Windows11 #TechGuide #USBPrinter #DtpTips


