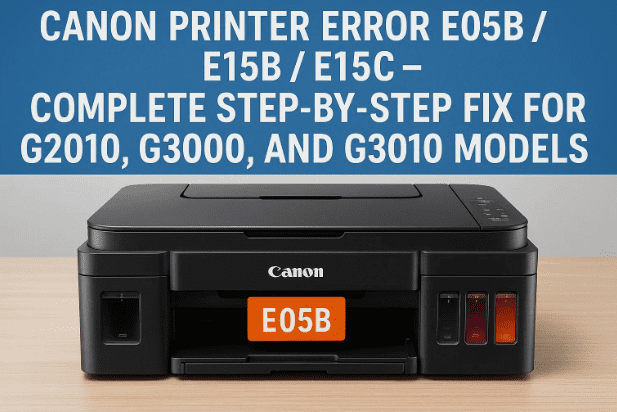
If you own a Canon G2010, G3000, or G3010 printer, chances are you might one day face an error message like E05B or E15C flashing on the display panel. These codes can be confusing at first — your printer suddenly stops working, the indicator blinks, and you have no idea what went wrong.
But don’t worry. This detailed article will walk you through exactly what these error codes mean, why they appear, and how you can fix them at home — safely and step by step.
Let’s get started and bring your printer back to perfect working condition.
1️⃣ Understanding Canon Printer Error Codes
Canon printers are designed to self-diagnose problems using error codes. These codes help you understand which component or process has malfunctioned, such as ink levels, paper jams, or printhead failures.
For example:
- E05B → Black printhead error
- E15C → Color printhead error
- E15B → General printhead malfunction (depending on model series)
These codes typically indicate that your printhead is either clogged, misaligned, or not being detected correctly by the printer’s carriage unit.
Before replacing anything, it’s always wise to try a complete cleaning and reinstallation, which often solves the issue completely.
2️⃣ What Does Error E05B / E15B / E15C Mean?
When you see the E05B or E15C error on the screen, your Canon G-Series printer is alerting you that there’s a problem with the printhead connection.
Here’s what each part of the code signifies:
- E05 – Error code prefix related to the cartridge or printhead system
- B – Indicates Black printhead issue
- C – Indicates Color printhead issue
If you see the letter B, the issue is coming from your black ink printhead.
If you see C, it means the color printhead is affected.
These errors are most common in Canon’s ink tank printers (like G2010, G3000, and G3010) because of ink drying, dust buildup, or improper installation.


3️⃣ Common Reasons Behind These Errors
Let’s first understand why these errors happen. Knowing the root cause helps prevent future issues.
🔹 Possible Causes:
- Printhead not seated properly in the carriage.
- Ink dried up due to long periods of inactivity.
- Clogged nozzles that block ink flow.
- Moisture or dust on the printhead contact points.
- Damaged carriage cable or loose printhead connection.
- Faulty printhead that needs replacement.
Sometimes, these errors also appear temporarily after refilling ink or cleaning the printer externally — in that case, a proper reseating or internal cleaning often fixes it.
4️⃣ Identifying Whether the Issue Is Black or Color Printhead
Before jumping into cleaning, you need to confirm which printhead is responsible for the error.
- If your screen shows E05B → The problem is with the Black printhead.
- If it shows E15C → The problem lies with the Color printhead.
This distinction helps you focus your cleaning effort only where needed.
💡 Tip:
If you’re unsure which one is malfunctioning, remove both heads and clean them together — it ensures both units are properly refreshed.
5️⃣ Step-by-Step: Cleaning the Printhead Safely
Now let’s move to the most important step — cleaning the printhead.
This process must be done carefully because the printhead is the most delicate part of your printer.
🧰 What You’ll Need
- Clean lint-free cloth or tissue
- Cotton buds (earbuds)
- A small bowl of lukewarm distilled water or isopropyl alcohol (70%)
- Soft gloves (optional, to prevent ink stains)
🪜 Step-by-Step Cleaning Process
- Turn Off the Printer Completely
Disconnect the power cable to prevent any electric movement of the carriage. - Open the Printer Lid
Wait until the carriage moves to the center position. - Remove the Ink Cartridges
Gently lift the latches and take out both the black and color cartridges. - Remove the Printhead Assembly
Lift the small locking lever and carefully slide the printhead out of its holder.
Avoid touching the metal contacts or nozzles directly. - Clean the Printhead Surface
Dip a cotton bud into warm distilled water and lightly clean the nozzle area (the metal part with small holes).
This removes dried ink and dust. - Clean the Contact Points
Use a dry cloth to gently wipe the gold contact pins on both the printhead and the printer carriage.
This improves connection and communication. - Dry Completely
Let the printhead dry naturally for 15–20 minutes before reinstalling. - Clean the Carriage Dock
Use a dry tissue to wipe any ink residue or dust where the printhead sits.
So far we’ve done a good job preparing your printer for reinstallation — now let’s move to the next step.
6️⃣ How to Reinstall the Printhead After Cleaning
After cleaning, the reinstallation must be done carefully to ensure proper alignment and connection.
🧭 Reinstallation Steps:
- Place the Printhead Back in the Carriage
Gently insert the black printhead (B) and the color printhead (C) into their respective slots.
Ensure they fit perfectly and the locking lever closes firmly. - Reinsert the Ink Cartridges
Align and press the cartridges back into place until they click. - Close the Printer Lid and Reconnect the Power Cable.
- Turn the Printer ON and wait for it to initialize.
If the display shows “Ready” or returns to normal without the E05B/E15C code — congratulations! You’ve solved the problem.
If the error persists, don’t worry — there are still two more possibilities we can check.
7️⃣ When to Replace the Printhead or Carriage Unit
If cleaning doesn’t fix the error, the issue might lie deeper — either with the printhead itself or the carriage unit that holds it.
Let’s go over both scenarios.
🧩 Option 1: Replace the Printhead
If the printhead is physically damaged, clogged internally, or shorted, replacement is the best option.
You can purchase genuine Canon printheads for your model from:
👉 https://in.canon
Make sure you buy the correct model:
- QY6-8004 for many G-series models (verify before buying).
After replacement, install it just like before and run a nozzle check test to confirm it’s working.
⚙️ Option 2: Replace or Check the Carriage Unit
If you still see the same error even after using a new printhead, the carriage unit or cable might be faulty.
- Inspect the flex cable connecting the printhead to the mainboard.
- If it looks damaged or loose, replace it carefully.
- Alternatively, a service center can replace the entire carriage unit.
Though this is rare, it’s the final step if all else fails.
8️⃣ How to Perform a Test Print After Fixing
Once the issue is fixed, it’s time to confirm the repair with a test print.
Steps:
- Load one or two blank A4 pages into the input tray.
- Press the Copy or Test Print button (depending on your model).
- Wait for the printer to pick up the paper and print a test sheet.
If the printer produces a clean test page — without blinking lights or codes — your fix is successful.
💡 Tip:
Run a “Deep Cleaning” cycle from the printer’s maintenance menu once every few weeks to keep ink flowing smoothly.
9️⃣ Additional Maintenance Tips for Canon G-Series Printers
Now that your printer is back in working order, here are a few extra care tips to prevent similar errors in the future.
- Use the printer regularly. Even one small print per week prevents ink from drying.
- Keep it covered when not in use to avoid dust buildup.
- Use genuine Canon inks for best results and printhead longevity.
- Avoid unplugging during operation — it can misalign the carriage.
- Clean the nozzles monthly using the built-in maintenance option.
A little regular maintenance can make your Canon printer last many years without issues.
❓ 10️⃣ Frequently Asked Questions (FAQs)
Q1. What does E05B mean in Canon printers?
It means there is an error with the black printhead — either not detected, clogged, or damaged.
Q2. What does E15C mean?
E15C indicates a color printhead issue. Cleaning or replacing it usually resolves the problem.
Q3. Can I fix it without replacing the head?
Yes. In most cases, thorough cleaning and reseating of the printhead clears the error.
Q4. How can I prevent printhead damage?
Use your printer regularly and always keep ink levels sufficient. Avoid letting ink dry out in the nozzles.
Q5. Is it safe to use alcohol for cleaning?
Yes, 70% isopropyl alcohol or distilled water is safe for external cleaning — but avoid soaking for too long.
Q6. My printer still shows the same error after replacing both heads. What now?
If both heads are new and errors persist, you likely have a carriage cable or mainboard issue.
In such cases, visiting an authorized Canon service center is recommended.
⚠️ 11️⃣ Disclaimer
This article provides practical, verified methods to fix Canon printer printhead errors.
All brand names, codes, and model numbers belong to Canon Inc.
Proceed carefully when cleaning or handling printer components — any physical damage caused by mishandling is not covered under standard warranty.
For official Canon support, visit:
🔗 https://in.canon/en/support
🏷️ Tags & Hashtags
Tags: Canon printer error E05B, Canon G2010 error solution, Canon G3000 printhead fix, Canon printer E15C, Canon G3010 troubleshooting, Canon ink tank printer errors, printhead cleaning guide, printer repair, printer maintenance, Canon carriage unit replacement
Hashtags: #CanonPrinter #PrinterError #E05B #E15B #E15C #CanonG2010 #PrinterFix #TechGuide #PrintheadError #PrinterMaintenance


