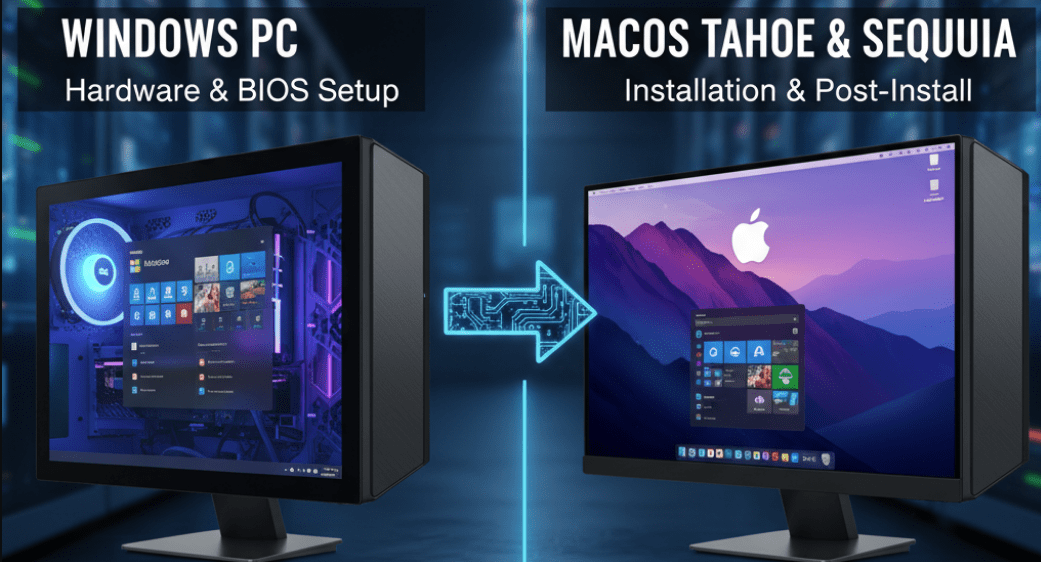
Have you ever dreamed of running macOS on your regular PC or laptop but thought the process was too complicated? You’re not alone. For years, creating a Hackintosh required hours of forum research, trial and error, and complex EFI configurations. But the good news is—things have changed. Thanks to tools like OpenCore Simplify, installing macOS on Intel and AMD computers has become much easier, even for beginners.
In this article, I’ll walk you through the complete process of installing macOS Sequoia or Tahoe (the latest macOS versions) on a Windows PC or laptop. By the end, you’ll have a fully working Hackintosh ready for app development, design, video editing, or simply experiencing the Apple ecosystem without buying a Mac.
Let’s break everything down step by step.
📋 What You’ll Learn in This Guide
Before we dive in, here’s a quick overview of what we’ll cover:
- How to create a bootable macOS USB installer (supports both Sequoia & Tahoe)
- How to configure and set up OpenCore Simplify for your hardware
- How to generate a proper EFI folder for stable Hackintosh booting
- How to use MiniTool Partition Wizard to finalize your USB
- How to boot into the macOS installer and perform the installation
- How to transfer your EFI to the internal drive for direct booting
- Common issues and tips for fixing errors such as kernel panic, boot failures, or kext problems
⚠️ Disclaimer
Installing macOS on non-Apple hardware (Hackintosh) is against Apple’s End User License Agreement (EULA). This guide is for educational purposes only. If you decide to proceed, you’re doing so at your own risk.
🛠️ Tools You’ll Need
Before we begin, let’s gather all the required tools. It’s best to download them ahead of time so you don’t run into delays later.
- OpenCore Simplify – to generate your EFI automatically.
👉 Download OpenCore Simplify (GitHub) - Balena Etcher – for creating the bootable macOS USB installer.
👉 Download Balena Etcher - macOS Installer (Olarila Vanilla Images) – official macOS installer files (Sequoia, Tahoe, and older versions).
👉 Download macOS Installers (Olarila) - MiniTool Partition Wizard (Free Edition v10) – to prepare and edit the EFI partition on your USB.
👉 Download MiniTool Partition Wizard
1. Prepare Your macOS Installer USB
To start, we need a bootable USB drive that will hold the macOS installer. This is what your PC will boot from.
- Install and open Balena Etcher.
- Select the macOS installer
.dmgor.isofile you downloaded from Olarila. - Choose your USB drive as the target device.
- Click Flash and wait for the process to complete.
💡 Tip: The process may take 10–30 minutes depending on your USB speed. Don’t interrupt it.
At the end of this step, you’ll have a USB with the macOS installer ready. Next, we’ll add OpenCore EFI so your PC can actually boot macOS.
2. Generate Your EFI Folder with OpenCore Simplify
This is the most crucial step. The EFI folder contains drivers, patches, and configurations tailored to your hardware. Without it, your Hackintosh won’t boot.
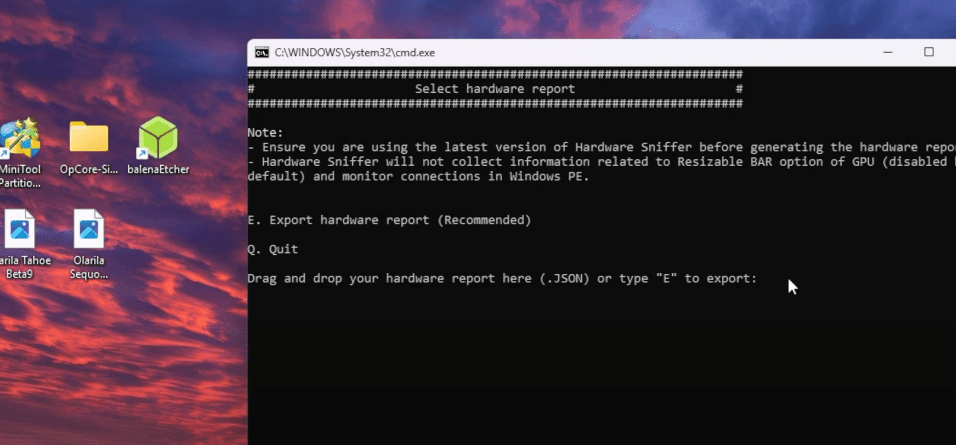
- Extract the OpenCore Simplify ZIP file.
- Run the included BAT file (Windows batch script).
- Make sure your computer is connected to the internet—the tool will download required files during first use.
- When the terminal opens, select Option 1 to export your hardware specs.
- Press E to confirm.
The tool will use a hardware sniffer to analyze your CPU, GPU, and other components, then suggest which macOS version (Sequoia, Tahoe, etc.) is best suited.


👉 Example: If your PC supports macOS Tahoe Beta, it will recommend it. But you can still choose Sequoia for stability.
3. Choose macOS Version & Generate SMBIOS
After the scan:
- Enter the number corresponding to the macOS version you want (e.g.,
24for Sequoia). - Next, type
5to generate SMBIOS (Mac model identity). - The tool will auto-select a model (highlighted in green) that best matches your hardware.
- You can explore alternatives with
A, but stick to green-marked models. - Once done, return to the main menu with
B.
4. Create the EFI Folder
Now, type 6 in OpenCore Simplify’s menu to generate your EFI folder.
- Stay online, as the program downloads drivers and kexts.
- If prompted to choose a default kext, just accept the default (e.g.,
17). - The tool will build your EFI automatically with all required components.
At the end, you’ll have a complete EFI folder on your desktop, ready to use.
5. Copy EFI to Your USB (MiniTool Partition Wizard)
Next, we’ll transfer the EFI folder to the USB drive.
- Open MiniTool Partition Wizard.
- Select your USB drive that contains the macOS installer.
- Locate the existing EFI partition.
- Right-click → Delete Partition.
- Right-click again → Create New Partition.
- Name it EFI.
- File system = FAT32.
- Click Apply to confirm changes.
Now, open the new EFI partition and paste the EFI folder you generated earlier.
Finally:
- Change the partition type back to EFI System Partition.
- Apply changes again.
✅ Your USB is now fully Hackintosh-ready.
6. Boot from the USB & Install macOS
Now the fun begins!
- Restart your PC and enter the BIOS/UEFI (usually F2, F11, or F12 at startup).
- Set your USB drive as the boot device.
- When OpenCore boots, you’ll see a menu.
- Select Install macOS Sequoia (or Tahoe, depending on your choice).
After a few moments, you’ll reach the macOS installer screen.
7. Format the Target Drive
Inside the installer:
- Open Disk Utility.
- Select the drive where you want to install macOS.
- Click Erase.
- Format = APFS, Scheme = GUID Partition Map.
- Name it
macOS.
⚠️ Warning: This step deletes all data on the selected drive. Backup your files first!
8. Begin the Installation
- Close Disk Utility.
- Select Install macOS Sequoia (or Tahoe).
- Choose the formatted
macOSdrive. - Installation will take 20–45 minutes, depending on your hardware.
- Your PC will reboot multiple times—each time, reselect the installer in OpenCore until it completes.
At the end, you’ll land on the macOS setup screen where you can create your account.
🎉 Congratulations! You now have a working Hackintosh.
9. Copy EFI to Internal Drive
Currently, your Hackintosh boots only with the USB. To make it permanent:
- Use MiniTool again to open the EFI partition of your internal system drive.
- Copy the EFI folder from the USB to it.
- Apply changes.
Now, your system will boot macOS directly without needing the USB installer.
🔧 Troubleshooting & Common Issues
Even with tools like OpenCore Simplify, Hackintosh can be tricky. Here are some common problems and fixes:
- Kernel Panic → Usually caused by wrong kexts. Double-check your hardware compatibility.
- No Boot Option in BIOS → Ensure EFI partition type is set correctly.
- Black Screen After Apple Logo → GPU drivers (kexts) may be missing. Re-generate EFI with correct options.
- No Internet in macOS → Install proper network kext (IntelMausi, RealtekRTL8111, etc.).
❓ Frequently Asked Questions (FAQ)
Q1. Can I install macOS on AMD processors?
Yes, OpenCore Simplify supports AMD builds too, though you may need specific patches.
Q2. Do I need a dedicated GPU?
Not always. Many Intel iGPUs work fine, but for performance, a compatible NVIDIA/AMD GPU is better.
Q3. Can I dual boot macOS and Windows?
Yes. Just install macOS on a separate drive or partition and manage booting through OpenCore.
Q4. Can I update my Hackintosh later?
Yes, but always back up your EFI folder before updating macOS.
Q5. Is Hackintosh legal?
Technically no—it violates Apple’s EULA. This is why Hackintosh is considered a community project for learning.
✅ Final Thoughts
Running macOS on non-Apple hardware has always been a challenge, but tools like OpenCore Simplify make the process much easier. Whether you’re an app developer, designer, or just curious about macOS, this guide should help you set up macOS Sequoia or Tahoe on your PC.
It may take patience, especially if you encounter errors, but once set up, you’ll enjoy the speed and stability of macOS right on your Windows hardware.
Tags
hackintosh, macos sequoia, macos tahoe, opencore, create efi, hackintosh usb installer, balena etcher, minitool partition wizard, olarila macos installer, run macos on windows pc, install macos on amd, install macos on intel
Hashtags
#Hackintosh #macOS #OpenCore #Sequoia #Tahoe #BalenaEtcher #MiniTool #Olarila #WindowsToMac


