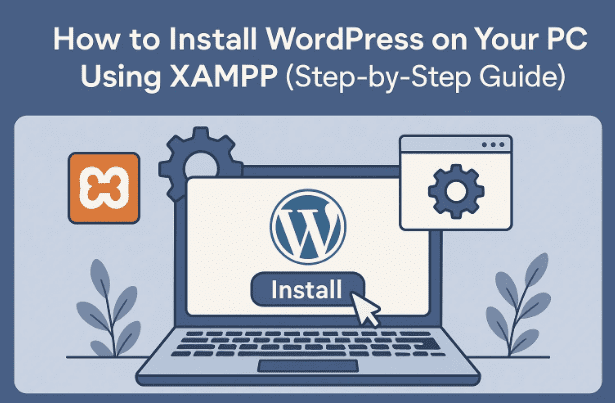
Learning WordPress is one of the best ways to build a career in web design, blogging, or freelance development. But before you buy hosting or a domain name, you can actually install WordPress on your computer for free. This allows you to practice, experiment, and even build full websites without spending a single rupee (or dollar) on hosting.
In this article, I’ll walk you through every step to install WordPress locally on your PC using XAMPP (a free, open-source software that lets you run a server environment on your computer). Don’t worry if the term sounds technical right now—I’ll break it down in simple terms so that by the end, you’ll have your own WordPress site running offline.
1. What is XAMPP and Why Do You Need It?
Before jumping into the installation steps, let’s understand the key tool we’ll use: XAMPP.
- XAMPP is a free software package that lets you run a local server on your computer. It includes:
- Apache (the web server),
- MySQL/MariaDB (database system),
- PHP (the programming language WordPress is written in),
- and some other helpful tools.
In short, XAMPP mimics the same environment as a real web host. This means you can install WordPress locally and use it as if it were hosted on the internet—except only you will be able to see it on your machine.
👉 You can download XAMPP from the official website here: https://www.apachefriends.org
Now that you know what XAMPP is, let’s move to the first step.
2. Step 1: Download and Install XAMPP
Let’s start by setting up the server software.
- Open your browser (Google Chrome, Edge, Firefox, etc.).
- Go to the official XAMPP site: https://www.apachefriends.org.
- On the homepage, you’ll see download buttons for different operating systems (Windows, Linux, macOS). Choose Windows if you’re on a PC.
- Once the file is downloaded, locate it in your Downloads folder and double-click to run the installer.
- Windows might ask for permission—click Yes.
- Follow the installation wizard:
- Click Next multiple times.
- Accept the license agreement.
- Keep the default installation options (no need to change).
- Finally, click Install.
After a few minutes, the installation will finish. Click Finish, and you’ll notice a shortcut icon on your desktop for XAMPP Control Panel.
3. Step 2: Start Your Local Server
Now that XAMPP is installed, it’s time to start the local server.
- Open the XAMPP Control Panel (the gray icon you see on the desktop).
- You’ll see a list of modules like Apache and MySQL.
- Click Start next to Apache and MySQL.
- When they turn green, it means both are running correctly.
✅ To check if everything is working:
- Open Chrome and type
localhostin the address bar. - Press Enter. You should see the XAMPP welcome page.
So far so good—we have our server running. Now, let’s bring WordPress into the picture.


4. Step 3: Download WordPress
Next, we’ll get WordPress itself.
- Go to the official WordPress website: https://wordpress.org.
- On the top-right, click Get WordPress.
- Click the download button, and a
.zipfile will start downloading.
Once downloaded, locate the file in your Downloads folder.
5. Step 4: Move WordPress Files into XAMPP
Now comes an important step—placing WordPress into the correct folder so XAMPP can recognize it.
- Right-click the WordPress
.zipfile and choose Extract All. - You’ll get a folder named wordpress after extraction.
- Open File Explorer and go to the XAMPP installation folder (usually
C:\xampp). - Inside, you’ll find a folder named htdocs.
- Drag and drop the wordpress folder into htdocs.
That’s it! Now WordPress files are inside your server’s root folder. Let’s create a database for WordPress to use.
6. Step 5: Create a Database for WordPress
Every WordPress website needs a database to store its content. Let’s set that up.
- Go back to the XAMPP Control Panel.
- Click Admin next to MySQL. This will open phpMyAdmin in your browser.
- In phpMyAdmin, click Databases from the top menu.
- Enter a name for your new database (e.g.,
wordpress). - Click Create.
That’s it—you’ve created a blank database for WordPress.
7. Step 6: Install WordPress
Now comes the exciting part—actually installing WordPress.
- Open your browser and type:
http://localhost/wordpress
(If you renamed the folder earlier, replace wordpress with your chosen name.) - The WordPress setup page will appear.
- Choose your language (e.g., English) and click Continue.
- On the next screen, enter the following details:
- Database Name: The one you created in phpMyAdmin (e.g.,
wordpress). - Username:
root - Password: Leave it blank (by default in XAMPP).
- Database Host:
localhost - Table Prefix:
wp_(default is fine).
- Database Name: The one you created in phpMyAdmin (e.g.,
- Click Submit and then Run the Installation.
- Now, set up your WordPress site:
- Site Title: Any name (this can be changed later).
- Username: Choose something simple (e.g.,
admin). - Password: Set a password (make sure you remember it).
- Email Address: Enter any valid email.
- Search Engine Visibility: You can leave it unchecked since it’s a local site.
- Click Install WordPress.
Congratulations! WordPress is now installed on your computer. 🎉
8. Step 7: Log in and Explore the Dashboard
- Once installed, click Login.
- Enter the username and password you set earlier.
- You’ll now enter the WordPress Dashboard—the control center where you create pages, install themes, and add plugins.
Take some time to explore the dashboard:
- Posts → Create blog posts.
- Pages → Add static pages like About or Contact.
- Appearance → Change themes.
- Plugins → Add extra features.
At this point, you officially have your own WordPress site running locally!
9. How to Reopen Your WordPress Site Later
Here’s how to open your site the next time:
- Launch the XAMPP Control Panel.
- Start Apache and MySQL.
- Open your browser and type:
http://localhost/wordpress - To go to the dashboard, type:
http://localhost/wordpress/wp-admin
If you forget to start Apache and MySQL, your site won’t load. So always start them first.
10. Frequently Asked Questions
Q1: Is it safe to install WordPress locally?
Yes, it’s perfectly safe. Everything runs offline, and no one else can access your local site unless you configure advanced settings to share it.
Q2: Can I move my local WordPress site to real hosting later?
Absolutely. You can migrate your local site to live hosting using plugins like All-in-One WP Migration or Duplicator, or by manually exporting the database and files.
Q3: Do I need internet after installing XAMPP and WordPress?
Once installed, you don’t need internet to run the site. But you’ll need it for downloading plugins, themes, or WordPress updates.
Q4: Can I install multiple WordPress sites locally?
Yes! Just create a new folder inside htdocs (e.g., site2) and a new database in phpMyAdmin. Then repeat the installation steps.
Q5: Is XAMPP the only option?
No, there are alternatives like WAMP (for Windows), MAMP (for Mac), and Local by Flywheel. But XAMPP is the most widely used.
11. Final Thoughts
So far, we’ve done a great job. We started from scratch, installed XAMPP, set up WordPress, created a database, and logged into the dashboard—all on a personal computer without spending a single rupee on hosting. This setup is perfect for learners, developers, and anyone who wants to test themes or plugins before deploying them on a live site.
When you feel comfortable, the next step will be to buy real hosting and connect your domain. But until then, practicing locally is the best way to sharpen your WordPress skills without risk.
⚠️ Disclaimer
This tutorial is for educational purposes only. Running a local server environment is safe, but your local WordPress installation will not be visible to others on the internet unless you configure advanced settings. Always remember that when moving to a live website, additional steps such as securing databases, setting up SSL, and choosing strong passwords are necessary.
Tags:
WordPress installation, XAMPP tutorial, install WordPress on PC, localhost WordPress, phpMyAdmin WordPress setup
Hashtags:
#WordPress #XAMPP #WebDevelopment #Localhost #Tutorial #BloggingTips