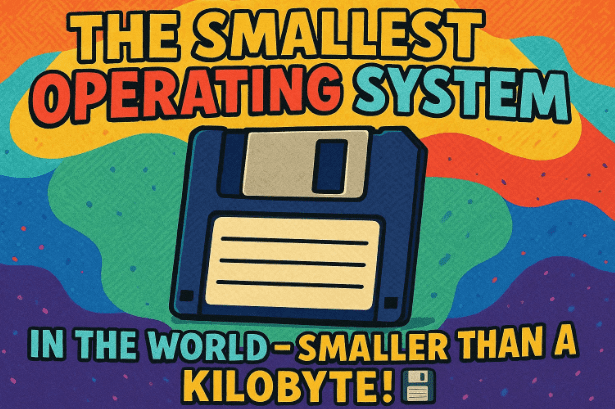
Have you ever wondered just how small an operating system could possibly be? We’re used to operating systems that gobble up gigabytes of storage and demand powerful processors. But what if I told you there’s an OS that claims to be less than one kilobyte—specifically, just 512 bytes?
That’s the astounding claim behind Boot OS, an open-source project created by the brilliant Oscar Toledo. It’s an operating system designed to fit entirely within a single boot sector, which is the smallest logical division of a storage device. The sheer audacity and technical elegance of this concept are mind-blowing, and naturally, we had to put it to the test!
In this detailed article, we’ll walk through the process of setting up, booting, and interacting with this minuscule marvel. Prepare to journey back to the fundamentals of computing and discover just what’s possible when every single byte counts!
Understanding the Marvel: What is Boot OS?
Before we dive into the technical setup, let’s take a moment to appreciate what Boot OS is. It’s more than just a novelty; it’s a profound demonstration of efficiency and low-level programming mastery.
Boot OS is a boot sector operating system. This means the entire operating system code is contained within the first sector of a storage device (like a hard drive or floppy disk image), which is typically 512 bytes. This is where the computer’s BIOS or UEFI firmware looks for instructions to start the boot process. By residing here, Boot OS effectively becomes the very first program your computer runs, and the only one it needs to run a basic operating environment.
To put its size in perspective: the operational part of Boot OS is 512 bytes. That is 24 times smaller than a blank, empty Microsoft Word document! Its source code is larger, around 20 kilobytes, but the final, compiled binary is compressed to fit the strict 512-byte limit. This focus on size forces an extremely minimalist design, offering a command-line interface and a handful of essential functions, which we’ll explore later.
Oscar Toledo’s project is a fantastic piece of engineering, and you can explore the code and documentation yourself on the official GitHub page: https://github.com/nanochess/bootOS
Step-by-Step Guide to Setting Up Boot OS 🛠️
Since Boot OS is an entirely different beast from modern operating systems, we can’t just install it on a standard hard drive. We’ll use a virtual machine environment to safely set it up and run it. The setup involves getting the source code, compiling it, and creating a bootable image.
1. Acquiring the Source Code
Our first step is to get the project files onto our local machine.
- Clone the Git Project: We need to use Git to clone the Boot OS repository from the project’s GitHub page. This process downloads all the source files and scripts to your computer.
2. Compiling the Operating System
Once the source code is on your machine, it needs to be turned into the small, raw binary file that is the actual 512-byte operating system.
- Introducing NASM: This process requires an assembler. The Boot OS project uses NASM (Netwide Assembler), which is a powerful and widely-used x86 assembler. If you don’t have it, you’ll need to install it on your system. NASM takes the human-readable assembly language source code and translates it into machine code—the binary instructions the computer can execute.
- The Assembly Command: To compile the OS, we run a specific command provided in the project’s documentation. While the exact syntax might look like an ancient spell to those unfamiliar with assembly, its purpose is straightforward: it tells NASM to take the Boot OS source file and output a raw binary file. I’m not a fluent assembly speaker myself, but my best guess is that this command effectively compresses and transforms the relatively larger source code into the minuscule 512-byte raw binary file that will become our boot sector OS.Technical Insight: The output is a raw binary file because a boot sector cannot contain complex file system structures. It needs to be a direct sequence of instructions that the machine can execute immediately upon reading the sector.
3. Creating the Bootable Image
We’ve successfully generated the 512-byte operating system file. Now, we need a “home” for it—a storage device that a virtual machine can boot from. We’ll simulate an old-school floppy disk.


- Create an Empty Floppy Disk Image: We start by creating a file that is exactly the size of a floppy disk image (e.g., a standard 1.44 MB image), but filled with zeros. This serves as our empty virtual “disk.”
- Combining the Binary and the Image: The next crucial step is combining our raw 512-byte OS binary with the empty disk image. Since the OS is a boot sector OS, we copy the 512-byte binary directly onto the very beginning of the floppy disk image (the first 512 bytes). This action effectively turns the empty floppy image into a bootable floppy disk image containing Boot OS.
So far, we’ve done a great job setting up the necessary components—source code cloned, operating system compiled, and a bootable floppy image created. Let’s move on to the next major step: booting the system!
Firing Up the Virtual Machine with QEMU
With our bootable floppy image ready, it’s time to bring Boot OS to life! We’ll use a robust and popular virtual machine emulator for this purpose.
4. Introducing QEMU
We’ll use QEMU (Quick Emulator) to run our bootable image. QEMU is a generic and open-source machine emulator and virtualizer. It’s often favored for low-level OS development and running obscure systems because of its flexibility and ability to emulate various hardware configurations, including booting from floppy disk images.
- Booting the OS: We launch QEMU and instruct it to boot using our newly created bootable floppy disk image. QEMU will simulate a computer starting up, reading the instructions from the first 512 bytes of our image, and executing the Boot OS code.
And just like that, after a few moments of setup, we are greeted with the Boot OS command line! It works! 🎉
5. Confirming the Size
Before we get into the fun of interacting with the OS, I wanted to quickly confirm the size. In a world where even a simple text file can be several kilobytes, confirming that the running operating system is indeed just 512 bytes is essential to the magic of this project.
- We can confirm this by checking the size of the compiled binary file on our host machine. It consistently shows the size of 512 bytes. This is an incredible feat of optimization! While the source code file is indeed around 20 kilobytes, the final, operational OS adheres perfectly to the boot sector limit.
We’ve successfully booted an OS smaller than the smallest unit of modern file allocation! Let’s move on to exploring what this tiny system can actually do.
Interacting with the Boot OS Command Line ⌨️
As expected, a 512-byte OS doesn’t offer a fancy graphical user interface (GUI). We are firmly rooted in a Command Line Interface (CLI) environment. This is where efficiency reigns supreme, and every keystroke matters. According to the documentation, there are a few core commands available to us.
Before we start using the commands, we need to perform an initial setup action. This highlights the minimalist nature of the OS, where even basic directory structures need a manual kickstart.
1. Initialization and System Check
The first steps are all about getting the system ready and confirming its identity.
- The
formatCommand: Upon first boot, you must type the commandformat. This isn’t a typical disk formatting operation; it initializes the directory structure for the operating system, preparing it for file storage and management. Without this step, you can’t create or view files. - Checking the Version: Next, you can check the operating system’s version. The specific keyword reveals the current OS identity. Interestingly, at the moment, there’s no version number outputted, but the command still outputs a confirmation message that shows you are indeed using Boot OS, which is a neat touch for an OS this small.
2. File Management: The Core Functionality
The main purpose of a basic OS is file management—creating, listing, and deleting files. Boot OS has streamlined these functions down to a minimum of keywords and syntax.
Listing Files
- The Directory Keyword: You use a specific, concise keyword to check the contents of your directory. Initially, since we just ran
format, it will show that we have no files.
Creating New Files with enter
This is where the process gets a little more involved, demonstrating a deep-level interaction that is rarely seen in modern systems.
- Start the Creation: You initiate file creation using the keyword
enter. - Specifying a New Line: After the
enterkeyword, you must add a plus sign (+). This symbol is critical, as I believe it specifies the start of a new line or block of input, signifying to the OS that you are beginning to write the file content. - Inputting Content (Hexadecimal Text): This is a key difference from modern text editors. You can enter your file content, but it’s not a standard, free-flowing text area.
- You can input up to 512 hexadecimal bytes in total.
- The input is broken up into lines, with each line allowing up to 128 characters of text (which corresponds to 64 bytes of hexadecimal data, as each character is represented by two hexadecimal digits).
- The documentation suggests breaking up your text into chunks of four, eight, or sixteen bytes for organization.
- Continuation and Termination:
- After each line of text you input, you must type the plus symbol (
+) again to signal that you wish to write the next set of characters on a new line. - Once you are completely done writing your file content, you must add a final plus sign (
+) at the end. This final symbol tells the OS where the file effectively ends.
- After each line of text you input, you must type the plus symbol (
- Naming the File: After all the content is input and terminated, you proceed to give your new file a name. For our example, let’s call it
helloworld.
Displaying File Content
- Viewing the File: To see what you wrote, you simply type the file’s name:
helloworld. The OS then outputs the content you painstakingly entered!
Deleting Files
- The Deletion Keyword: The final essential command is for file deletion. You use a specific keyword followed by the file’s name to remove it from the directory. For instance, to clean up, we can use the command to delete the
helloworldfile we just created. A subsequent check of the directory will confirm the file is gone.
For being just 512 bytes in size and implementing basic file system operations—including creation, listing, and deletion—this operating system is incredibly cool and a fantastic educational tool.
Exploring the Boot Sector Concept and Structure
We’ve covered the practical steps, but let’s delve a little deeper into the fundamental concept that makes Boot OS possible: the boot sector.
What is the Boot Sector? 🧱
The boot sector is a crucial, foundational component of any bootable storage device (hard disk, SSD, floppy, USB drive, etc.).
- Location: It is found right at the very beginning of the storage device.
- Purpose: The boot sector holds essential instructions—a tiny piece of code—that the computer’s firmware (like BIOS or UEFI) executes to kickstart the operating system. It’s the ignition key for your computer. Without it, the computer wouldn’t know where to find the main operating system files and how to begin loading them into memory.
How Boot OS Utilizes the Boot Sector
In a typical scenario, the boot sector doesn’t contain the whole OS; it contains a tiny program called the boot loader. This boot loader’s job is simply to find and load the larger, primary operating system files (like Windows or Linux) that are stored elsewhere on the disk.
The genius of Boot OS is that it has compressed the entire operating system functionality—the commands, the file management, the system logic—to fit within the 512-byte limit of the boot sector itself!
- Self-Contained: As far as we can tell, Boot OS runs entirely from this single 512-byte block. It uses the available memory and the computer’s basic I/O (Input/Output) functions directly to run its command line and manage its tiny, internal file system. This is what makes it a “boot sector operating system.” It eliminates the need for a separate, larger OS kernel and file system structure.
This is a testament to the power of highly optimized, low-level programming!
Bonus Content: Boot Sector Programs and Games! 🕹️
The Boot OS project itself is impressive, but the fun doesn’t stop there. The world of low-level assembly programming often features astonishingly small, standalone programs, and some of these are made to run directly from a boot sector, independent of Boot OS.
It’s important to clarify that these boot-sector software programs are generally not applications you install into Boot OS and launch from its command line. Rather, they are standalone programs that, like Boot OS, are compiled into a 512-byte boot sector image and are booted directly by QEMU. They replace the operating system entirely and launch immediately upon boot.
Setting Up a Boot Sector Program
The process to set up these programs is very similar to how we set up Boot OS:
- Clone the Project: First, get the specific program’s Git project (e.g., the code for a game) onto your machine.
- Compile: You change into the program’s directory and run the compilation command specified in its documentation. Similar to before, this command likely uses an assembler (like NASM) to turn the source code into a raw 512-byte binary.
- Boot with QEMU: You then instruct QEMU to boot this 512-byte raw binary, which acts as the entire bootable image.
A Look at a Boot Sector Game: Doom
One such amazing example is a game inspired by classics like Doom, also running from a 512-byte boot sector!
- Gameplay and Graphics: When it boots up, you are met with a very simple, wireframe-like view. There are colorful cubes that act as enemies. The color of the cubes changes based on how close they are to you, acting as a proximity warning. The goal, naturally, is to shoot them!
- Controls (A Trip Back in Time): The controls are far from a modern setup, reflecting the constraints of the minimal code and direct hardware access:
- Turn Left: $\text{Left Control}$
- Turn Right: $\text{Right Control}$ or $\text{Left Alt}$
- Move Forward: $\text{Left Shift}$
- Shoot: $\text{Right Shift}$ (which appears as a simple screen flicker)
- The Challenge: I found the game to be nearly impossible to play while moving! The best strategy seemed to be standing still and shooting as enemies approached.
For a piece of software—a functional game with simple graphics, movement, and enemy tracking—that is running from a single 512-byte boot sector, it is genuinely impressive and a fantastic demonstration of extreme optimization.
We’ve covered all the steps and explored both the OS and a bonus program! It truly showcases the incredible feats of engineering that can be achieved when working at the byte level.
Frequently Asked Questions (FAQ) About Boot OS
Q1: Is Boot OS a practical operating system for daily use?
A: Absolutely not. Boot OS is a purely educational and technical demonstration project. It lacks modern features like a robust file system, networking, complex memory management, a GUI, and the ability to run standard applications. It’s a fascinating proof-of-concept that shows the absolute minimum required to be called an OS, not a competitor to Windows or Linux.
Q2: What programming language is Boot OS written in?
A: Boot OS is written almost entirely in x86 Assembly Language. This low-level language allows the programmer direct control over the hardware and memory, which is essential for achieving the extreme size optimization required to fit the entire OS into 512 bytes.
Q3: Why is the source code 20 kilobytes if the OS is 512 bytes?
A: The source code contains all the comments, variable names, labels, and human-readable instructions that make the code understandable and maintainable. The assembler (NASM) is responsible for translating this source code into the final machine code, which is then highly optimized and compressed to ensure the resulting raw binary file is precisely 512 bytes. It’s the difference between a detailed blueprint (source code) and the highly compressed, functional machine (binary).
Q4: Can I run Boot OS on my physical computer?
A: Theoretically, yes, if you wrote the bootable image onto a physical floppy disk or a similar device and configured your BIOS to boot from it. However, this is highly discouraged as it involves low-level disk operations and could be risky for a primary machine. Using a virtual machine like QEMU is the safest and recommended way to explore Boot OS.
Disclaimer ⚠️
This article is for educational and informational purposes only. Setting up and booting low-level operating systems or boot sector programs involves using tools like Git, NASM, and QEMU, and manipulating disk images. These activities carry a small risk if not performed correctly. Do not attempt to write or install Boot OS on your primary hard drive or storage device. Always perform these experiments within a safe, isolated virtual machine environment. We are not responsible for any data loss or damage that may result from following the steps described herein.
Conclusion
Boot OS stands as a fantastic example of minimalism and technical brilliance in the world of computing. Oscar Toledo has given us a fully functional, albeit extremely basic, operating system that fits into the smallest imaginable space. This exploration takes us back to the roots of computing, reminding us that with enough dedication and low-level mastery, size truly doesn’t matter when it comes to fundamental functionality. We hope you enjoyed this deep dive into the 512-byte wonder!
Hashtags: #BootOS #OperatingSystem #BootSector #512Bytes #AssemblyLanguage #Programming #Minimalism #QEMU #RetroComputing #TechDeepDive


