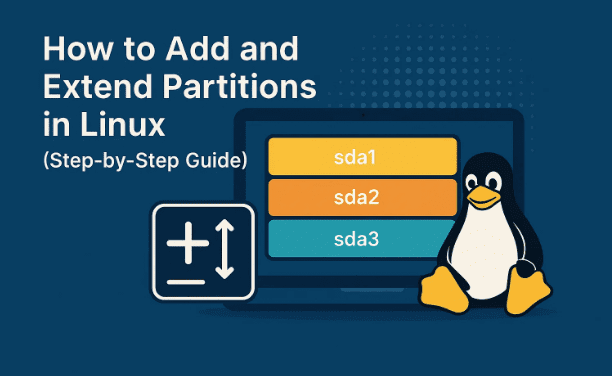
Managing storage in Linux often requires adding new partitions or extending existing ones. Whether you’re running a virtual machine or working directly on a Linux desktop/server, learning how to safely create, format, and mount partitions is an essential skill.
In this guide, we’ll walk through the entire process: from adding a new virtual hard disk, creating partitions, formatting them with a filesystem, and finally making them persist across reboots. By the end, you’ll know not only how to add space to your Linux system but also how to ensure it is permanently available.
📑 Table of Contents
- Why Partition Management is Important
- Adding a Virtual Disk in VMware/VirtualBox
- Identifying the New Disk in Linux
- Creating a New Partition with fdisk
- Formatting the Partition with a Filesystem
- Mounting the Partition Temporarily
- Making Mounts Permanent with fstab
- Creating Multiple Partitions (2GB Example)
- Verifying Persistent Mounts After Reboot
- Best Practices and Safety Tips
- Frequently Asked Questions
- Final Thoughts
1. 🔍 Why Partition Management is Important
Before we jump into commands, let’s understand why partitions matter. In Linux, storage devices like SSDs and HDDs cannot be used directly. They first need to be divided into partitions, which are then formatted with filesystems and mounted to directories for actual use.
- Without partitions, your storage is invisible to the operating system.
- Without formatting, it cannot store files.
- Without mounting, it cannot be accessed by users or applications.
So, partitioning is the bridge between raw storage and usable space.
2. ➕ Adding a Virtual Disk in VMware or VirtualBox
If you’re working in a virtual machine, you’ll first need to add a new virtual disk. This simulates adding an extra SSD or HDD to your system.
Here’s how you can do it in VMware:
- Open your virtual machine settings.
- Scroll down and click Add Device.
- Choose Hard Disk → click Next.
- Select SATA (you can also select NVMe if supported).
- Choose Create a New Virtual Disk → Next.
- Allocate size (e.g., 2GB) for the disk.
- Select Store virtual disk as a single file.
- Finish and confirm.
At this point, you’ve successfully added a virtual disk. But Linux won’t see it until you boot the VM and configure it.
3. 🔎 Identifying the New Disk in Linux
Once the VM boots, open a terminal and run:
lsblk
This command lists all block devices (hard disks, SSDs, USB drives).
- You’ll see existing partitions like
/dev/sda,/dev/sda1. - The new 2GB disk will appear as
/dev/sdb(or similar).
At this stage, the disk exists, but it has no partition and no filesystem—so we cannot use it yet.
4. 🛠 Creating a New Partition with fdisk
Now that we’ve identified the disk, let’s create a partition using fdisk.


- Run the command:
sudo fdisk /dev/sdb - Inside fdisk:
- Type
g→ to create a GPT partition table. - Type
n→ to create a new partition. - Accept default values for partition number, first sector, and define size (e.g.,
+1Gfor a 1GB partition). - Type
t→ to change type, select Linux filesystem. - Type
w→ to write changes.
- Type
Congratulations! You’ve just created a 1GB Linux partition on your disk.
5. 🧹 Formatting the Partition with a Filesystem
A partition is just a container; it needs a filesystem to actually store files. The most common one in Linux is ext4.
Run:
sudo mkfs.ext4 /dev/sdb1
This formats the partition as ext4. You could also use xfs or btrfs, depending on your system’s needs.
6. 📂 Mounting the Partition Temporarily
Now that we have a formatted partition, we need to mount it to a directory. Without mounting, the OS cannot access it.
- Create a folder to act as mount point:
sudo mkdir /part1 - Mount the partition:
sudo mount /dev/sdb1 /part1 - Verify:
lsblk
You’ll see /dev/sdb1 mounted at /part1.
⚠️ Note: This mount is temporary. If you reboot the system, the partition will be unmounted.
7. 📌 Making Mounts Permanent with fstab
To ensure your partition mounts automatically after every reboot, you must edit /etc/fstab.
- First, get the partition UUID:
blkid /dev/sdb1 - Copy the
UUIDvalue. - Edit fstab:
sudo nano /etc/fstab - Add a new line at the bottom:
UUID=xxxx-xxxx /part1 ext4 defaults 0 2 - Save and exit.
- Reload systemd:
sudo systemctl daemon-reload
Now, even after a reboot, /dev/sdb1 will always mount at /part1.
8. 📊 Creating Multiple Partitions (2GB Example)
Sometimes you don’t want to allocate the full disk to one partition. For example, let’s split our 2GB disk into two partitions:
- 1GB (sdb1) → mounted at
/part1. - 900MB (sdb2) → mounted at
/part2.
Steps:
- Run
fdisk /dev/sdbagain. - Create partition 2:
n→ size+900M. - Write changes with
w. - Format new partition:
sudo mkfs.ext4 /dev/sdb2 - Create mount point:
sudo mkdir /part2 - Mount it:
sudo mount /dev/sdb2 /part2 - Repeat the fstab process to make it permanent.
Now your system has two usable partitions from the same disk.
9. ✅ Verifying Persistent Mounts After Reboot
After completing the steps, reboot your system:
sudo reboot
Once the machine restarts, run:
lsblk
You should see both /dev/sdb1 and /dev/sdb2 mounted at /part1 and /part2.
If they didn’t mount, double-check your fstab entries for typos.
10. ⚠️ Best Practices and Safety Tips
Partitioning is powerful, but mistakes can cause data loss. Keep these tips in mind:
- Always backup important data before creating or editing partitions.
- Double-check the disk name (
/dev/sda,/dev/sdb) before running fdisk—choosing the wrong disk could erase your main OS. - Use
lsblkfrequently to confirm changes. - Avoid saving inside
/etc/fstabwithout testing your mount first—incorrect entries can prevent Linux from booting. - Practice on a virtual machine before attempting this on production systems.
11. ❓ Frequently Asked Questions
Q1: Can I resize a partition without deleting it?
Yes, using tools like gparted or resize2fs you can extend partitions, but it’s riskier than creating new ones.
Q2: Why use UUID instead of device names like /dev/sdb1?
Device names can change if you add or remove disks. UUIDs are unique and permanent, making them safer for fstab.
Q3: Which filesystem should I choose?
ext4– default for most Linux systems.xfs– good for servers handling large files.btrfs– advanced features like snapshots.
Q4: Can I mount a partition without formatting?
Only if it already has a valid filesystem. Otherwise, Linux won’t recognize it.
Q5: How do I unmount a partition safely?
Run:
sudo umount /mount/point
🏁 Final Thoughts
Partition management may sound intimidating at first, but once you break it into steps—add disk, create partition, format, mount, and make permanent—it becomes a logical process.
In our walkthrough, we successfully:
- Added a 2GB virtual disk.
- Created multiple partitions using fdisk.
- Formatted them with ext4 filesystem.
- Mounted them both temporarily and permanently using fstab.
Now you can manage your Linux storage with confidence, whether you’re running a virtual lab or configuring a production server.
⚠️ Disclaimer
Partitioning and formatting operations can result in data loss if performed incorrectly. Always back up important data before attempting changes. The steps above are provided for educational purposes and should first be practiced in a virtual machine environment.
Tags
linux partitioning tutorial, add partition linux, extend partition linux, fdisk guide, mount linux disk, ext4 format linux, fstab permanent mount
Hashtags
#Linux #Partition #SysAdmin #LinuxTutorial #StorageManagement #fstab