When setting up a new Windows 11 computer, Microsoft strongly encourages you to sign in using your Microsoft account — the same one you use for Outlook, OneDrive, or Xbox. This makes synchronization easier, but not everyone wants their computer tied to the cloud.
Some users prefer the simplicity, privacy, and independence of a local account — a standalone login that doesn’t rely on online services or Microsoft servers.
However, over time Microsoft has made it increasingly difficult to set up or switch to local accounts.
In this guide, we’ll go through two complete methods for switching back to a local user account on Windows 11:
- The easy and recommended method (by creating a new local account).
- The harder but cleanest method (by reinstalling Windows 11 with only a local user account).
Along the way, we’ll discuss what happens to your files, how to transfer your data safely, and which settings may change.
🌐 1. Why Microsoft Pushes Microsoft Accounts
Over the past few years, Microsoft has re-engineered Windows to work more like a connected ecosystem than a standalone operating system. When you use a Microsoft account:
- Your settings and themes sync between devices.
- Your documents and photos automatically back up to OneDrive.
- You can recover your password or device remotely.
- Windows integrates with Microsoft Store and Outlook.
While convenient, it also means your local PC is now linked to Microsoft’s cloud. Many users — especially those who value privacy or simplicity — find this unnecessary or intrusive.
That’s where local accounts come in.
🔒 2. Benefits of a Local Account
Before jumping into the setup process, let’s understand why many users still prefer local accounts despite Microsoft’s persistent nudging.
Key advantages include:
- Privacy: Your login credentials and data aren’t tied to Microsoft servers.
- Offline access: You can log in even without an internet connection.
- Less telemetry: Limited background syncing with Microsoft services.
- No forced OneDrive integration: Local accounts let you manage storage your way.
- Ideal for shared or guest PCs: Useful in offices, schools, or homes with multiple users.
If you mainly use your computer offline, or simply don’t want your personal profile linked to the cloud, a local account is the way to go.
🧩 3. Method 1: The Easy Way — Create a New Local Account
This is the most reliable and least risky method.
Instead of deleting your existing Microsoft-linked profile, you’ll add a new user account that is local (offline) and then switch to it.


Let’s move step by step.
Step 1: Open Settings
Press Windows + I to open the Settings app.
From the left sidebar, choose Accounts.
Step 2: Confirm Your Current Account
Under Your Info, you’ll see your Microsoft account details — for example, something like:
askleoexample@hotmail.com
Microsoft Account
This confirms you’re currently signed in with an online account.
Step 3: Add a New Local Account
- In the left pane, click Other users (in some versions, labeled Family & other users).
- Under Other users, click Add account.
- When Windows asks for an email or phone number, choose “I don’t have this person’s sign-in information.”
- On the next page, click Add a user without a Microsoft account.
This is the hidden option that allows you to create a traditional local user account.
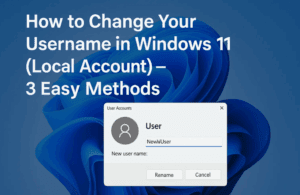
Step 4: Create Credentials
Enter a username and password for the new account.
Microsoft will now force you to set up three security questions for password recovery.
🟢 Tip: Use answers you can actually remember — they’re your only way back in if you forget your password.
Once you’ve completed the questions, click Next.
Congratulations — your local account now exists on your system.
⚙️ 4. Making the Local Account an Administrator
By default, new local accounts are standard users, meaning they can’t install or modify system-wide apps.
If you plan to use this new account as your main one, it’s best to make it an administrator.
Here’s how:
- Go back to Settings → Accounts → Other Users.
- Under your newly created account, click Change account type.
- In the drop-down menu, select Administrator.
- Click OK.
Now your local account has full system permissions.
💡 A quick note:
An administrator account doesn’t mean “always admin mode.”
It simply means that when Windows asks for permission (via the User Account Control dialog), you can approve actions without logging into another account.
📂 5. Switching Over and Migrating Your Data
Now that your local account is ready, it’s time to start using it.
Log out of your current Microsoft account (click Start → Profile → Sign out) and sign in with your new local account credentials.
You’ll now have a clean desktop environment, separate from your old one.
Moving Your Files
You can manually copy important data from your old user profile:
- Go to File Explorer → This PC → C: → Users.
- Open your old Microsoft-linked folder (for example,
C:\Users\LeoorC:\Users\<email>). - Copy folders like Documents, Downloads, Desktop, and Pictures into your new local account’s folders.
This ensures your personal files transfer smoothly.
Reinstalling Apps
Apps installed under your Microsoft account may not automatically appear in your local account.
- Microsoft Store apps are tied to your Microsoft login, so you’ll need to reinstall them if needed.
- Desktop programs (like Chrome, VLC, Photoshop, etc.) often give you an option to “Install for all users.”
- If you did this originally, those apps will still appear.
- If not, simply reinstall them from their official websites while logged into your local account.
⚠️ 6. Common Issues When Switching Accounts
Switching from an online to a local account can lead to a few hiccups. Let’s go through them so you’re prepared.
1. Some apps won’t carry over
Applications tied to your Microsoft Store account (like Xbox or Mail) will need re-sign-ins or reinstallation.
2. OneDrive backup stops automatically
Since you’re no longer connected to a Microsoft account, your files will stop syncing to OneDrive unless you log in manually.
3. Edge browser sync will reset
Your Edge favorites, history, and passwords sync through your Microsoft profile. To keep them, export or sync them before switching.
4. Hidden folders and permissions
You might face “Access Denied” errors while copying data between user profiles. Right-click the target folder → Properties → Security → Edit → Give your new account full control.
These are minor hurdles, but they’re manageable. Once you adjust, your system will feel lighter and more private.
🧱 7. Method 2: The Hard Way — Reinstalling Windows with a Local Account
If you want your entire PC to be built around a local account from scratch, you can reinstall Windows 11.
This method wipes everything and gives you a clean system without ever signing into Microsoft during setup.
It’s more advanced, but here’s an overview.
Step 1: Create Windows 11 Installation Media
- Visit the Microsoft Windows 11 Download Page.
- Use the Media Creation Tool to make a bootable USB installer (at least 8 GB).
Step 2: Boot From the USB
Restart your PC → enter your boot menu (commonly F12, F9, or Esc) → choose the USB drive.
Step 3: Bypass Microsoft Account Setup
When you reach the setup screen asking to sign in to a Microsoft account:
- Disconnect your internet (unplug Ethernet or disable Wi-Fi).
- Press Shift + F10 to open Command Prompt.
- Type the command:
OOBE\BYPASSNROThis restarts setup and unlocks the “Offline Account” option.
Now you can complete setup entirely offline, creating a pure local user account.
Step 4: Complete Installation
Proceed normally — choose your region, keyboard layout, username, and password.
Once setup finishes, reconnect to Wi-Fi, and you’ll have a Windows 11 machine with no Microsoft account tied to it.
⚠️ Note: Microsoft occasionally updates Windows installers to block these workarounds. If the option disappears, you may need an earlier ISO or third-party tool to create a modified installer.
❓ 8. FAQ: Local vs Microsoft Account Questions
Q1. Can I remove my Microsoft account completely after creating a local one?
Yes. Once you’re logged in as your new local user, go to Settings → Accounts → Other Users, select your old Microsoft account, and click Remove.
Just make sure you’ve backed up all data first.
Q2. Will I lose files if I switch to a local account?
No. Your data stays under the original user folder, but you must manually copy it to your new account.
Q3. Do I need an internet connection for a local account?
No, that’s one of its advantages. You can log in and use your PC completely offline.
Q4. Can I use Microsoft Store with a local account?
Yes, but you’ll be prompted to sign in only for app installations — it won’t link your entire Windows login.
Q5. Is it safe to use a local account on a shared PC?
Yes, but always protect it with a strong password since it lacks online recovery options.
Q6. Can I revert back to a Microsoft account later?
Absolutely. Go to Settings → Accounts → Your info → Sign in with a Microsoft account instead to reconnect anytime.
🏁 9. Final Thoughts
Switching from a Microsoft account to a local one gives you back control of your computer.
While it takes a few extra steps, the benefits — privacy, simplicity, and independence — are worth it for many users.
If you’re not ready to reinstall Windows completely, the first method (creating an additional local account) strikes a perfect balance.
You get the freedom of a local profile without losing access to your existing setup.
Ultimately, both options let you decide how connected or independent you want your Windows experience to be.
⚠️ Disclaimer
This guide is intended for educational purposes. Always back up your important files before creating or deleting accounts. Windows versions and settings may vary slightly depending on updates. For the latest official documentation, refer to Microsoft’s help page:
👉 https://support.microsoft.com/en-us/windows
#Windows11 #LocalAccount #MicrosoftAccount #Privacy #WindowsTips #TechGuide #AskLeo


