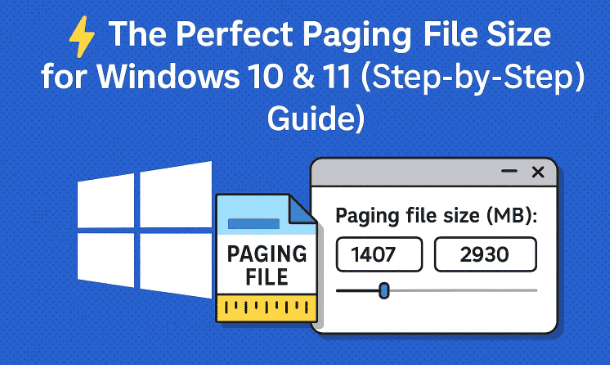
If you’ve ever experienced your PC slowing down despite having a decent amount of RAM, there’s a good chance that your paging file settings might not be optimized. The paging file, also known as virtual memory, plays a crucial role in how smoothly Windows handles memory-intensive tasks.
Many users ignore this setting, but here’s the truth:
- Setting the paging file too small can cause crashes or performance bottlenecks.
- Setting it too large can waste disk space and sometimes slow things down.
- Configuring it correctly can instantly improve stability and performance, especially on systems with lower RAM.
In this article, we’ll cover everything you need to know about paging files on Windows 10 and Windows 11, including:
- What the paging file actually does.
- When you should rely on automatic settings vs. manual (custom size).
- The ideal paging file size for 2 GB, 4 GB, 8 GB, and 16 GB RAM systems.
- Step-by-step instructions with screenshots explained in words.
- How to test if your chosen values are correct.
- Common myths and mistakes to avoid.
By the end, you’ll know exactly how to configure paging file size for your system.
🧠 What Is a Paging File (Virtual Memory)?
Let’s start simple before we dive into advanced tweaks.
The paging file (pagefile.sys in Windows) is a hidden file stored on your hard disk or SSD. Windows uses this file as extra RAM whenever your physical memory is about to run out.
Think of it this way:
- RAM = your desk where you actively work.
- Paging file = a filing cabinet nearby where you can offload less important items when your desk gets full.
So, when RAM usage goes above 90%, Windows starts temporarily moving some inactive processes to the paging file. This prevents crashes and keeps your system running, even if it’s slightly slower compared to RAM.
👉 Note: Using an SSD instead of an HDD significantly improves paging performance because SSDs are much faster at read/write operations.
⚙️ How to Access Paging File Settings in Windows
Before changing anything, let’s walk through how to reach the settings menu.
- Open System Properties
- Press
Windows + R, type:sysdm.cpland hit Enter. - This opens the System Properties window.
- Press
- Go to Advanced Settings
- Select the Advanced tab.
- Under Performance, click Settings.
- Virtual Memory Section
- In the Performance Options window, again select Advanced.
- At the bottom, you’ll see Virtual memory with a description: “A paging file is an area on the hard disk that Windows uses as if it were RAM.”
- Click Change to configure it.
You’ll now see three options:


- Automatically manage paging file size
- Custom size
- No paging file (not recommended)
🔍 Automatic vs. Custom Paging File Size
This is the point where most users get confused. Should you leave it to Windows or set it manually? Let’s break it down.
1. Automatic Management
Best for:
- Users with 16 GB RAM or more.
- Systems that rarely go above 60–70% RAM usage.
In this case, Windows is smart enough to allocate paging file size dynamically based on your workload.
2. Custom Size
Best for:
- Users with 2 GB, 4 GB, or 8 GB RAM.
- Systems where RAM usage frequently crosses 70–80%.
- Those who want to fine-tune performance and prevent Windows from over-allocating space.
👉 Never select “No paging file” unless you have a very specific reason and more than 32 GB of RAM. Even then, some applications and drivers expect a paging file to exist.
📐 How to Calculate the Right Paging File Size
Here’s where things get interesting. Many guides repeat Microsoft’s old recommendation:
- Initial size = 1.5 × physical RAM
- Maximum size = 3 × physical RAM
While this works as a rule of thumb, it isn’t always optimal. Instead, we’ll use a practical method to calculate values.
Step 1: Find Your Installed RAM
- Right-click on the taskbar and select Task Manager.
- Go to the Performance tab → Memory.
- Note your total RAM (e.g., 2 GB, 4 GB, 8 GB, or 16 GB).
Step 2: Convert RAM to MB
Multiply your RAM size in GB by 1024 to get MB.
- 2 GB × 1024 = 2048 MB
- 4 GB × 1024 = 4096 MB
- 8 GB × 1024 = 8192 MB
- 16 GB × 1024 = 16384 MB
Step 3: Set Initial Size = Physical RAM in MB
- For 4 GB RAM → Initial size = 4096 MB
- For 8 GB RAM → Initial size = 8192 MB
This ensures paging file has enough base capacity to support your physical memory.
Step 4: Set Maximum Size
Here’s the trick:
- Start by multiplying your RAM (in MB) by 2.
- If Windows accepts it (shows a restart required message), you’re good.
- If not, try multiplying by 1.5.
Example:
- 8 GB RAM (8192 MB) → Max size = 16384 MB (×2).
- If that fails, use 12288 MB (×1.5).
Step 5: Verify Settings
After entering values, click Set → OK.
If you get this message:
“The changes you have made require you to restart your computer before they can take effect.”
That means your values are valid.
Restart your PC to apply changes.
📊 Recommended Paging File Sizes by RAM
Here’s a quick reference table:
| RAM Installed | Initial Size (MB) | Maximum Size (MB) | Recommended Setting |
|---|---|---|---|
| 2 GB | 2048 | 4096 (×2) or 3072 (×1.5) | Custom |
| 4 GB | 4096 | 8192 or 6144 | Custom |
| 8 GB | 8192 | 16384 or 12288 | Custom |
| 16 GB | 16384 | 32768 (if usage >70%) or Automatic if usage <70% | Auto/Custom |
👉 For 16 GB or higher, Automatic is often the best choice unless you run heavy workloads like video editing, 3D rendering, or virtual machines.
⚠️ Common Mistakes to Avoid
Before we move forward, let’s clear up some mistakes many users make.
- ❌ Setting paging file to 0 (No paging file) – Can cause system crashes and memory errors.
- ❌ Using extreme values (e.g., 10× RAM) – Wastes disk space and doesn’t improve performance.
- ❌ Forgetting to restart – New values don’t apply until after a reboot.
- ❌ Placing paging file on a slow HDD when you already have a faster SSD. Always prefer the SSD.
🧪 How to Check If Paging File Is Helping
Once you’ve configured your paging file, you may wonder: how do I know if it’s working?
Here’s how to test:
- Open Task Manager → Performance → Memory.
- Observe Commit Charge (Committed memory). This shows how much memory is allocated between RAM and paging.
- If the committed value is consistently higher than your physical RAM, your paging file is actively helping.
- If your system runs smoother after enabling custom paging, you’ve found the right setting.
🙋 Frequently Asked Questions
Q1. Will increasing paging file size make my PC faster?
Not directly. It doesn’t speed up your RAM, but it prevents crashes and lag when RAM is full. It’s more about stability than raw speed.
Q2. Should I disable paging file if I have 32 GB of RAM?
Not recommended. Some apps (and even Windows itself) require a paging file, even if you rarely use it.
Q3. Is paging file harmful for SSDs?
No. Modern SSDs are built for heavy read/write cycles. The paging file won’t significantly impact lifespan under normal usage.
Q4. Can I move the paging file to another drive?
Yes. If you have a faster secondary SSD, moving the paging file there may slightly improve performance.
Q5. Do gaming PCs benefit from custom paging file settings?
Yes, especially if you play modern AAA games on 8 GB RAM systems. Setting a proper custom size prevents crashes when memory spikes.
⚖️ Disclaimer
The steps in this article are safe for most Windows users. However, tweaking paging file size involves system settings that, if misconfigured, could affect performance or stability. Always restart after applying changes and avoid setting values far beyond the recommended range.
✅ Conclusion
Configuring the paging file size in Windows 10 or 11 isn’t just a technical detail—it can make the difference between a smooth experience and a laggy, crash-prone PC.
- If you have 16 GB or more RAM and don’t push it to 80% usage, stick with Automatic management.
- If you have 2–8 GB RAM, setting a custom paging file with Initial = RAM size in MB and Max = ×1.5–2 of RAM works best.
- Always restart to apply changes and verify if the system recognizes your values.
So far, we’ve done a good job breaking down what paging files are, why they matter, and how to optimize them. The next step is up to you—go ahead and configure yours today for a more stable Windows experience.
Tags
paging file Windows 11, paging file size Windows 10, virtual memory optimization, Windows performance boost, best paging file settings, RAM and paging file, system stability Windows
Hashtags
#Windows11 #Windows10 #VirtualMemory #PagingFile #PCPerformance #TechTips #RAM


