You’ve probably heard it countless times — your computer starts freezing, random errors appear, and someone on a forum confidently says:
“Just run
sfc /scannow. It fixes everything.”
But if you’ve ever tried it yourself, you know that magical command often ends with frustration. Instead of healing your system, it usually ends with something cryptic like:
“Windows Resource Protection found corrupt files but could not fix some of them.”
And then… nothing happens. No fix, no explanation, no next step.
So why does Microsoft’s System File Checker (SFC) exist if it rarely seems to fix anything? The truth is surprising — SFC isn’t broken, it’s simply working with the wrong data. In this guide, we’ll walk through how to make it work correctly every single time.
We’ll also explore the real repair tool Microsoft hides in plain sight: the Deployment Image Servicing and Management tool (DISM). When used together, these two can restore your Windows installation without reinstalling your OS or losing your data.

So, grab your coffee, take a deep breath, and let’s fix this the right way.
🧩 1. Why “SFC /scannow” Fails So Often
Before jumping into commands, it helps to understand what’s going on under the hood. The System File Checker (SFC) is not actually a magical all-in-one repair button.
It’s a verification tool that scans protected Windows files and tries to replace damaged or missing ones from a local cache. That cache is located in:
C:\Windows\WinSxS
Think of it as your PC’s “spare parts bin.”
When you installed Windows, it stored original copies of system files there. When SFC runs, it compares what’s currently on your system to what’s in that cache.


Here’s the problem:
If your PC has been updated hundreds of times since installation, those cached files are now outdated. So even if SFC finds a problem, it’s trying to fix it with old versions that no longer match the system.
That’s why you often see:
“Windows Resource Protection found corrupt files but could not fix some of them.”
It’s not that your PC is unfixable — it’s that SFC is trying to heal modern wounds with ancient medicine.
⚙️ 2. Before You Start: Back Up and Create a Restore Point
Before performing any deep repairs, it’s smart to prepare for the unexpected. These tools are safe, but they work at a system level, which means mistakes can affect your OS.
Let’s take a minute to set a restore point. If something goes wrong, you can roll back instantly.
Here’s how:
- Click the Start menu and type
System Restore. - Select Create a Restore Point from the results.
- Choose your main drive (usually
C:). - Click Create, then give it a name like “Before SFC Fix”.
- Wait until Windows confirms it’s created successfully.
It takes less than two minutes and can save hours of frustration later.
Now that your safety net is ready, let’s move to the actual fix.
🧱 3. Meet DISM — The Hidden Tool That Fixes SFC
Here’s the secret Microsoft rarely mentions:
SFC is only as good as the image it’s repairing from.
If that image is corrupted, outdated, or incomplete, SFC will always fail.
That’s where DISM (Deployment Image Servicing and Management) comes in.
What DISM Does:
DISM repairs the core Windows system image — the blueprint SFC relies on. Once you clean up and rebuild that image, SFC suddenly starts working as intended.
Think of DISM as the mechanic that tunes your engine, and SFC as the test drive that confirms it’s fixed.
🧰 4. Step-by-Step: Using DISM to Repair the Windows Image
Let’s roll up our sleeves and start the real repair process.
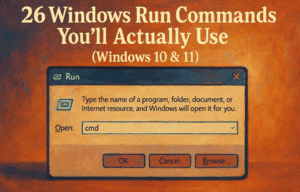
Step 1: Open Command Prompt as Administrator
- Click Start, type
cmd. - Right-click Command Prompt and choose Run as administrator.
- When prompted by User Account Control (UAC), click Yes.
You’ll know you’re in the right place if you see “Administrator: Command Prompt” in the window title.
Step 2: Check the Health of the Windows Image
Type this command and press Enter:
DISM /Online /Cleanup-Image /CheckHealth
This command performs a quick diagnostic. It checks if your Windows image is flagged as corrupted.
It doesn’t fix anything — just reports what it finds.
If you see:
“No component store corruption detected,”
you can move directly to running SFC later.
If not, continue to the next step.
Step 3: Scan for Corruption
Next, run a deeper scan with:
DISM /Online /Cleanup-Image /ScanHealth
This one takes a while (5–15 minutes depending on your system speed). It checks every component file against Microsoft’s online database.
If corruption is found, it’ll flag it for repair — but it won’t fix it yet.
Step 4: Restore the Health of Your Windows Image
Now, the real magic command:
DISM /Online /Cleanup-Image /RestoreHealth
This instructs DISM to:
- Download missing or corrupted components directly from Microsoft’s official servers.
- Replace damaged files.
- Rebuild the entire system image cache in WinSxS.
It might take 15–30 minutes depending on your network connection.
Be patient — even if it looks frozen, let it finish.
When it completes, you should see:
“The restore operation completed successfully.
The component store corruption was repaired.”
If you get that, you’ve just repaired Windows’ internal repair system itself.
But sometimes, even this step fails — and when it does, it’s time for the manual fix.
🧨 5. The “Nuclear Option”: Rebuilding from a Local Source
If DISM can’t download the files it needs (for example, due to network issues or heavy corruption), you can manually provide it with a fresh copy of Windows as the source.
Let’s go step by step.
Step 1: Download a Clean Windows Image
Go to Microsoft’s official website:
👉 https://www.microsoft.com/software-download/
From there:
- Choose Windows 10 or Windows 11, depending on your system.
- Click Download tool now under Media Creation Tool.
- Run it and select Create installation media (ISO file).
- Save the ISO somewhere easy to find — e.g., your Desktop.
This ISO file contains the latest, untouched Windows system files.
Step 2: Mount the ISO File
- Right-click the ISO file and select Mount.
- It will appear as a new drive — e.g.,
D:orE: - Open that drive and go to the
sourcesfolder. - Find the file named install.wim or install.esd — note which one you have.
Step 3: Repair Using the Local Source
Return to your Administrator Command Prompt and type this command (adjust the drive letter and file name to match your system):
DISM /Online /Cleanup-Image /RestoreHealth /Source:D:\sources\install.wim /LimitAccess
or if your file is .esd:
DISM /Online /Cleanup-Image /RestoreHealth /Source:D:\sources\install.esd /LimitAccess
Here’s what happens:
/Source:tells DISM to use the ISO as a verified file source./LimitAccessprevents it from connecting to Windows Update.
You’re essentially telling Windows:
“Here’s a clean copy of yourself. Fix everything using this.”
Once completed successfully, you now have a brand-new system image — fresh, healthy, and ready for SFC to use.
🧾 6. The Final Step: Run SFC the Right Way
Now that the system image is repaired, it’s time to finally run:
sfc /scannow
This time, instead of working with outdated cache files, SFC uses your rebuilt image from DISM as the reference.
You should now see:
“Windows Resource Protection found corrupt files and successfully repaired them.”
Congratulations — that’s what success looks like.
Your PC’s internal system files are now restored, and your operating system should run more smoothly and stably.
🔍 7. Why Microsoft Never Explains This
If you’re wondering why Microsoft doesn’t mention this in their guides, the answer is simple: simplicity sells.
“Just run sfc /scannow” sounds friendly and approachable.
“Run three layered system-level commands, rebuild your image using an ISO, and use DISM as your cache source” — not so much.
But if you’ve been through enough Windows glitches, you know that real fixes require real understanding.
This method — DISM + SFC — is the same process used by IT professionals, system administrators, and Microsoft support engineers behind the scenes.
You’ve just learned how to do it yourself.
🧠 8. Advanced Tips and Common Scenarios
So far, you’ve rebuilt your repair system and fixed your files. But let’s address a few real-world scenarios that come up during this process.
💡 Scenario 1: DISM or SFC Is Stuck at a Certain Percentage
Sometimes DISM or SFC appears frozen (e.g., 20% for 10 minutes). In most cases, it’s still working.
Avoid closing it unless it’s stuck for over an hour with no CPU or disk activity.
💡 Scenario 2: You Get Error 0x800f081f
This typically means DISM can’t find the correct source files.
Double-check that:
- The ISO version matches your Windows version (e.g., both are 22H2).
- The path in the
/Source:command is correct. - You’ve included
/LimitAccessto avoid conflicting sources.
💡 Scenario 3: You Don’t Want to Download an ISO
You can also use the Windows installation USB or Recovery Drive if you already have one.
Just point the /Source: path to that drive’s sources folder.
💡 Scenario 4: The System Is Too Corrupted to Boot
If your PC won’t even start, boot into the Windows Recovery Environment (WinRE), open Command Prompt, and run the same DISM and SFC commands from there.
They work the same way even outside the desktop environment.
💬 9. Frequently Asked Questions (FAQ)
Q1. What’s the difference between SFC and DISM?
- SFC repairs files currently in use by Windows.
- DISM repairs the system image that SFC relies on.
Running DISM first ensures SFC has a healthy reference to compare against.
Q2. How often should I run these commands?
You don’t need to run them regularly — only when your system behaves abnormally (crashes, missing DLLs, Start menu issues, etc.). Running them once every few months as preventative maintenance is optional but safe.
Q3. Can DISM delete my personal files?
No. DISM only repairs system components. Your documents, photos, and installed apps remain untouched.
Q4. Can I run these in Windows PowerShell instead of Command Prompt?
Yes — PowerShell accepts the same commands. Just make sure you open it as Administrator.
Q5. What if nothing works after all this?
If DISM and SFC both fail even with a local ISO source, the next step would be a repair installation of Windows (also known as an “in-place upgrade”).
This reinstalls Windows without deleting your files — a topic we’ll cover in a separate article.
🧭 10. Why This Fix Works When Others Don’t
Let’s step back and appreciate what’s really happening here.
When your Windows system files are damaged, most people reinstall Windows completely.
But that’s like replacing your car because the oil filter’s dirty.
By combining DISM and SFC, you’re repairing the core structure of Windows, restoring stability without starting from scratch. It’s a cleaner, more elegant solution — and it saves hours of work.
This approach also ensures:
- Faster boot times.
- Fewer blue screens.
- Improved reliability in Windows Update and Microsoft Store apps.
So next time someone tells you to “just run SFC,” you’ll know the full story — and the correct way to fix it.
⚠️ 11. Important Notes and Safety Reminders
- Always run these commands in Administrator mode.
- Avoid interrupting the process mid-scan.
- Keep your device plugged in if you’re on a laptop.
- Match ISO versions exactly (Windows 10 22H2 ≠ Windows 11 23H2).
- Restart your computer after completing repairs to apply the restored files.
🧾 Disclaimer
This guide is for educational purposes only.
All commands and procedures are part of official Microsoft troubleshooting steps, but misuse can cause unexpected behavior. Always create a system restore point and back up important data before performing system-level repairs.
Official Microsoft DISM documentation:
👉 https://learn.microsoft.com/en-us/windows-hardware/manufacture/desktop/dism
Official Windows download page:
👉 https://www.microsoft.com/software-download/
🏁 Final Thoughts
Windows may frustrate us with cryptic errors and half-working tools, but once you understand what’s really happening, you can fix things like a pro.
The SFC /scannow command isn’t useless — it just needs help from DISM and, sometimes, a clean Windows image. When you combine these properly, you can bring even the most unstable systems back to life without reinstalling your OS.
So the next time your computer throws an error, don’t panic.
Run DISM. Run SFC.
And remember: you’re not just fixing Windows — you’re fixing the fixer.
#SFC #DISM #Windows11 #Windows10 #SystemRepair #TechTips #CommandPrompt #dtptips


