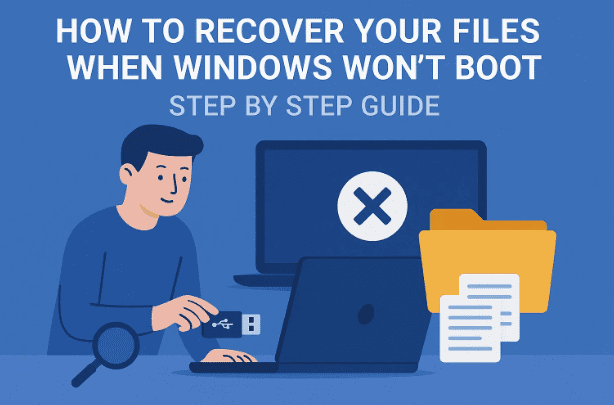
When your computer refuses to boot into Windows, panic often follows — especially when you realize that your most recent photos, work documents, or projects haven’t been backed up yet. The good news is that even if Windows is completely dead, your files are not necessarily lost.
In this detailed guide, we’ll walk through a proven and safe method to access and recover your data using a trusted technician’s tool — Hiren’s BootCD PE. This rescue environment can help you copy your data, check your hard drive, and prepare your system for a clean reinstall of Windows.
Let’s start from scratch and go step by step.
🧭 Table of Contents
- What Is Hiren’s BootCD PE?
- Why Use Hiren’s Instead of Windows Recovery?
- What You’ll Need Before Starting
- Step 1: Download Hiren’s BootCD PE ISO File
- Step 2: Download and Launch Rufus
- Step 3: Create a Bootable Hiren’s Flash Drive
- Step 4: Boot from the Flash Drive
- Step 5: Access and Recover Your Files
- Safety Tips While Copying Data
- FAQs About Data Recovery Using Hiren’s
🧩 What Is Hiren’s BootCD PE?
Hiren’s BootCD PE (Preinstallation Environment) is a free Windows-based live operating system that runs entirely from a USB flash drive. It’s designed to help you troubleshoot, repair, or recover data from systems that can’t boot normally.
It’s packed with dozens of tools including:
- File recovery and backup utilities
- Disk management and partition repair software
- Antivirus scanners
- System information tools
- Password reset and network diagnostics
You can download it directly from the official website:
🔗 https://www.hirensbootcd.org/download/
🧠 Why Use Hiren’s Instead of Windows Recovery?
Sometimes, when Windows crashes, the built-in troubleshooting menu (Startup Repair, Safe Mode, etc.) fails to load or simply doesn’t help. Hiren’s BootCD works outside your Windows installation — meaning it doesn’t depend on your broken operating system to function.
It’s like carrying your own portable Windows toolkit that can:
- Access your internal drive even when Windows won’t start
- Copy or back up important data before reinstalling
- Test or repair partitions and boot records
- Check if your hard drive is failing
So even in worst-case scenarios, you can still rescue your data before wiping your system.
🧰 What You’ll Need Before Starting
Before we dive into setup, let’s make sure you have the following items ready:
- 💻 A working computer — any Windows PC or laptop will do.
- 🔌 A USB flash drive (minimum 8 GB) — ensure it’s completely empty because it will be formatted.
- 🌐 An internet connection — required to download the ISO and Rufus utility.
- ⏳ Some patience — creating the bootable USB takes about 10–15 minutes.
Now that you’re ready, let’s move on to the actual process.


🥇 Step 1: Download Hiren’s BootCD PE ISO File
The ISO file is basically a digital copy of the bootable disc we’ll use to rescue your system.
- Visit the official Hiren’s BootCD website here:
🔗 https://www.hirensbootcd.org/download/ - Scroll down the page until you find “Hiren’s BootCD PE x64 (v1.0.2)”.
- Click on the “Download ISO (ZIP)” link.
- The file size is around 3 GB, so depending on your internet speed, this may take a few minutes.
⚠️ Tip: Avoid downloading Hiren’s from any unofficial mirror sites or forums. Only use the official link above to ensure authenticity and security.
🧰 Step 2: Download and Launch Rufus
While Hiren’s provides the system files, you’ll need a utility to write that ISO onto a USB drive. The best one for this purpose is Rufus, a free and trusted tool for creating bootable drives.
- Visit the official Rufus page:
🔗 https://rufus.ie/ - Scroll down and click “Download Rufus” (choose the latest version).
- Once downloaded, open the
rufus-x.x.exefile. There’s no installation required; it runs directly.
When Rufus opens, make sure your USB flash drive is already plugged in — it should appear under Device.
⚙️ Step 3: Create a Bootable Hiren’s Flash Drive
Now comes the most crucial part — converting your USB into a rescue drive.
- In Rufus, under Device, ensure the correct USB drive is selected.
- Click Select next to Boot selection, then choose the Hiren’s ISO file you downloaded earlier.
- Under Partition Scheme, select MBR (works with both UEFI and Legacy BIOS).
- Under File System, choose NTFS (or FAT32 if you plan to use it on older PCs).
- Optionally, name the drive under Volume label (e.g., “HirensPE”).
- Press Alt + E to enable Dual UEFI/BIOS mode — this makes the USB bootable on almost any computer.
- Finally, click Start.
You’ll get a warning saying all data on the drive will be erased. Click OK to confirm.
Rufus will now begin writing the ISO to the USB. You can track progress via the status bar at the bottom — it usually takes 5–10 minutes.
Once you see “READY” in green, the process is complete. You now have a bootable Hiren’s rescue USB!
🚀 Step 4: Boot from the Flash Drive
With your new USB ready, it’s time to use it on the computer that won’t boot.
- Insert the USB into the problem computer.
- Power it on and immediately start pressing your boot menu key — usually
F12,F11, orESCdepending on the manufacturer:- Dell → F12
- HP → F9
- Lenovo → F11
- ASUS → ESC
- Acer → F12
- From the boot menu, select your USB drive and press Enter.
Your system will now boot into the Hiren’s BootCD PE environment — a simplified Windows 10 desktop that runs entirely from your flash drive.
💾 Step 5: Access and Recover Your Files
Once inside Hiren’s desktop, you’ll see a familiar Windows-like interface. From here, you can browse, copy, and back up your data safely.
- Click on the File Explorer (folder icon) at the bottom left of the screen.
- In the left panel, locate your internal Windows drive (usually C:).
- Double-click it and navigate to:
C:\Users\[YourUsername]\ - Inside that folder, you’ll find all your personal data — Desktop, Documents, Downloads, Pictures, Videos, and so on.
- Connect another external USB drive (preferably a large one — 64GB or more).
- Simply right-click any folder (e.g., Documents) → choose Send to → [Your External Drive Letter].
Repeat this for all essential folders. You can also selectively copy files instead of entire folders if storage is limited.
⚠️ Tip: Avoid copying system files (like Windows or Program Files). Focus only on your personal data.
🧠 Safety Tips While Copying Data
Before you move on, here are some practical precautions:
- Don’t unplug the drives while copying. Wait until transfers finish completely.
- Check available space on your backup drive before starting large transfers.
- Keep power connected to your laptop/PC to prevent shutdown mid-copy.
- Do not open suspicious folders (especially
AppDataorSystem Volume Information) unless you know what you’re doing.
Once you’ve confirmed that all critical files have been copied successfully, you can safely proceed to reinstall Windows.
❓ Frequently Asked Questions (FAQs)
1. Is Hiren’s BootCD PE safe to download and use?
Yes. It’s a trusted tool used by IT professionals worldwide. Always download from the official site: https://www.hirensbootcd.org/
2. My antivirus flagged Rufus — should I worry?
No. Some antivirus programs falsely flag Rufus because it modifies boot records. It’s completely safe from the official site.
3. What size USB drive should I use?
Minimum 8GB is required. For storing recovered files, consider a 64GB or 128GB external drive for safety.
4. What if I don’t see my “C:” drive in Hiren’s?
If the drive doesn’t appear, your hard drive might be physically damaged. You can try using Hiren’s disk tools (like TestDisk or CrystalDiskInfo) to check health status.
5. Can I recover files from a dead SSD?
If the SSD is completely unresponsive, recovery is unlikely. However, if it shows up in File Explorer, you can still copy your data.
6. How do I reinstall Windows afterward?
After recovery, download Microsoft’s official Windows installation media tool here:
🔗 https://www.microsoft.com/software-download/windows11
Follow the on-screen steps to reinstall a fresh copy of Windows.
🧩 Final Thoughts & Preventive Advice
You’ve now seen how powerful a simple flash drive can be when disaster strikes. With Hiren’s BootCD PE, even a completely unbootable Windows system doesn’t mean your data is gone forever.
Going forward, consider these preventive tips:
- Always enable File History or OneDrive sync for automatic backups.
- Use an external drive for critical documents or projects.
- Create a Windows recovery drive once every few months.
If you ever find yourself in a no-boot situation again, you’ll be prepared — and most importantly, calm.
Disclaimer:
This guide is for educational and troubleshooting purposes. Always back up your data regularly. Neither the author nor the website is responsible for any data loss or hardware damage caused by incorrect usage of third-party tools.
Tags: Windows recovery, Hiren’s BootCD PE, data recovery, bootable USB, Windows won’t start, file rescue, Rufus, troubleshooting
Hashtags: #Windows11 #DataRecovery #HirensBootCD #WindowsCrashFix #FileBackup #BootableUSB #TechGuide


