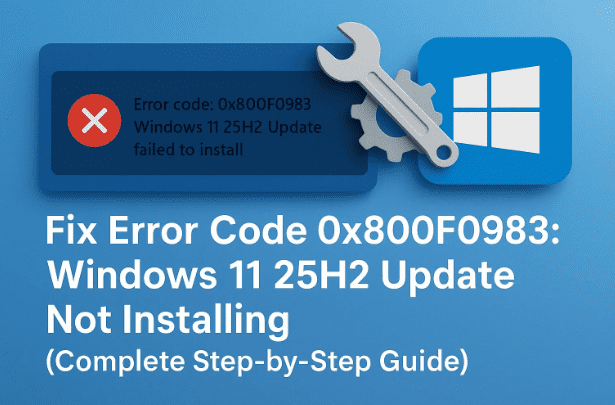
If you’ve recently tried to install the Windows 11 version 25H2 update and encountered the error code 0x800F0983, you’re not alone. This error usually pops up during cumulative update installations, stopping Windows midway and displaying messages like:
“We couldn’t install this update on Windows 11. Error code: 0x800F0983”
The good news is that this issue is entirely fixable. In this guide, we’ll explore what causes it, and then walk you through multiple proven solutions — from repairing corrupted system files to resetting the Windows Update components. Every step has been explained in detail, so even if you’re not a technical expert, you can follow along confidently.
⚠ 1. Understanding Error Code 0x800F0983
The 0x800F0983 error occurs when Windows cannot properly process or apply one or more update packages. Essentially, your system’s internal “update engine” tries to integrate the 25H2 components but encounters damaged files or broken dependencies.
This often relates to:
- Corruption in the Windows Component Store (WinSxS).
- Damaged configuration files.
- Inconsistent update dependencies that prevent the system from finalizing the upgrade.
- Interrupted update downloads due to unstable internet or background services not running properly.
In short, Windows 11 knows an update is available but cannot correctly apply it — resulting in a failed installation and this specific error code.
🧠 2. Possible Causes of the 25H2 Update Failure
Before jumping into solutions, it’s helpful to know why the error happens in the first place. Here are the most common causes:
- ❌ Corrupted System Files: Damaged or missing core Windows files can block updates.
- 📦 Broken Windows Update Cache: The “SoftwareDistribution” folder stores old update data that may conflict with new ones.
- ⚙️ Faulty Services: Critical background services like Windows Update or Background Intelligent Transfer Service (BITS) might be disabled.
- 🔌 Interrupted Power or Network: A sudden shutdown or unstable connection during update download/installation.
- 🧩 Pending Restart or Previous Update: A prior cumulative update that wasn’t completed successfully can create dependency issues.
Now that you know the background, let’s start fixing it step by step.
🧰 3. Method 1: Repair Windows Image Using DISM Tool
Let’s begin by repairing the internal Windows image files. The DISM (Deployment Image Servicing and Management) tool can scan and restore damaged components that might be blocking the 25H2 installation.
Steps:
- Open the Start menu and type cmd.
- Right-click on Command Prompt → select Run as Administrator.
- When prompted by UAC, click Yes.
- Now type the following command carefully and press Enter:
DISM /Online /Cleanup-Image /RestoreHealth - Wait patiently — this process can take 10–20 minutes depending on your system speed.
- Once completed, you should see a message saying “The restore operation completed successfully.”
- Type
exitand press Enter to close the window.
This process ensures that any system-level corruption or mismatched dependencies are corrected before retrying the update.
🔍 4. Method 2: Run System File Checker (SFC)
Once DISM repairs the image, the next logical step is to verify the integrity of all protected Windows files. The SFC (System File Checker) tool checks for inconsistencies and replaces missing files automatically.


Steps:
- Again, open Command Prompt as Administrator (same as before).
- Type the following command and press Enter:
sfc /scannow - The tool will begin scanning your system for any file integrity violations.
- Once the scan completes, you’ll see one of the following messages:
- ✅ “Windows Resource Protection did not find any integrity violations.”
- 🔧 “Windows Resource Protection found corrupt files and successfully repaired them.”
- After completion, type
exitand press Enter.
If any repairs were made, restart your PC before proceeding to the next step.
🧩 5. Method 3: Use the Built-in Windows Troubleshooter
If you still face issues, Windows includes a built-in troubleshooting utility specifically designed for update-related problems. This is an automated diagnostic tool that resets background services, clears caches, and fixes misconfigurations.
Steps:
- Open the Start menu and click Settings.
- Go to System → Troubleshoot → Other troubleshooters.
- Locate Windows Update under the list of troubleshooters.
- Click the Run button next to it.
- Allow the troubleshooter to scan your system.
- If it finds any problems, click Apply this fix or Yes when prompted.
- After it finishes, close the troubleshooter and restart your PC.
This method resolves the majority of “stuck update” scenarios automatically, especially if the issue is related to a misconfigured service.
🧹 6. Method 4: Reset Windows Update Components Manually
If none of the automated tools work, it’s time to perform a manual reset of the Windows Update components. This involves deleting the “SoftwareDistribution” folder where Windows stores temporary update data.
Steps:
- Open the Start menu, click Settings → System → Recovery.
- Under Advanced startup, click Restart now.
- Confirm by clicking Restart now again.
Your PC will reboot into a blue recovery screen.
- Select Troubleshoot → Advanced options → Startup Settings → Restart.
- When prompted, press the F4 key to boot into Safe Mode.
- Once in Safe Mode, open File Explorer.
- Navigate to:
C:\Windows - Locate the folder named SoftwareDistribution.
- Right-click it and select Delete.
- Restart your PC normally.
When Windows restarts, it will automatically recreate the SoftwareDistribution folder with fresh update files. This often resolves corrupted cache-related issues.
💡 7. Method 5: Use Advanced Startup Recovery Options
If even after resetting the update components the installation still fails, you can use Advanced Startup Repair to ensure all boot-time services and files are restored properly.
Steps:
- Open Settings → System → Recovery.
- Under Advanced startup, select Restart now.
- Choose Troubleshoot → Advanced options → Startup Repair.
- Let Windows automatically diagnose and fix potential startup-related conflicts that might be blocking updates.
After this repair completes, reboot your system normally and try updating to Windows 11 version 25H2 again.
❓ 8. FAQs About Windows 11 25H2 Update Issues
Q1: What does error code 0x800F0983 mean in simple terms?
It means Windows couldn’t properly apply the update files because something in your system is either missing, corrupted, or locked by another process.
Q2: Can I skip the update entirely?
While you can pause updates temporarily, skipping major feature updates like 25H2 is not recommended since they include important performance and security improvements.
Q3: What if the problem keeps coming back after restarting?
You may need to use the Windows Update Assistant or Media Creation Tool from Microsoft’s official website to manually install the 25H2 update.
Q4: Do I lose any files during these fixes?
No — all methods here are non-destructive. However, always back up your important data before performing system repairs.
Q5: Is there an official tool to repair Windows updates?
Yes. You can use the Windows Update Troubleshooter or the DISM tool built into Windows itself — both are official and safe to use.
🧭 9. Final Thoughts and Additional Tips
If you’ve followed all the above steps, your Windows 11 update error 0x800F0983 should now be resolved. However, if the issue persists, consider the following:
- Run Windows Update Assistant from the official Microsoft website.
- Ensure you have at least 20 GB of free disk space.
- Temporarily disable third-party antivirus or VPN software before updating.
- Make sure your device drivers and BIOS are up to date.
Remember, Windows 11 version 25H2 introduces important stability, performance, and AI improvements, so it’s worth taking the time to fix this update error properly.
⚠ Disclaimer
The steps described in this article are intended for standard Windows 11 installations. If you are using a managed or enterprise device, please contact your IT administrator before performing system-level repairs. Always back up your data before deleting or modifying system folders.
#Windows11 #WindowsUpdate #Error0x800F0983 #TechFix #Troubleshooting #Microsoft #UpdateError


Really helpful article – thanks so much! It’s rare to find one of these guides which actually matches step by step all the way to the end what actually appears on the screen in front of me, and which actually achieves what I set out to do. I was a bit nervous about doing step 6, deleting a vast C:\Windows folder was a heart-in-mouth moment, but it also showed me why my C drive was getting so full – SoftwareDistribution must have been filling up with failed updates ..