Windows 11 brings a sleek interface and plenty of new features, but one thing that annoys many users is the forced Microsoft account requirement during installation. Microsoft pushes you to sign in online so you can sync settings, use OneDrive, or access the Store. While that may be useful for some, not everyone wants their PC tied to an online account.
Some prefer a simple local account for privacy, faster setup, or because they just don’t want to bother with internet during installation. The good news? There’s a reliable method to bypass this step and install Windows 11 with a local account.
In this article, I’ll take you through the full process. I’ll explain why we’re doing each step, what to watch out for, and I’ll even add extra context so nothing feels rushed or robotic. By the end, you’ll be able to enjoy Windows 11 with a local account — and re-enable internet right after setup.
📑 Table of Contents
- 1. Why Bypass the Microsoft Account in Windows 11?
- 2. Things to Know Before You Begin
- 3. Step 1 – Facing the Online Account Roadblock
- 4. Step 2 – Opening the Hidden Command Prompt
- 5. Step 3 – Disabling Internet Connections Temporarily
- 6. Step 4 – Running the OOBE Bypass Command
- 7. Step 5 – Setting Up a Local Account Instead
- 8. Step 6 – Restoring Internet After Setup
- 9. Extra Tips During Installation
- 10. Troubleshooting Common Issues
- 11. FAQs on Local vs Microsoft Accounts
- 12. Final Thoughts
1. Why Bypass the Microsoft Account in Windows 11?
Before jumping into commands and shortcuts, it’s worth asking: why even bother skipping the Microsoft account?
For many users, the online account setup feels unnecessary. Some don’t want constant cloud integration, others dislike data sharing, and quite a few simply want to use their PC offline. By choosing a local account, you keep things traditional — your username and password stay on the machine, nothing is forced to sync, and you get more control over what Windows does in the background.
So if privacy, simplicity, or independence matter to you, this guide is worth following.
2. Things to Know Before You Begin
Let’s prepare ourselves before starting the process. This will make sure nothing feels confusing once you’re in the middle of installation.
- You should already be in the Windows 11 setup environment (either fresh install or reset).
- This process involves temporarily disabling your internet — don’t worry, we’ll enable it again after setup.
- We’ll use the Command Prompt, a powerful tool built into Windows that allows you to run commands directly.
- The method uses a special bypass command (OOBE\BYPASSNRO) which is officially part of Windows’ setup routines.
⚠️ Important Disclaimer: This guide is safe, but since you are modifying setup steps, always make sure you back up your files and understand that skipping Microsoft account means some cloud services won’t work until you sign in later.
3. Step 1 – Facing the Online Account Roadblock
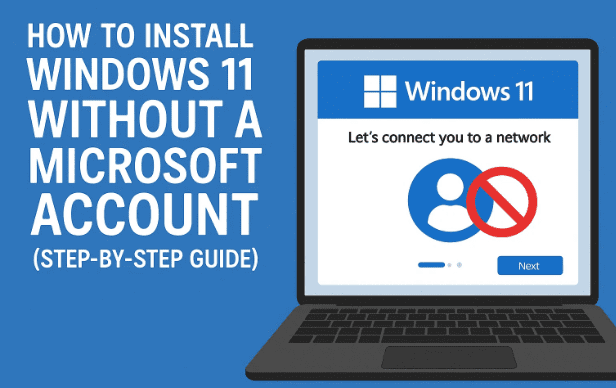
At some point during installation, Windows 11 brings you to the account setup screen. This is the infamous moment where it says: “Let’s connect you to a network” and tries to force you into signing in with a Microsoft account.
No matter what you enter, Windows will push for online sign-in. For many, this feels like hitting a wall. But don’t worry — this is exactly the place where our bypass trick comes into play.
4. Step 2 – Opening the Hidden Command Prompt
Windows setup has a secret doorway that most users don’t know about. Right when you’re stuck at the Microsoft account screen, you can pull up a Command Prompt window — a direct way to talk to Windows and give it special instructions.


To do this, press Shift + F10. If you’re on a laptop where function keys behave differently, try Shift + Fn + F10 instead. Once you press the right combo, a black window will appear — that’s the Command Prompt.
This little trick is the foundation of what we’ll do next.
5. Step 3 – Disabling Internet Connections Temporarily
Here’s the logic: Windows only insists on a Microsoft account when it detects you’re online. If we take away the internet, suddenly it offers the old local account option.
Inside the Command Prompt, type:
ncpa.cpl
and hit Enter. This will open the Network Connections window from the Control Panel. You’ll see your available network adapters — maybe Ethernet, maybe Wi-Fi, or both.
Now:
- Right-click each one.
- Select Disable.
Make sure every adapter is disabled. Once done, Windows won’t be able to connect to the internet and will stop pestering you for online login.
6. Step 4 – Running the OOBE Bypass Command
Disabling internet helps, but Windows may still try to steer you back online. To fully cut through this, we use a built-in bypass.
Go back to the Command Prompt and type this command exactly:
OOBE\BYPASSNRO
Press Enter. Windows will confirm the command, reboot your machine, and then reload setup.
Now we’ve effectively told Windows: “Don’t force the network requirement. Let me continue offline.”
7. Step 5 – Setting Up a Local Account Instead
After reboot, you’ll once again go through a few setup screens like choosing your country and keyboard layout. But this time, something is different: you’ll see an option saying “I don’t have internet” or “Continue with limited setup.”
Click it.
From here, you’ll be prompted to enter a username. This will be your local account. If you want extra protection, set a password (recommended). If you prefer quick login, you can leave it blank.
Once you confirm these, Windows continues installation and soon you’ll land on your desktop with a fresh local account.
8. Step 6 – Restoring Internet After Setup
At this point, you’ve got Windows 11 running with your chosen local account. Now it’s time to bring back your internet connection.
- Press Win + R to open the Run dialog.
- Type:
ncpa.cpland hit Enter. - In the Network Connections window, right-click on the adapters you disabled earlier.
- Select Enable.
Within moments, you’ll see the network icon light up again in the system tray. Congratulations — you’re now online, but still using a local account!
9. Extra Tips During Installation
While finishing setup, Windows will ask about privacy and services. This part often gets skipped quickly, but let’s pause and think.
- You can toggle off options like location tracking, tailored ads, or speech recognition if you value privacy.
- Cortana and OneDrive aren’t necessary for everyone, so feel free to decline them if you want a minimal setup.
- Give your device a meaningful name — it helps if you ever connect it to a network or share files.
Little choices here make your Windows experience much more personal.
10. Troubleshooting Common Issues
Even with this method, a few hiccups might appear. Let’s look at them in advance:
- Shift + F10 not working: Try Shift + Fn + F10, or plug in a USB keyboard.
- Command not recognized: Ensure you typed
OOBE\BYPASSNROcorrectly — no spaces, exact spelling. - No offline option shown: Double-check that all network adapters are disabled. Even one active Wi-Fi card can block the bypass.
- Internet not restoring later: Restart and check Device Manager if enabling doesn’t work.
11. FAQs on Local vs Microsoft Accounts
Q1. Can I add a Microsoft account later if I change my mind?
Yes. Go to Settings → Accounts → Your Info → Sign in with a Microsoft account instead.
Q2. Will skipping the account affect updates?
No. You’ll still get Windows Updates. Only cloud services (OneDrive, Xbox Live, etc.) require a Microsoft account.
Q3. Does this method work on all editions of Windows 11?
It’s most relevant to Windows 11 Home, which forces the account. Pro editions sometimes allow local accounts directly.
Q4. Is this method safe and legal?
Yes, it uses Microsoft’s own setup command. There’s nothing illegal about it.
12. Final Thoughts
Microsoft designed Windows 11 to be cloud-connected, but users should still have the freedom to choose. With this method, you can install the OS your way — fast, private, and without unnecessary online requirements.
By using the simple Shift + F10 trick, disabling internet, and running the OOBE bypass command, you reclaim control. And once setup is done, your internet is back, and your PC is ready — without tying it to a Microsoft account.
For more Windows tips and detailed tech guides, you can visit the official Microsoft website here: https://www.microsoft.com/windows
Disclaimer
This article is for educational purposes only. Skipping the Microsoft account during installation is safe but not officially encouraged by Microsoft. If you rely on cloud features, you can always add an account later.
Tags
Windows 11 local account, Windows 11 installation, bypass Microsoft account, Windows 11 tips, OOBE bypass, Windows setup guide
Hashtags
#Windows11 #LocalAccount #Microsoft #WindowsTips #Privacy