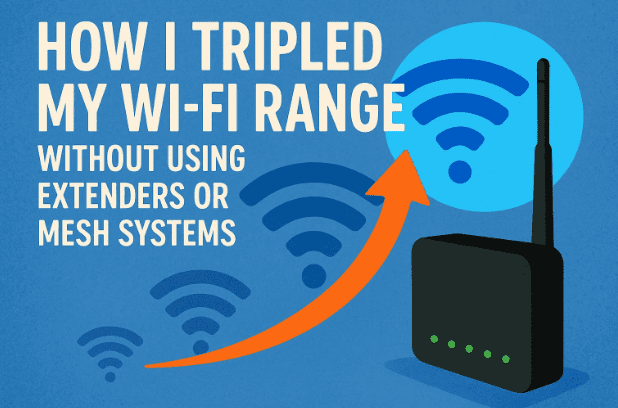
Getting strong and reliable Wi-Fi coverage across your entire home is a constant struggle for many people. You may notice dead zones in certain rooms, weak signals in the garage, or no coverage at all in your backyard. Many assume the only solution is to buy expensive Wi-Fi extenders, repeaters, or even a mesh system.
But here’s the surprising part: with just three simple changes—and no new hardware—you can often double or even triple the effective Wi-Fi range of your existing router.
In this article, I’ll explain:
- The best way to install and place your router for maximum coverage.
- How to optimize your Wi-Fi setup based on your environment.
- Which professional features like beamforming can significantly extend range.
By the end, you’ll see how small but crucial tweaks can transform your Wi-Fi experience without extra devices.
1. Establishing the Baseline: The Original Wi-Fi Setup
Before making changes, let’s consider the starting point.
- The router was installed on the ground, behind a television, next to a PlayStation, speakers, and a mess of wires.
- Coverage in the house was inconsistent, with several dead zones.
- The garage had such a weak signal that connecting was almost impossible.
- The backyard had zero Wi-Fi coverage.
This baseline highlights a problem many people face: poor Wi-Fi isn’t always due to weak hardware—it’s often due to poor setup and environment design.
2. Step 1 – Router Placement and Installation Best Practices
The first improvement came from correcting basic router placement mistakes. Let’s break them down.
Elevate the Router
- Routers should not sit on the floor.
- Place it at about desk height, where laptops, phones, and tablets are typically used.
- This aligns with how omnidirectional antennas broadcast signals: horizontally outward in a donut-shaped pattern.
Keep It Away From Electronics
- Placing a router behind a TV, near speakers, or next to gaming consoles creates electromagnetic interference.
- This interference weakens Wi-Fi signals and shortens effective range.
Centralize the Router
- Don’t place your router against one wall or in a far corner.
- Put it in the center of your home so coverage radiates evenly in all directions.
- Placing it to one side wastes nearly half of the router’s potential coverage.
Adjust Antenna Position
- For a single-story house: keep antennas vertical so signals spread outward horizontally.
- For a two-story house: experiment with one antenna vertical and one horizontal to balance between floors.
💡 Result after Step 1: Signal in the garage improved significantly—with strong 2.4 GHz and usable 5 GHz coverage. Just correcting placement nearly doubled the usable range.
3. Step 2 – Adjusting Wi-Fi Settings for Your Environment
The second change came from optimizing Wi-Fi channels and channel width to minimize interference.
2.4 GHz vs 5 GHz vs 6 GHz
- 2.4 GHz: Longer range, slower speeds. Ideal for devices far from the router (smart home devices, cameras, sensors).
- 5 GHz: Shorter range but much faster speeds. Great for laptops, phones, and gaming consoles used closer to the router.
- 6 GHz (Wi-Fi 6E): Super-fast but only works well in close proximity with compatible devices.
Choosing the Right Channel
- In 2.4 GHz, only three channels are non-overlapping: 1, 6, and 11.
- If neighbors use 1 and 11, you should use 6 to avoid interference.
- Overlapping channels create noise, reducing both speed and range.
Channel Width
- By default, 2.4 GHz channels use 20 MHz width.
- Many routers allow you to increase this to 40 MHz (2.4 GHz) or even 160 MHz (5 GHz).
- While wider channels theoretically increase bandwidth, they also overlap more, causing interference in crowded areas like apartments.
Think of it like traffic:
- A supercar on a traffic jammed freeway doesn’t help—it’s stuck like everyone else.
- A motorbike (20 MHz channel) weaves through traffic efficiently, reaching the destination faster.
The Adjustment Made
- Reduced 2.4 GHz width to 20 MHz.
- Reduced 5 GHz width to 80 MHz (instead of 160 MHz).
💡 Result after Step 2:


- Signal improved by +5 dBm on 2.4 GHz and +6 dBm on 5 GHz in the garage.
- The backyard now had stable 2.4 GHz coverage and decent 5 GHz signal.
4. Step 3 – Leveraging Professional Features (Beamforming)
The final improvement used a feature often hidden in advanced router settings: beamforming.
What Is Beamforming?
- Traditional Wi-Fi broadcasts equally in all directions.
- Beamforming allows the router to focus the signal directly toward connected devices.
- This improves signal strength, speed, and range—especially in weak areas.
Two Types of Beamforming
- Universal (Implicit) Beamforming
- Works with older devices.
- Router “guesses” where devices are.
- Less accurate, but still helpful.
- Explicit Beamforming
- Supported by modern routers and devices.
- Device provides feedback to router for more precise signal focusing.
By enabling both implicit and explicit beamforming, the router maximizes performance across all devices.
💡 Result after Step 3:
- Both the garage and backyard had strong, usable signals.
- 5 GHz remained solid where it previously failed.
- Effective Wi-Fi range was nearly tripled compared to the original setup.
5. Testing Results: Coverage Before and After
| Location | Before (Original Setup) | After All 3 Changes |
|---|---|---|
| Living Room | Strong (2.4 & 5 GHz) | Strong (2.4 & 5 GHz) |
| Bedrooms | Weak on 5 GHz | Stable on both bands |
| Garage | Barely usable (2.4 only) | Strong (2.4 & 5 GHz) |
| Backyard | No coverage | Usable (2.4 strong, 5 decent) |
As you can see, without buying any new hardware, coverage improved dramatically.
6. Lessons Learned: Why Range Tripled
The three main reasons coverage increased:
- Placement Matters More Than Hardware
- Elevating and centralizing the router can easily double coverage.
- Interference Reduction Is Key
- Proper channel selection and channel width make Wi-Fi signals cleaner and more stable.
- Advanced Features Can Do Wonders
- Beamforming ensures power is directed where it’s needed most, reducing dead zones.
7. Frequently Asked Questions
Q1. Do I need to buy a mesh system for full coverage?
Not always. Many homes can get excellent coverage with just a single router if placed and configured correctly.
Q2. Should I always use 40 MHz or 160 MHz channel widths?
No. These wider channels work best in environments with little interference. In crowded neighborhoods, stick with 20 MHz (2.4 GHz) and 80 MHz (5 GHz).
Q3. Will beamforming work with old devices?
Yes. Universal (implicit) beamforming supports older devices, though it is less accurate.
Q4. How can I check which channels my neighbors are using?
Use a free Wi-Fi analyzer app on your phone to scan available networks and see which channels are busiest.
Q5. What if I still have dead zones after all this?
If placement, settings, and features still don’t give full coverage, then it may be time to invest in a mesh system or range extender.
8. Final Thoughts
You don’t always need to spend money on new devices to fix poor Wi-Fi. By simply:
- Correcting router placement,
- Adjusting channel settings, and
- Enabling beamforming,
…it’s possible to double or even triple the effective Wi-Fi range in your home.
The key takeaway is that network design matters as much as hardware. Before upgrading equipment, try optimizing what you already have—you may be surprised by the results.
Disclaimer
This article is for educational purposes only. Router interfaces and available features may vary depending on brand and model. Always consult your router’s official documentation before changing advanced settings.
Tags
Wi-Fi optimization, router placement, beamforming, channel width, 2.4 GHz vs 5 GHz, home networking, extend Wi-Fi range
Hashtags
#WiFiTips #RouterPlacement #HomeNetworking #WiFiCoverage #Beamforming #TechGuide #Networking


