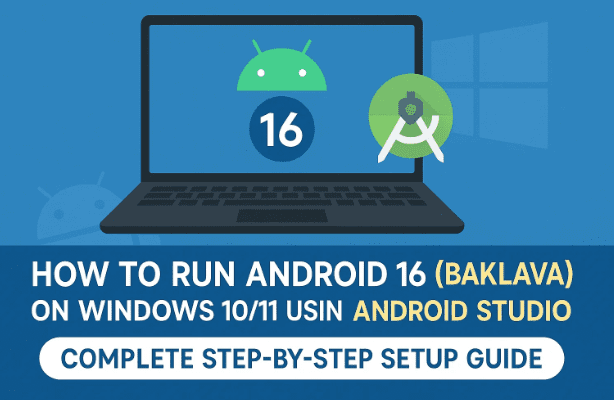
Have you ever wished to run the latest Android version right on your PC, complete with Google Play Store and full functionality? With Android Studio’s official emulator, you can now experience Android 16 (Baklava, API Level 36) directly on your Windows 10 or 11 machine — without buying a new phone.
This detailed guide walks you through the entire process — from enabling virtualization to downloading the Android 16 system image, creating a virtual device, optimizing performance, and installing apps and games just like on a real Android tablet or phone.
By the end, your Windows PC will act as a fully functional Android 16 device capable of browsing, streaming, testing apps, or gaming — all for free, using Google’s official tools.
1. 🌟 Introduction to Android 16 (Baklava)
Android 16 — codenamed Baklava — is Google’s newest release built on API Level 36. It introduces:
- Refined performance and smoother animations
- A redesigned Quick Settings panel
- New power and battery analytics
- Updated system UI with subtle rounded corners
- Enhanced privacy controls and app-specific permissions
Normally, you’d need a new Pixel or flagship device to experience this version. But thanks to Android Studio, you can emulate it safely on any modern Windows PC.
2. ⚙️ Enable Virtualization and Windows Features
Before installing anything, we must make sure your system supports hardware virtualization. This technology allows the Android emulator to run smoothly.
Step 1: Check Virtualization Status
- Press Ctrl + Shift + Esc to open Task Manager.
- Go to the Performance tab → CPU.
- On the right side, look for Virtualization.
If it says Enabled, you’re ready to go.
If it says Disabled, follow the next step.
Step 2: Enable Virtualization in BIOS
- Restart your PC and repeatedly press Del, F2, or F10 to enter BIOS/UEFI.
- Locate a setting called Intel Virtualization Technology (VT-x) or SVM Mode (for AMD).
- Turn it On, then save and exit (usually F10).
Once Windows boots, re-check Task Manager to confirm virtualization is now enabled.
Step 3: Enable “Virtual Machine Platform” in Windows
Android Studio’s emulator also requires a Windows feature for hardware acceleration.
- In the Start menu, type Windows Features → click Turn Windows features on or off.
- Scroll down and tick Virtual Machine Platform.
- Click OK, let Windows apply the changes, and reboot when prompted.
With this done, your computer is ready for the emulator’s high-speed virtual environment.
3. 🧩 Download and Install Android Studio
Now it’s time to install Android Studio, Google’s official IDE that includes the Android Emulator.


👉 Download from the official site: https://developer.android.com/studio
Step 1: Download Installer
Visit the site above and click Download Android Studio. Accept the license agreement and save the installer.
Step 2: Run the Installer
Double-click the downloaded .exe file.
Follow the on-screen setup — choose Standard installation when asked.
This will automatically install:
- Android SDK
- Platform tools
- Android Emulator
Step 3: First Launch
After installation, open Android Studio. On first launch, it may download extra components; let it finish.
Accept the license terms when prompted.
Once Android Studio loads, you’re ready to install Android 16 (Baklava).
4. 📦 Download Android 16 System Image (API 36)
Android Studio uses SDK Manager to install specific Android versions.
Step 1: Open SDK Manager
From the welcome screen:
- Click More Actions → SDK Manager.
- Go to the SDK Platforms tab.
Step 2: Select Android 16 (API 36)
Check the box next to Android 16 (Baklava).
Click Apply, then OK to download and install all required files.
This includes the system image, Google APIs, and emulator dependencies.
It may take a few minutes depending on your connection — grab a coffee while it downloads.
5. 🛠️ Create and Configure the Virtual Device
Now that Android 16 is installed, let’s create a virtual Android TV, tablet, or phone to run it.
Step 1: Open Virtual Device Manager
- From Android Studio’s start window, click More Actions → Virtual Device Manager.
- Click the + Create Device button.
Step 2: Choose a Device Profile
You’ll see multiple categories:
- Phone: Pixel 8, Pixel 7 Pro, etc.
- Tablet: Pixel Tablet, Nexus 9
- TV / Wear OS / Desktop (older builds only)
Select Pixel Tablet if you want a large-screen experience or any Pixel Phone for mobile layout.
Desktop profiles support only up to Android 14, so avoid them for now.
Step 3: Select Android 16 System Image
In the list of system images, pick Android 16 (API 36) with the Google Play Store logo.
Click Next to proceed.
Step 4: Adjust Hardware Resources
Before finishing, click Show Advanced Settings.
Here you can fine-tune performance for smoother results.
Let’s go through the key options:
- RAM: Allocate 4 GB (4096 MB) if you have 8 GB or more system RAM.
- Internal Storage: 30 GB is a good size for apps and games.
- SD Card / Extended Storage: 2 GB or higher for media files.
- CPU Cores: Set equal to your physical cores (e.g., 6 for Ryzen 5).
- Graphics: Select Automatic or Hardware so the emulator uses your dedicated GPU.
- VM Heap: 52 MB is optimal for handling complex textures.
Click Finish to save.
Your new virtual device will now appear in the Device Manager list.
6. 🚀 Run Android 16 for the First Time
We’re ready to launch the emulator.
- In Device Manager, click the ▶ Play icon next to your new device.
- A new window opens — this is your Android 16 virtual machine booting for the first time.
The first boot may take a minute; that’s normal.
Soon you’ll see the Android 16 welcome screen, identical to what you’d find on a brand-new Pixel device.
Spend a moment exploring:
- Swipe down to open Quick Settings — note the redesigned toggles.
- Open Settings → About Device to confirm Android 16 (API 36).
- Swipe up for the App Drawer and notice the refreshed icons and layouts.
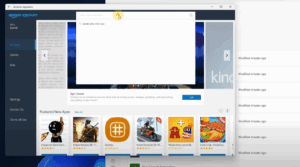
7. 🏪 Access Google Play Store and Install Apps
With Android 16 running, you now have access to the official Google Play Store.
- Open Play Store from the home screen.
- Sign in with your Google account.
- Browse recommended apps or use the search bar.
- Select any app → click Install → Open when finished.
All installed apps appear in your App Drawer just like on a real device.
You can now:
- Use Chrome to browse the web
- Stream videos via YouTube
- Manage media with Files or Google Photos
- Test your own apps if you’re a developer
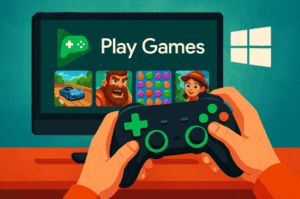
8. 🎮 Try Games and Optimize Performance
Let’s test how gaming feels inside this environment.
Lighter titles such as Candy Crush, Angry Birds, or Subway Surfers run flawlessly.
For a challenge, try Asphalt 9, Call of Duty Mobile, or Genshin Impact — results depend on your hardware.
Here are a few optimization tips before you jump in:
- Use hardware graphics acceleration: Ensure it’s set to Automatic/Hardware under Advanced Settings.
- Allocate more RAM or CPU cores if you notice slowdowns.
- Disable other background programs in Windows to free resources.
- Enable keyboard mapping or connect a USB controller for better game controls.
Keep in mind that some competitive games (PUBG Mobile, BGMI, Free Fire) detect emulators and may restrict matchmaking.
However, most single-player and casual games perform surprisingly well.
9. ❓ Frequently Asked Questions
Q1. Is Android Studio’s emulator safe?
Yes — it’s an official Google tool used by developers worldwide. No third-party software is involved.
Q2. Will this work on Windows 10 and 11?
Absolutely. The emulator runs on both versions as long as virtualization and the Virtual Machine Platform feature are enabled.
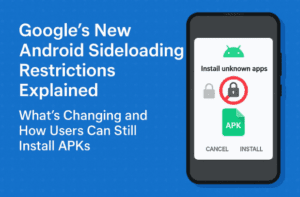
Q3. Can I install APK files manually?
Yes. Drag and drop any APK onto the emulator window or use ADB:
adb install myapp.apk
Q4. Why is the emulator slow on my laptop?
Ensure virtualization is enabled in BIOS, allocate at least 4 GB RAM to the virtual device, and set graphics to hardware acceleration.
Q5. Can I test my own apps on Android 16?
Yes. Android Studio lets you build and run your apps on the emulator to test compatibility with Android 16 features.
10. ⚠️ Disclaimer
This tutorial is for educational and testing purposes only.
Android Studio and its emulator are official Google products distributed freely for developers.
Performance depends on your PC hardware and virtualization support.
Games that restrict emulator usage are beyond this guide’s scope — use responsibly.
🔗 Useful Link
- Download Android Studio: https://developer.android.com/studio
#Android16 #AndroidStudio #Windows11 #Emulator #GooglePlay #TechGuide #Baklava #AndroidEmulator #Windows10 #AppDevelopment