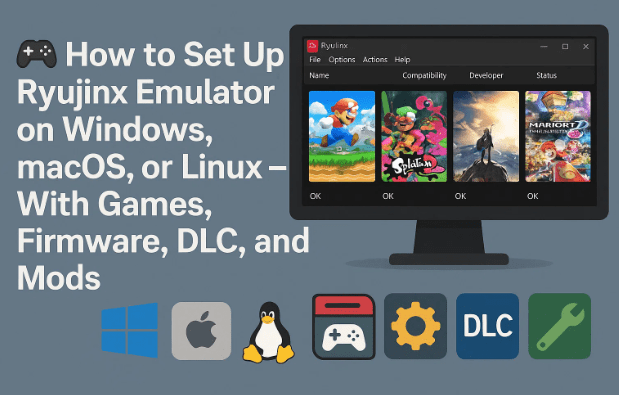
Emulation has come a long way in the past few years, and Ryujinx stands as one of the best Nintendo Switch emulators available today. Whether you’re trying to play your favorite Switch games on a powerful desktop or just experimenting with homebrew projects, Ryujinx provides a stable, high-performance environment with advanced features like Vulkan rendering, multiplayer (LDN), and mod support.
In this detailed guide, we’ll walk through everything you need to know — from installation and configuration to adding keys, firmware, DLCs, and even community-made mods. By the end, you’ll have a fully functioning Ryujinx setup ready to load your legally dumped Switch titles.
⚠️ Disclaimer: This tutorial is for educational purposes only. You should only use game files, keys, and firmware legally obtained from your own Nintendo Switch console. Downloading or sharing copyrighted game files from the internet may violate Nintendo’s terms of service and copyright laws.
1. 🧩 What Is Ryujinx and Why Use It?
Ryujinx is an open-source Nintendo Switch emulator written in C#. It’s designed to replicate the Nintendo Switch’s environment so you can run your own game dumps directly on PC, macOS, or Linux.
Unlike some experimental emulators, Ryujinx focuses heavily on accuracy and performance. It offers a clean graphical interface, customizable controller mapping, shader caching to reduce stutter, and even supports multiplayer via local wireless emulation (LDN).
You’ll see two main options: Download and Join Discord. Click Download to grab the latest version for your operating system (Windows 10/11, macOS, or Linux).
You’ll likely see a prompt saying “Keys not installed” — that’s expected. Keys are essential for decrypting your legally dumped Switch games, and we’ll handle them next.
Before we do, let’s look at the folder structure.
It’s best practice to create a single directory for all your emulation assets, such as:
Keeping everything organized ensures future updates or migrations go smoothly.
🔍 Tip: Finding Keys and Firmware (for Reference)
If you’re unsure where to obtain the required prod.keys and firmware files, remember these must come from your own Nintendo Switch. However, if you’re researching community discussions on how to extract them, you can search on Google for:
ryujinx prod.keys and firmware reddit
This often leads to helpful Reddit threads or guides that explain how others have legally backed up their own keys and firmware for use with Ryujinx.
Similarly, if you’re trying to understand how game dumps work, you can search phrases like:
how to dump switch game roms ryujinx
These queries typically bring up tutorials showing how to back up your purchased games safely without violating Nintendo’s terms.
⚠️ Important: Do not download game files or keys from unofficial websites. Always ensure you’re using backups you personally own.
5. 🔑 Step 3 – Install Keys and Firmware
Ryujinx requires two core components to boot games:
prod.keys – these decrypt game files
Firmware – the operating files from your Nintendo Switch system
⚠️ Legal Reminder: You must extract these from your own Switch console using homebrew tools such as Lockpick RCM. Distributing or downloading them from unofficial sources is not permitted.
Installing the Keys
In the Ryujinx window, go to File → Open Ryujinx Folder.
Navigate to the system folder.
Place your prod.keys (and title.keys if available) inside.
Restart the emulator.
Installing Firmware
Open Tools → Install Firmware → Install from XCI or ZIP.
Browse to your dumped firmware ZIP.
Confirm with Yes.
Wait until the message “Firmware Installed Successfully” appears.
Once both keys and firmware are in place, Ryujinx will now be able to load game files properly.
6. 🕹️ Step 4 – Add Your Game Library
Now comes the fun part — adding your game files.
Ryujinx supports .XCI, .NSP, and .NCA file formats (these are standard Nintendo Switch cartridge and eShop dumps).
To add them:
Go to Options → Settings → Game Directories.
Click Add and select the folder containing your games.
Press Apply → OK.
Your library will populate automatically with cover art, titles, and compatibility information.
You can right-click any title to:
View details and update info
Access save locations
Manage DLC or mods
💡 Tip: You can adjust icon size or switch to list view from View → UI Settings to make browsing easier.
7. 📦 Step 5 – Apply Game Updates and DLC
Switch games often come with performance updates or downloadable content (DLC). Ryujinx lets you apply these easily.
How to Add Updates and DLC
Go to Options → Settings → Game Directories again.
Click Add under Auto-Load DLC and Updates from Folder.
Point it to where your .NSP update and DLC files are stored.
Press Apply → OK.
Now, when you select a game, the latest version and installed DLC will automatically load.
Manually Managing Versions
Right-click → Manage Title Updates to select a specific update version.
Right-click → Manage DLC to enable/disable content.
This feature is excellent if a certain patch causes performance problems or incompatibility with mods.
8. 🎮 Step 6 – Configure Controllers and Input
Ryujinx supports a variety of controllers — from Nintendo Pro Controllers to Xbox and PlayStation pads, as well as keyboard input.
Setting Up Your Controller
Connect your controller via USB or Bluetooth.
In Ryujinx, open Options → Settings → Input.
Under Input Device, choose your controller (e.g., Xbox 360 Controller, DualSense).
Select the controller type:
Pro Controller
Joy-Con Pair
Joy-Con Left/Right
Map buttons manually by clicking each input or keep defaults.
Press Save when done.
You can configure up to eight players if you plan on local multiplayer sessions.
Docked vs Handheld Mode
Go back to Input Settings and ensure Docked Mode is checked for higher resolution output (1080p vs 720p).
9. 🖼️ Step 7 – Optimize Graphics Settings
Ryujinx automatically chooses optimized settings for most systems, but you can tweak them for extra performance.
Recommended Graphics Settings
Backend: Vulkan – generally faster and more modern than OpenGL.
Preferred GPU: Select your dedicated graphics card (not integrated Intel).
Resolution Scale: 1× (native 720p) to 2× (1080p). Higher scales improve visuals but cost performance.
Anti-Aliasing: FXAA or None for speed; MSAA for quality.
Scaling Filter: Bilinear (best balance of clarity and speed).
VSync: Keep enabled to avoid screen tearing.
Hovering over each setting shows a brief tooltip explaining its impact. If you encounter lag or graphical glitches, click Reset Settings to return to defaults.
10. 🌐 Step 8 – Enable Multiplayer (LDN Mode)
Ryujinx features LDN – Local Wireless Network emulation, allowing you to play online with other Ryujinx users as if connected locally.
Follow the setup steps for creating or joining rooms.
Ensure both players are using identical game versions and updates.
While setup can be tricky, once configured, multiplayer sessions are smooth for compatible titles like Mario Kart 8 Deluxe or Super Smash Bros Ultimate.
11. 🧱 Step 9 – Install and Manage Game Mods
One of Ryujinx’s most exciting features is its mod support, allowing you to apply texture packs, character swaps, or gameplay tweaks.
How to Add Mods
Find mods on community sites like GameBanana.
Each mod should contain a folder such as: [ModName] └── romfs or sometimes both exefs and romfs.
Right-click your game in Ryujinx → Open Mods Directory.
Copy your mod folder inside this location.
Back in Ryujinx, right-click the same game → Manage Mods → enable or disable individual mods → Save.
💡 If a mod causes a crash, simply disable it and relaunch the game.
You can mix multiple mods per title, just keep them in separate folders to avoid conflicts.
12. 👤 Bonus – Managing User Profiles and Save Data
Ryujinx allows custom user profiles, which helps separate progress across different players.
Create or Manage Profiles
Go to Options → Manage User Profiles.
Click Add to create a new profile.
Each profile has its own unique save data folder.
⚠️ Important: Deleting a profile also deletes its save data. Back up before removing profiles.
You can locate save files by right-clicking a game → Open Save Data Location, perfect for transferring saves or backups.
13. 💬 Frequently Asked Questions (FAQ)
Q1: Can I use Ryujinx on macOS? ✅ Yes. Ryujinx offers builds for Windows, macOS, and Linux. On macOS, performance depends on the Metal backend support provided by your hardware.
Q2: Is Ryujinx free? Yes, Ryujinx is completely open-source and free to use. Donations help ongoing development but are not required.
Q3: What’s the difference between Ryujinx and Yuzu? Both emulate the Nintendo Switch, but Ryujinx is known for higher stability and LDN multiplayer support. Yuzu sometimes outperforms Ryujinx in certain GPU-bound games, but both are excellent.
Q4: Are online Nintendo Switch services supported? No. Ryujinx only supports LDN local-wireless emulation, not Nintendo’s official online service.
Q6: Can I improve performance further? Yes. Close background apps, enable Vulkan, use a dedicated GPU, and make sure your drivers are updated.
14. 🏁 Final Thoughts
By now, you should have a fully functional Ryujinx emulator capable of running your favorite Nintendo Switch titles — complete with DLC, updates, and mods.
Whether you’re exploring classic exclusives like Zelda: Breath of the Wild or testing new indies, Ryujinx delivers smooth, authentic gameplay while giving PC users enhanced control and flexibility.
Keep your files organized, update your keys responsibly, and always use your own legally obtained dumps. The emulator’s development is active, so check back periodically at the official site for new features and improvements.
Disclaimer: This guide is for informational and educational purposes only. Downloading or sharing copyrighted material you don’t own may violate copyright laws. Always dump your own keys, firmware, and games from your personal Nintendo Switch console. For support and updates, visit the official Ryujinx website: https://ryujinx.app/download.
Jonathan is a US-based gaming journalist with more than 10 years in the industry. He has written for online magazines and covered topics ranging from PC performance benchmarks to emulator testing. His expertise lies in connecting hardware reviews with real gaming performance, helping readers choose the best setups for play.