For years, Windows users have relied on third-party Android emulators like Bluestacks, NoxPlayer, and LDPlayer to enjoy mobile games on their computers. But now, the wait for an official solution is finally over.
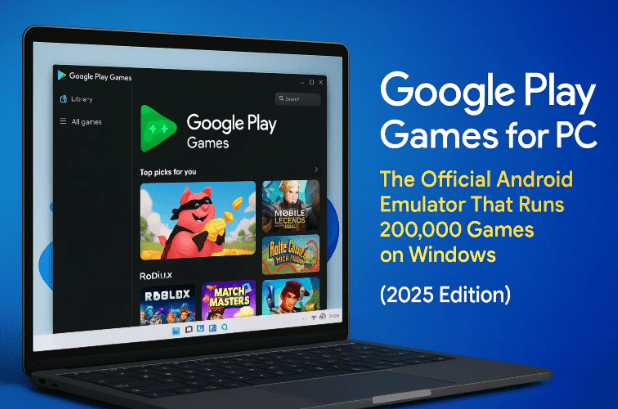
Google Play Games for PC is here — not in beta, but as a stable and fully supported release, capable of running over 200,000 Android games right on your desktop. With deep integration between your Google account, synchronized progress, and official Play Store updates, this marks a huge leap forward for Android gaming on Windows.
This guide explains how to install, configure, and optimize Google Play Games for PC — even if you’ve never used an emulator before.
🕹️ What Is Google Play Games for PC?
Google Play Games for PC is Google’s official Android emulator built specifically for Windows computers. It allows you to play your favorite mobile games with mouse and keyboard controls, larger displays, and smoother performance.
Unlike older emulators that relied on unofficial Android images or advertising-filled platforms, Google’s emulator is clean, free, and deeply integrated with your Play Store account.
Key highlights:
- Officially developed by Google
- Runs Android games natively on Windows
- Syncs game progress with your Android phone
- Supports over 200,000 titles from the Play Store
- Free and ad-free
- Optimized for Intel and AMD hardware
👉 Official site: https://play.google.com/googleplaygames/
⚙️ Minimum System Requirements
Before installing, make sure your PC meets these basic specifications:
| Component | Minimum Requirement |
|---|---|
| Operating System | Windows 10 (v2004) or later |
| Processor | 4-core CPU (Intel i5 / Ryzen 5 or higher) |
| RAM | 8 GB or more |
| Storage | 10 GB of free space |
| Graphics | Intel UHD 630 / AMD Radeon Vega 8 or higher |
| Virtualization | Must be enabled in BIOS |
If virtualization is turned off, you’ll encounter a setup error — but don’t worry, we’ll fix that later in this guide.
📥 Step 1 – Downloading Google Play Games for PC
Let’s start with the basics.
- Open any web browser (Chrome, Edge, or Brave).
- Type Google Play Games PC in the search bar and press Enter.
- Click the first result titled Google Play Games — make sure it’s not labeled “Beta.”
- You’ll land on Google’s new official download page (no longer in beta).
You’ll notice there’s no mention of “beta” anywhere — confirming this is the stable, production version.


Click “Download Google Play Games” and wait for the installer file to appear at the top of your browser.
💾 Step 2 – Installing the Emulator
After downloading, locate the installer file (usually named GooglePlayGamesInstaller.exe) and double-click it.
- Confirm the installation when prompted by Windows.
- The setup tool will automatically download dependencies and begin installation.
- The installer will show a progress bar — the total size is about 800 MB.
- Once finished, Google Play Games will launch automatically.
If you prefer, you can close your browser during installation — it’s not required afterward.
When the installation completes, the emulator window will open automatically, ready for your first sign-in.
🔐 Step 3 – Logging In With Your Google Account
Once Google Play Games opens:
- Click Sign In and log in with your existing Google account.
- It’s best to use the same account linked to your Android phone so your game data syncs automatically.
- After signing in, a confirmation message appears: “You’re signed in. You can safely close this window.”
Return to the main emulator screen, accept the terms of service, and click Finish Setup.
Your library and home page will now load with a beautiful interface showcasing featured and popular games.
🧭 Step 4 – Understanding the Interface
Once inside, you’ll see several sections on the left sidebar:
- Home: Displays featured and trending games.
- Library: Shows games you’ve installed.
- Search: Lets you find titles by name or genre.
- News: Provides updates about new features and community highlights.
- Downloads: Displays ongoing or queued installations.
- Profile: Manages your account and preferences.
At the top, you can also access settings such as:
- Auto-update games
- Diagnostics data sharing
- Game optimization settings
- Application version (currently around v25.9)
It’s lightweight, clean, and intuitive — no ads or unnecessary menus.
🧩 Step 5 – Fixing the Virtualization Error in BIOS
One common issue new users face is a message saying:
“Virtualization is disabled. Please enable it in BIOS.”
This is critical because virtualization allows your processor to run the Android subsystem efficiently.
Let’s fix it step by step:
- Check first:
- Press Ctrl + Shift + Esc to open Task Manager.
- Go to the Performance tab.
- Look for Virtualization on the right side — it should say Enabled.
- If it says Disabled, continue below.
- Enable virtualization from BIOS:
- Restart your PC.
- While booting, repeatedly press F2, Del, or Esc (depending on your brand).
- On ASUS boards, enter Advanced Mode.
- Look for CPU Configuration → Virtualization Technology.
- Change it from Disabled to Enabled.
- Press F10 to save and reboot.
If your PC uses a different BIOS interface (like HP, Dell, Lenovo), search online for your model’s virtualization setting — it’s usually under CPU or Advanced options.
Once you reboot, open Google Play Games again, and the virtualization warning will disappear.
🎯 Step 6 – Installing and Playing Games
With virtualization enabled, you’re ready to play.
- Open Google Play Games for PC.
- Choose any game from the Home or Library tab.
- Click Install — it will download and appear as “Pending” in the queue.
- Once installed, you can launch it directly or add a desktop shortcut.
Games install quickly and run within their own window using Google’s optimized Android engine.
⚡ Performance Tips and Resolution Settings
If your computer struggles or lacks a dedicated GPU, you can still improve performance with a few tweaks.
🧩 Adjust Display Quality:
- Click the gear icon (settings) during gameplay.
- Lower the resolution from Full HD to 720p.
- Reduce graphical effects for smoother frame rates.
💡 Pro Tip:
Even mid-range systems (Intel Core i3, 8GB RAM) can run most games smoothly once resolution is lowered. Only high-end 3D games like Genshin Impact may need stronger GPUs.
🎮 Keyboard Mapping and Controls
Google Play Games automatically maps most game controls to your keyboard.
For example:
- Racing games use arrow keys or WASD for movement.
- Spacebar for jump or action.
- Mouse for aiming or tapping equivalents.
If a game doesn’t respond properly, you can:
- Open the control bar (usually on the side or bottom).
- Select Edit Key Mapping.
- Manually assign keys for actions like move, jump, shoot, or swipe.
- Save the configuration for future sessions.
This feature gives you full flexibility — even simulating joystick or touchscreen gestures.
🧠 Troubleshooting Common Issues
| Problem | Solution |
|---|---|
| Virtualization still shows disabled | Double-check BIOS changes were saved; disable Hyper-V in Windows if needed. |
| Game window too small | Use fullscreen toggle or adjust resolution settings. |
| Audio lag or stutter | Reduce graphics quality or close background apps. |
| Games crash or freeze | Ensure you have at least 8 GB RAM and updated GPU drivers. |
| Controls not working | Reconfigure key mappings or restart the emulator. |
💬 Frequently Asked Questions (FAQ)
Q1. Is Google Play Games for PC free?
Yes — it’s 100% free and ad-free. You only need a Google account.
Q2. Can I use it on Windows 10?
Yes. It supports Windows 10 (version 2004 or newer) and Windows 11.
Q3. Can I play Android apps too, not just games?
Currently, Google Play Games focuses on games only, not utility apps. Future updates may expand compatibility.
Q4. Does it work on Mac?
Not yet — this version is exclusive to Windows.
Q5. Why does it need virtualization?
Virtualization allows Android to run efficiently on your PC hardware, improving performance and stability.
Q6. How many games are available?
Over 200,000 titles are already compatible, with more added regularly.
⚠️ Disclaimer
This article is for educational purposes only.
Google Play Games for PC is an official Google product — always download it from the verified website:
👉 https://play.google.com/googleplaygames/
Enabling BIOS virtualization is safe, but proceed carefully and only change settings you understand. Performance may vary depending on your computer hardware.
Tags: Google Play Games, Android emulator for PC, run Android apps on Windows, BIOS virtualization, Genshin Impact PC, free emulator, gaming setup
Hashtags: #GooglePlayGames #AndroidEmulator #Windows11 #GamingOnPC #PlayStore #Virtualization #GoogleEmulator #AndroidGames