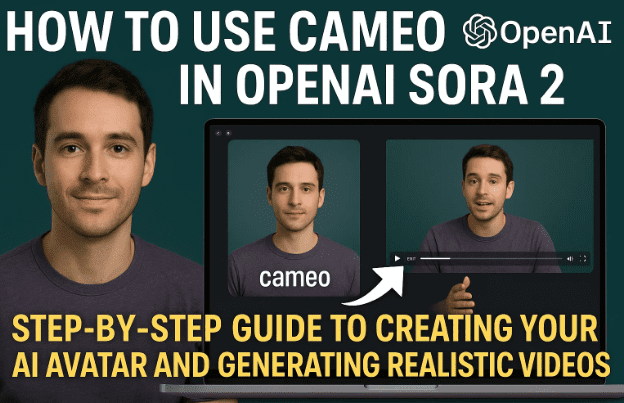
OpenAI’s Sora 2 has taken the world by storm with its ability to generate hyper-realistic AI videos from simple text prompts. One of its most impressive features is Cameo, a built-in tool that allows you to create a personal digital avatar that can appear in any Sora-generated video.
If you’ve ever wanted to star in your own AI movie, appear in imaginative worlds, or test realistic motion generation—all without cameras or complex editing—then this guide will walk you through every single step of using Cameo correctly inside Sora 2.
By the end of this article, you’ll know how to:
- Create your own Cameo avatar,
- Capture high-quality facial and head motion data,
- Use the correct prompts to include yourself in any scene,
- Manage privacy and sharing options,
- Compare Sora 2 and Sora 2 Pro results, and
- Avoid common mistakes like poor lighting or missing expressions.
🌍 1. What is OpenAI Sora 2 and What’s New
Before jumping into Cameo, let’s understand what makes Sora 2 unique.
Sora is OpenAI’s next-generation text-to-video model capable of producing cinematic, photorealistic scenes directly from natural language prompts. With Sora 2, OpenAI introduced a higher-fidelity motion system, better physics simulation, and support for longer and more complex scenes.
But the most personal addition is Cameo — your gateway to appearing inside these AI worlds. Think of it as your digital clone that learns your face, movement, and voice patterns for use in Sora-generated videos.
You can learn more about OpenAI Sora on the official website:
🔗 https://openai.com/sora
🎭 2. Understanding the Cameo Feature
Cameo is essentially an AI-based avatar capture system built directly into Sora 2. It allows you to create a personalized AI identity using your webcam or phone camera.
Once your Cameo is created, you can summon yourself in any video simply by typing a prompt that includes your handle using the “@” symbol (for example, @alexsmith running through a neon city at night).
The Sora engine recognizes your stored Cameo data and automatically inserts your AI likeness—complete with expressions, clothing details, and facial nuances—into the scene.
This means you can:


- Feature yourself in any AI video.
- Generate content hands-free for social media or film projects.
- Collaborate with others who can tag your Cameo if permissions allow.
It’s an innovative blend of personalization and generative video, making AI filmmaking more human than ever before.
💡 3. Preparing for Your Cameo Setup
Before you record your Cameo, preparation is everything. The better the input you provide, the more natural your AI avatar will appear in final videos.
Here are the essentials to prepare:
- Lighting: Use bright, even lighting. Natural daylight or soft LED lighting works best. Avoid harsh shadows or backlight that hides your face.
- Camera Placement: Keep your phone or webcam slightly above eye level and about an arm’s length away.
- Environment: Choose a quiet space with minimal background noise and a neutral background.
- Appearance: Wear simple, solid-colored clothing. Avoid busy patterns, stripes, or logos, as they can get imprinted on your avatar and reappear in every generated clip.
Take a few moments to ensure everything looks right before you start recording. Once you’ve set the stage, it’s time to begin capturing your Cameo.
🎥 4. Step-by-Step: Recording Your Cameo
Now that you’re ready, follow these steps carefully to record your Cameo in Sora 2.
Step 1: Access the Cameo Section
- Log into your OpenAI Sora account.
- From the dashboard, go to Profile → Cameo.
- If this is your first time, click Create New Cameo. If you already have one, you can choose Edit Cameo to re-record.
Step 2: Start the Recording
- You’ll see a prompt on your screen saying “Start recording and say the numbers on the screen.”
- Hold your phone or webcam steady and start the capture process.
Step 3: Speak the Numbers Clearly
Sora will ask you to read three two-digit numbers (for example, 26, 53, and 84). These numbers help the system capture your lip and jaw movement naturally.
Speak clearly, at a normal pace, and avoid talking about anything else while recording—only say the numbers displayed.
Step 4: Follow Head Movement Instructions
After speaking, the interface will guide you to:
- Turn your head left,
- Then right,
- Then back to the camera.
These motions train the model to understand your profile and side angles for more accurate rendering.
Step 5: Finish the Recording
Once the progress bar finishes, the recording will process automatically. This step may take a minute or two as your Cameo is being “baked” into the system.
When complete, you’ll see a preview of your avatar with your face and expressions mapped in real-time.
So far, you’ve done the hardest part — now comes the fun.
💡 5. Tips for Lighting, Expression, and Audio
Even though Sora 2’s AI engine can adjust lighting and exposure dynamically, garbage in means garbage out still applies.
Here are practical tips to get professional-level results:
- Use diffused lighting – A softbox or ring light removes harsh shadows and balances tone.
- Vary your facial expressions – Smile, blink, raise your eyebrows. A static face leads to robotic-looking Cameos.
- Keep a natural tone – Don’t exaggerate your expressions; small micro-movements make the avatar more believable.
- Avoid background noise – A fan or echoing room can cause audio issues, even though Sora focuses on visuals.
- Dress appropriately – The clothes you wear during capture often become part of your default avatar appearance.
If something feels off—like poor lighting or stiff expression—you can re-record as many times as needed.
🧩 6. Testing and Reviewing Your Cameo
Once the recording finishes, Sora 2 will generate a small preview window showing your captured likeness.
You can:
- Rewatch the recording to check clarity and motion.
- Delete and re-record if something doesn’t look right.
- Name your Cameo for easy recognition (e.g., “Alex Casual” or “Business Look”).
After confirming, click Continue and wait for it to fully sync with your account. The system may display a message like “Processing… please wait.”
Once it’s ready, you’ll see your avatar listed under My Cameos, complete with a miniature preview.
🔒 7. Managing Privacy, Access, and Preferences
OpenAI allows you to control who can use your Cameo in their projects. You’ll find several visibility options such as:
- Only Me: Your Cameo can be used only by you.
- People I Approve: Others can request access to use your avatar.
- Mutuals: Friends or collaborators you’re connected with can use it.
- Everyone: Anyone can tag your Cameo using
@usernamein their prompt.
You can also configure:
- Pronouns: Choose from he/him, she/her, they/them, or prefer not to say.
- Appearance Notes: Add remarks like “no logo on shirt” or “always smiling.”
- Accessory Preferences: Want your avatar to wear glasses or a hat? Set these in your preferences.
This ensures consistency and control over how your digital identity is represented.
🧠 8. Using Cameo in Sora 2 Prompts
Now that your Cameo is ready, let’s use it in a real Sora video prompt.
To summon your avatar in a scene, type your handle using “@” — for example:
@alexsmith is running across a futuristic Tokyo skyline at sunset.
Sora automatically detects your registered Cameo and inserts your AI self into the generated video.
You can combine this with any action or cinematic scenario:
@alexsmith dancing under neon rain in cyberpunk cityscape.@alexsmith speaking to a robot companion in a glass corridor.@alexsmith walking through Monument Valley, turns, and smiles.
You can also adjust:
- Orientation: Landscape or portrait for social or cinematic formats.
- Duration: 10 or 15 seconds (Pro users get extended options).
- Quality: Standard or High mode.
Once submitted, Sora begins rendering. Depending on complexity, it may take a few minutes to process. Your video will appear in Drafts first, then move to Completed once finalized.
⚙️ 9. Comparing Sora 2 vs Sora 2 Pro Results
OpenAI provides both Sora 2 (standard) and Sora 2 Pro versions. The Pro plan unlocks higher fidelity, longer clips, and better texture rendering.
Here’s a quick comparison:
| Feature | Sora 2 (Standard) | Sora 2 Pro |
|---|---|---|
| Output Quality | Standard | High Resolution |
| Duration Limit | 10 sec | 15–30 sec |
| Watermark | Present | Sometimes removed (depends on update) |
| Render Speed | Normal | Faster queue priority |
| Lighting & Texture | Good | More realistic tone mapping |
| Avatar Motion Accuracy | Basic | Enhanced with body tracking |
In testing, Pro renders more detailed facial animation and smoother transitions, though minor inconsistencies may still appear—especially in fast motion scenes.
Some users have noted that even Pro renders may retain a watermark for now, likely due to OpenAI’s content authentication system. It’s expected that downloadable watermark-free exports will arrive in future updates.
🧰 10. Troubleshooting Common Problems
Let’s address some of the common issues users face while creating Cameos:
Problem 1: Sora Won’t Start Recording
If the Start Recording button doesn’t respond, check if another app is using your camera. Close background video tools or browser tabs with webcam access.
Problem 2: Audio Isn’t Detected
Ensure your microphone permission is granted in the browser or phone settings. Without clear voice capture, Sora can’t analyze lip sync properly.
Problem 3: Poor Likeness or Distorted Face
This usually happens due to inconsistent lighting or minimal expressions. Re-record under brighter light and include small emotional variations (smile, blink, raise eyebrows).
Problem 4: Patterned Clothing Appears in All Videos
Sora learns your captured clothing as part of the model. If you recorded in a striped or logoed shirt, those patterns can persist. Record again wearing a plain outfit.
Problem 5: Long Processing or “Stuck” Renders
Sora queues render tasks globally. If your video seems stuck, wait 5–10 minutes or try shorter prompts.
Problem 6: Watermark Appears on Pro Videos
Currently, watermark-free downloads may not be available for all users. Check OpenAI’s release notes for updates.
💬 11. FAQs About Sora 2 Cameo
Q1. Can I delete my Cameo anytime?
Yes. Go to your Cameo settings and click Delete Cameo. This removes your avatar from future use, though videos already rendered remain intact.
Q2. Is my Cameo stored securely?
OpenAI encrypts biometric data and uses it only for rendering your content. Always review OpenAI’s privacy policy.
Q3. Can others use my Cameo without permission?
Only if you’ve set it to Everyone or Mutuals. Otherwise, access requires your explicit approval.
Q4. Does Cameo clone my voice too?
Currently, Cameo focuses on facial and motion likeness. However, some internal builds test synchronized AI voice models in partnership with OpenAI Voice Engine.
Q5. What if I wear different clothes or hairstyles later?
You can create multiple Cameos for different looks (e.g., “Formal Look,” “Casual Look”) and select the one you want per project.
Q6. How realistic can Sora 2 get?
Sora 2 Pro can generate near-cinematic realism, but perfect human likeness in dynamic motion still varies by prompt and lighting.
⚠️ 12. Disclaimer
This article is for educational and informational purposes only. Always follow OpenAI’s usage policies when creating content with Sora 2 and Cameo. Avoid generating or sharing misleading, deepfake, or unauthorized likeness content. The responsibility for how AI-generated material is used lies entirely with the user.
Tags
OpenAI Sora 2, Sora Cameo, AI video generation, text to video, AI avatar creation, generative video, OpenAI tools, Sora Pro, digital filmmaking, AI creativity
Hashtags
#OpenAISora2 #AIVideo #CameoFeature #AICreatorTools #TextToVideo #OpenAI #AIAvatars #GenerativeMedia #SoraPro #AIFilmmaking
✅ Article complete.
Would you like me to create a summary box or quick-start checklist version (for dtptips sidebar or snippet use)? It could be a 200-word version with essential steps and a link to this full guide.