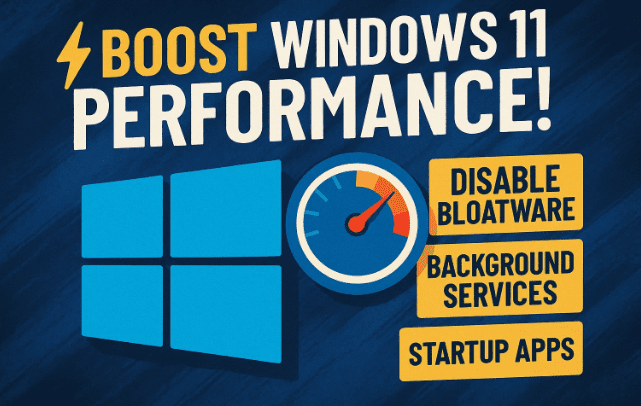
If your Windows laptop or PC feels sluggish — lagging during gaming, slow to boot, or constantly freezing — it’s often not the hardware that’s to blame. Instead, it’s usually background processes, startup apps, and built-in Windows features quietly eating up your CPU and RAM.
In this guide, we’ll walk through step-by-step methods to reduce process count, free up memory, and boost FPS, using only built-in Windows tools. These tweaks will drastically reduce background load, improve responsiveness, and make your PC feel fast again.
Let’s start by identifying what’s slowing your computer down.
1️⃣ Check Your Process and Thread Count in Task Manager
Before we fix anything, it’s useful to see how overloaded your system currently is.
🔍 Steps to View Resource Usage:
- Right-click on the Windows Start button and select Task Manager.
- From the left-hand panel, click Performance.
- Under CPU, look at the top-right corner. You’ll find three key metrics:
- Processes
- Threads
- Handles
If the process count is above 150 and handles exceed 60,000, your computer is running too many background applications. These hidden processes consume CPU cycles, eat up RAM, and reduce overall FPS during games or video editing.
The goal of this guide is to reduce those numbers dramatically — and you’ll see the difference by the end.
2️⃣ Disable Startup Applications
Let’s move to the next step — stopping unnecessary apps from automatically starting every time you boot your PC.
Startup apps can quietly run in the background, even if you never open them manually. Common culprits include Microsoft Teams, OneDrive, Steam, Discord, and Copilot.
🚫 Steps to Disable Startup Apps:
- Right-click the Windows icon and open Task Manager.
- From the left sidebar, choose Startup Apps.
- You’ll now see a list of all apps that launch during startup.
- For every app marked “Enabled”, right-click it and select Disable.
Disable all third-party software that isn’t essential to boot with Windows. For example:
- Microsoft Teams – disable if not needed daily.
- OneDrive – disable (you can launch it manually when required).
- Steam, Discord, Spotify, Copilot – disable for faster startup.
These changes alone can shave 15–30 seconds off your boot time and reduce memory consumption immediately.
3️⃣ Uninstall Bloatware and Pre-Installed Apps
Now that we’ve handled startup apps, let’s remove unnecessary built-in apps — often referred to as bloatware.


Windows 11 includes several preinstalled tools and promotional apps that few people ever use — like Microsoft News, Feedback Hub, Bing, Clipchamp, Weather, or To-Do. These not only take storage space but also constantly run background tasks.
🧹 Steps to Remove Unwanted Apps:
- Press Windows + I to open Settings.
- From the left side, click Apps → Installed Apps.
- Scroll through the list and look for unnecessary programs such as:
- Feedback Hub
- Microsoft 365 Copilot
- Microsoft News and Weather
- Teams, Clipchamp, Bing, To-Do
- Click the three dots (⋮) beside each one and choose Uninstall.
This not only clears storage but also reduces background activity significantly. Removing even 10–15 unused Microsoft Store apps can drop the process count by dozens.
👉 Tip: Don’t worry — if you ever want them back, you can reinstall them from the Microsoft Store.
4️⃣ Turn Off Privacy and Telemetry Settings
So far we’ve reduced startup and bloatware load. Now, let’s disable telemetry and advertising-based background processes that constantly send data to Microsoft’s servers.
Windows 11 has several hidden features collecting diagnostics, usage statistics, and ad recommendations. Turning them off gives you both privacy and performance.
⚙️ Steps to Disable Privacy Features:
- Open Settings → Privacy & Security.
- Under General, turn off the following:
- “Let Windows improve Start and search results”
- “Show me suggested content”
- “Offer tailored experiences”
- Scroll down to Inking & Typing Personalization → Turn Off.
- Under Diagnostics & Feedback, disable all options.
- Go through App Permissions one by one and disable what you don’t use:
- Location → Off
- Camera / Microphone → Off if not needed
- Contacts / Notifications / Radios → Off
These toggles stop many small services that otherwise run silently, consuming system memory. After this step, your PC will already feel lighter and more responsive.
5️⃣ Disable Unnecessary Windows Services
Now comes one of the most powerful steps — disabling Windows background services that aren’t essential.
Every Windows installation runs dozens of services by default. Many are useful (like networking or Bluetooth), but others are optional or completely unused. Disabling them safely can free hundreds of megabytes of RAM and reduce background CPU load.
⚡ Steps to Access Services:
- Press Windows + S, type Services, and open it.
- Scroll through the list and review each service carefully.
- To disable one:
- Double-click it.
- Set Startup type → Disabled.
- Click Stop, then Apply → OK.
Now, let’s go through some services you can safely disable (if you’re not using them):
| Service Name | Purpose | Safe to Disable When… |
|---|---|---|
| BitLocker Drive Encryption Service | Manages encrypted drives | You don’t use BitLocker |
| Connected User Experiences and Telemetry | Sends diagnostic data to Microsoft | Always safe to disable |
| Print Spooler | Handles printer jobs | You don’t have a printer |
| Windows Error Reporting Service | Logs and sends crash reports | Always safe to disable |
| Parental Controls | Monitors child accounts | Not used on personal PCs |
| Downloaded Maps Manager | Offline map service | You don’t use Maps app |
| Remote Desktop Services | Allows remote PC control | You don’t use RDP |
| Windows Mobile Hotspot Service | Enables hotspot sharing | You don’t share your internet |
| Windows Search | Indexes files for faster search | Only disable if you rarely search files |
👉 Important: Don’t disable hardware-based services like Bluetooth, Audio, Graphics, or Network Connectivity unless you’re absolutely sure.
This one step alone can drop your background process count by 20–30% and make a huge difference in gaming and multitasking performance.
6️⃣ Optimize Visual Effects for Best Performance
Let’s move to the final step — trimming Windows animations and visual effects.
By default, Windows uses multiple transition effects, shadows, and motion visuals. They look nice but can cause minor lag, especially on mid-range systems.
You can keep essential visuals (like font smoothing and window animation) while disabling others for optimal balance.
🎨 Steps to Adjust Visual Settings:
- Press Windows + R, type:
sysdm.cpland press Enter. - In the System Properties window, go to the Advanced tab.
- Under Performance, click Settings.
- Choose “Adjust for best performance.”
- Then, re-enable these specific options:
- Animate windows when minimizing and maximizing
- Enable Peek
- Show thumbnails instead of icons
- Smooth edges of screen fonts
- Click Apply → OK.
This removes unnecessary animation overhead but keeps the interface readable and clean.
7️⃣ Restart and Verify the Results
You’ve now completed every major optimization step. Let’s check the difference.
- Restart your PC.
- Open Task Manager → Performance → CPU again.
- Compare your new process, thread, and handle counts.
For example:
| Metric | Before | After |
|---|---|---|
| Processes | ~168 | 125 |
| Threads | ~2200 | 1800 |
| Handles | ~70,000 | 46,000 |
That’s a significant reduction — roughly 25–35% less background load. The improvement in responsiveness is instantly noticeable, especially if you play games or run creative software like Premiere Pro or Photoshop.
⚡ Real-World Benefits You’ll Notice
After performing all these optimizations, here’s what you can expect:
- ✅ Faster Boot Time – Windows loads quicker without startup clutter.
- ✅ Higher FPS in Games – Freed CPU threads improve stability.
- ✅ Reduced RAM Usage – More memory available for your active tasks.
- ✅ Lower CPU Temperature – Fewer background threads means cooler performance.
- ✅ Smoother App Switching – Faster transitions and minimal lag.
These aren’t just small tweaks — collectively, they give your system the same performance uplift you’d normally expect only from a RAM or SSD upgrade.
💬 Frequently Asked Questions (FAQ)
Q1. Is it safe to disable Windows services?
Yes — as long as you only disable non-essential services (like telemetry, print spooler, or maps). Avoid touching core services related to Windows Update, networking, or graphics.
Q2. Will disabling Windows Search affect my PC?
It only disables fast indexing. You can still search manually — it just takes slightly longer. Disable it only if you’re facing lag or high disk usage.
Q3. Should I uninstall Microsoft Store apps?
Yes, if you don’t use them. Removing News, Weather, Teams, or Bing Chat saves resources without harming stability.
Q4. Will these steps boost gaming FPS?
Yes. With fewer background threads, games get more CPU access — often resulting in smoother frame rates and reduced stuttering.
Q5. Can I re-enable services later?
Absolutely. Open Services, right-click the one you disabled, and set Startup Type → Automatic.
⚠️ Disclaimer
These optimizations are intended for personal systems and laptops where background Microsoft services and telemetry can be safely reduced.
Do not apply them on corporate or managed computers where administrative policies or encryption services like BitLocker are required.
Always create a restore point before disabling system services. For official Windows configuration guidance, visit Microsoft Support.
🧩 Final Thoughts
Windows 11 comes packed with smart features — but not all of them are necessary for every user. Disabling unused apps, telemetry, and startup programs can make your system feel brand new again.
After following these steps, you should see noticeably faster startup times, fewer frame drops in games, and lower overall CPU usage.
If your Task Manager now shows process counts around 120–130 and handle counts below 50,000, you’ve successfully optimized your PC for high performance.
So restart your machine, enjoy the boost, and remember: sometimes, the best performance upgrade isn’t hardware — it’s just smarter system management.
#Windows11 #PerformanceBoost #BloatwareRemoval #FPSBoost #WindowsTips #TaskManager #CPUTuning #dtptips


